Happy Scrap Book
Acid-Free card scraps
I took a class in Victorian Book Binding, and have signed up for another class in June, but meanwhile I wanted to practice the skills I learned, so I made a book entirely from scraps.
.
.
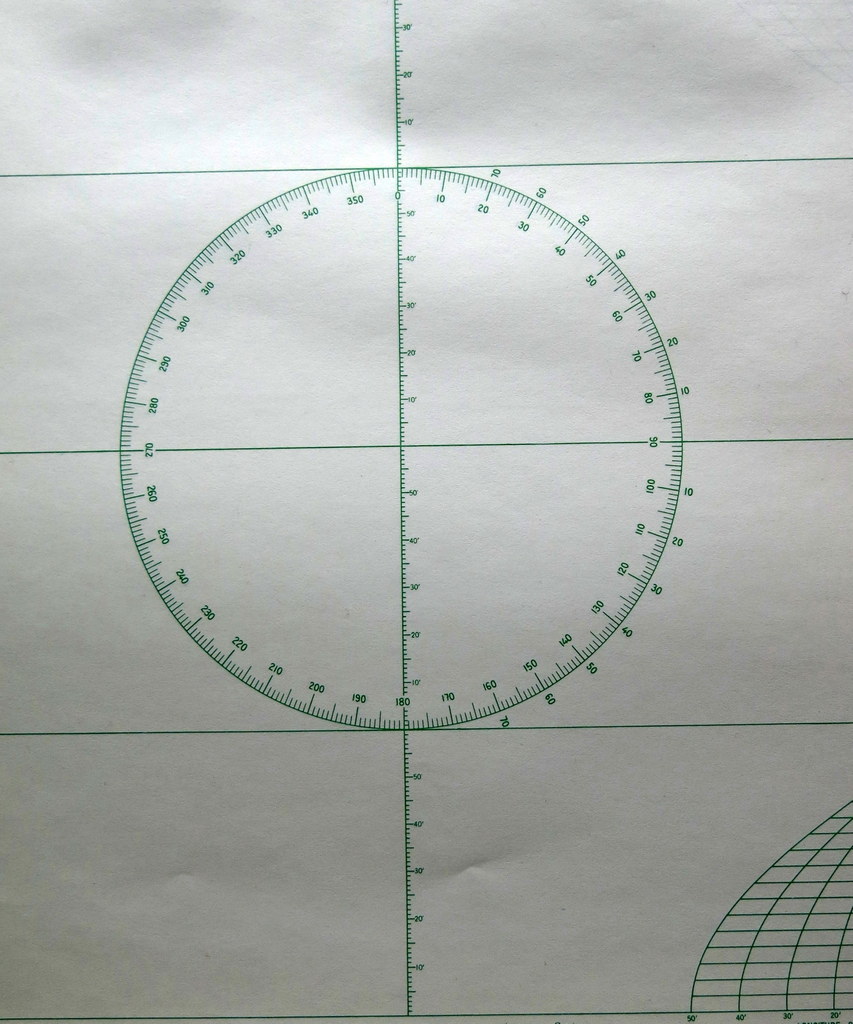
Universal plotting paper
In the “olden days” ship’s navigators used to have to make calculations and write things on paper plot charts! All this lovely plotting paper has become scrap except for people doing things the old fashioned way, or people who have lost communication with navigational satellites, or people using it for obscure purposes…
.
.
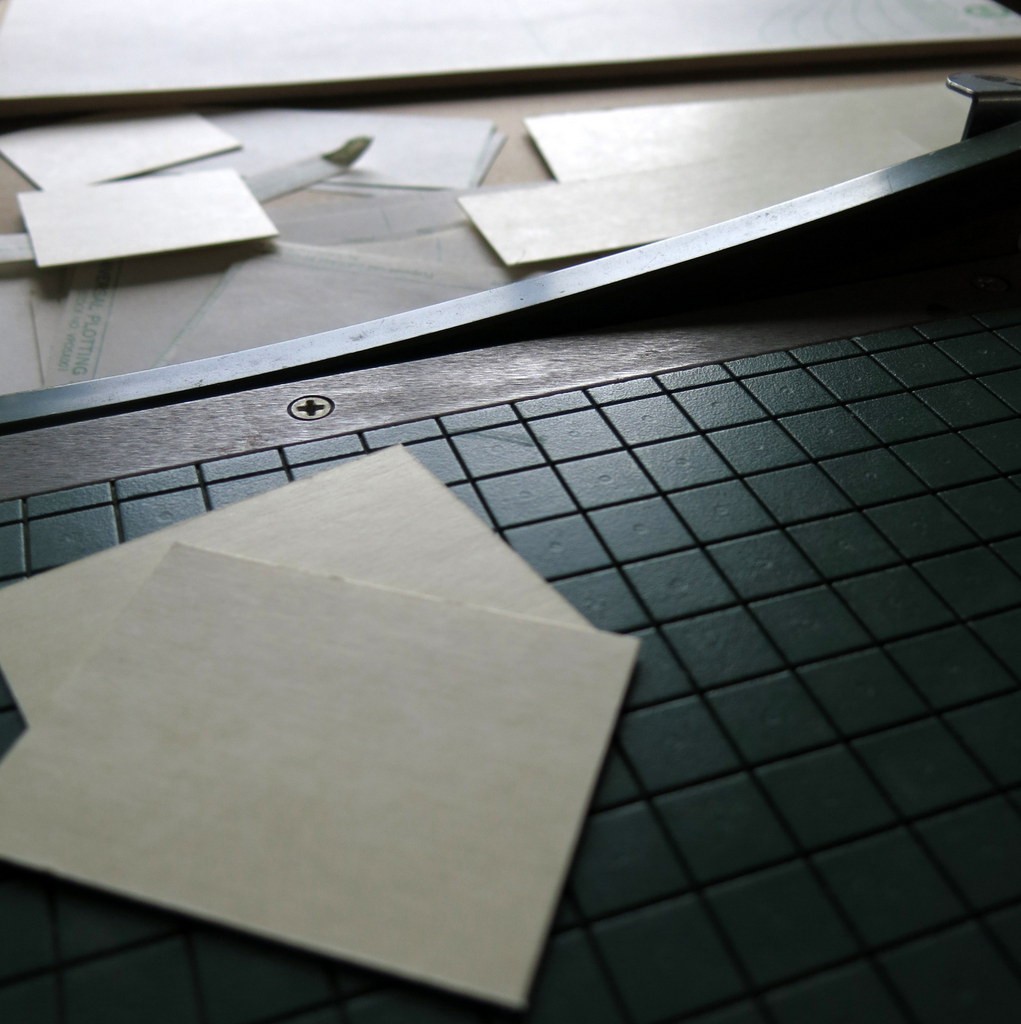
paper cutter
…like slicing it into tiny pages for tiny books.
.
.
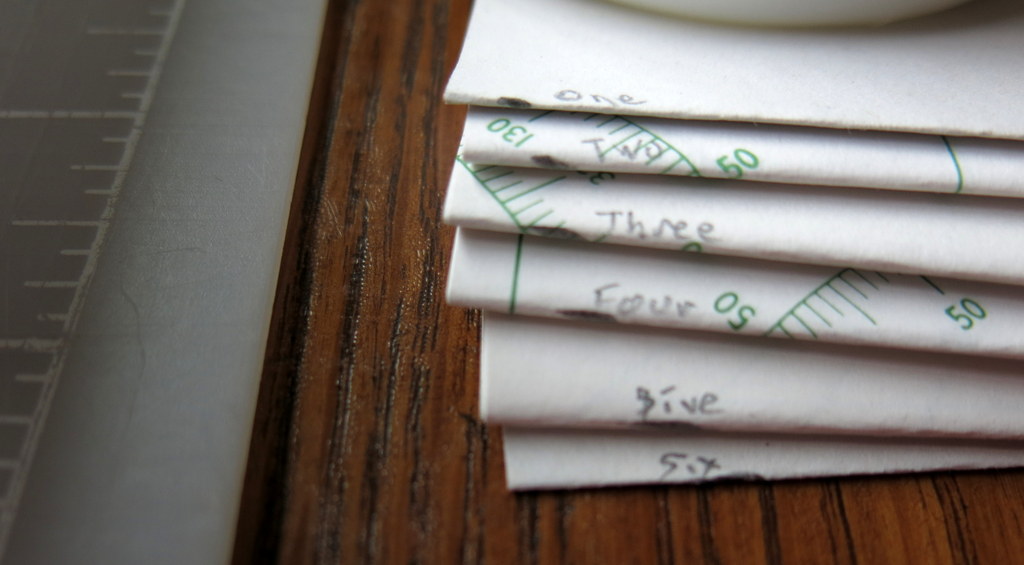
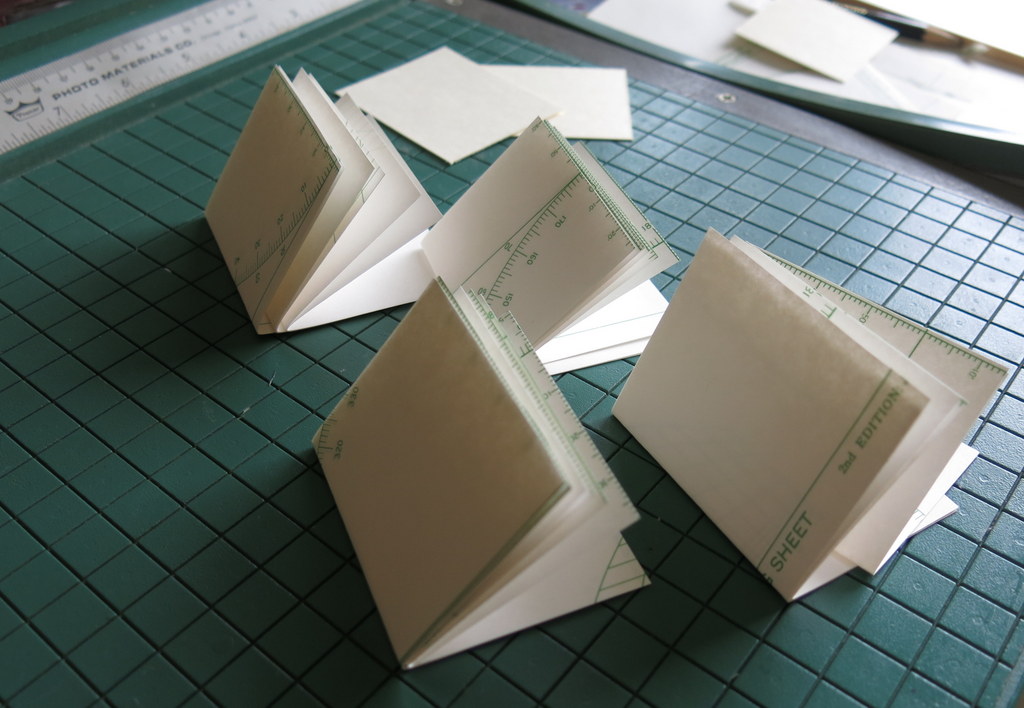
Signatures
I cut four pieces of paper per signature, and folded them in half, so each signature will have eight pages. The signatures are “signed” on the spine in the order that they will appear in the book!
.
.
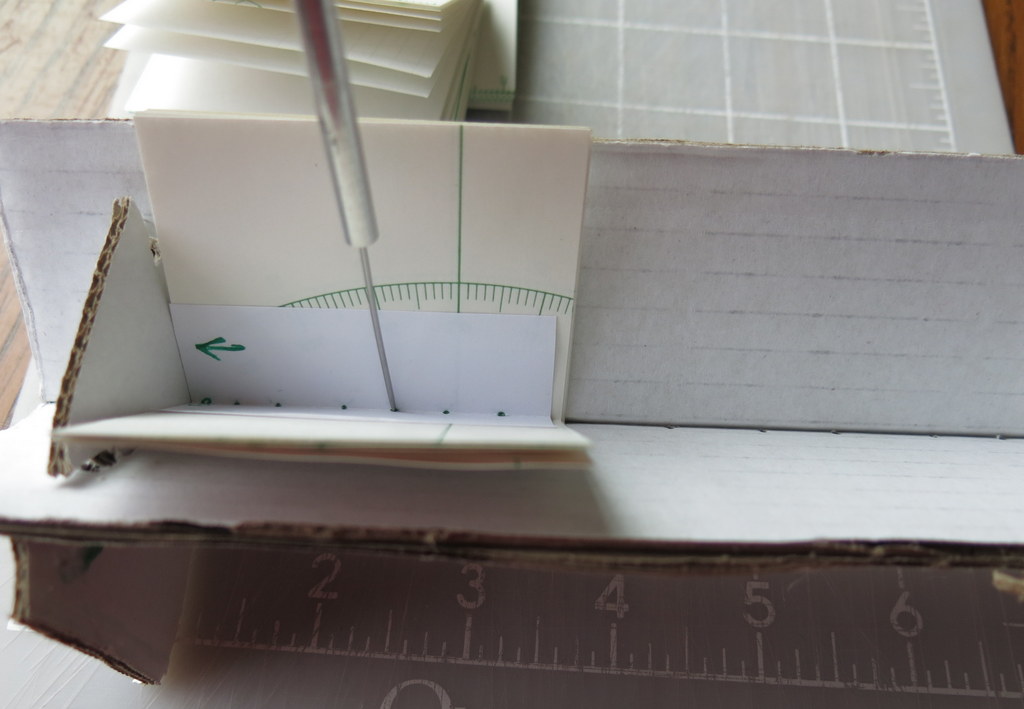
Piercing
I made a book cradle out of scrap cardboard. This is used for piercing vertical holes in the spine of the signatures. I used a template so all the holes would line up…
.
.

Holes lined up
…like this!
.
.
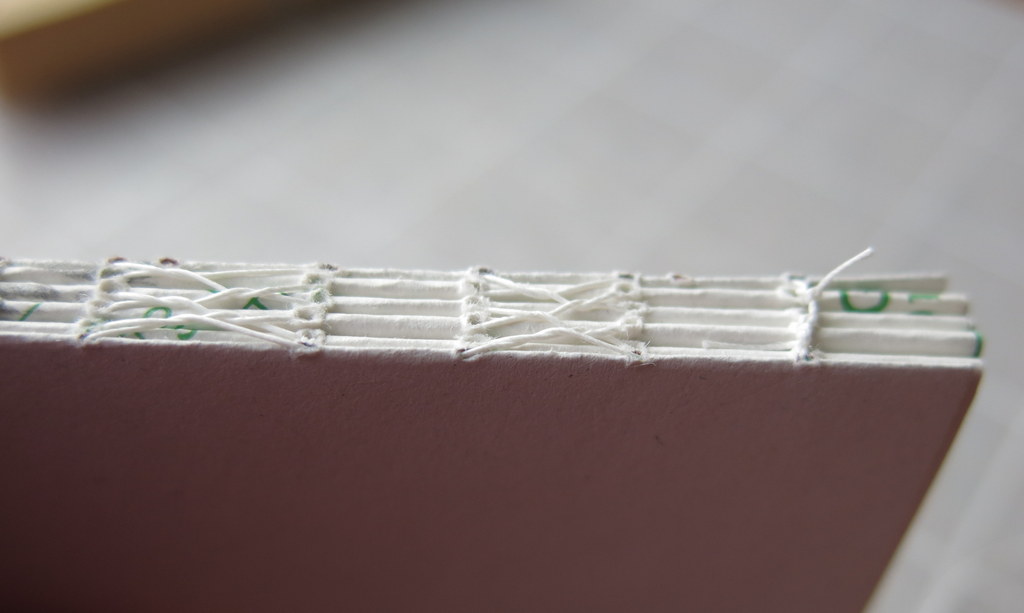
Herringbone Stitch
The pages of each signature are sewn together by going in and out the holes; and two other kinds of stitches connect the stacks of signatures – looping through the previous stitch as you go, making herringbone stitches at the back…
.
.
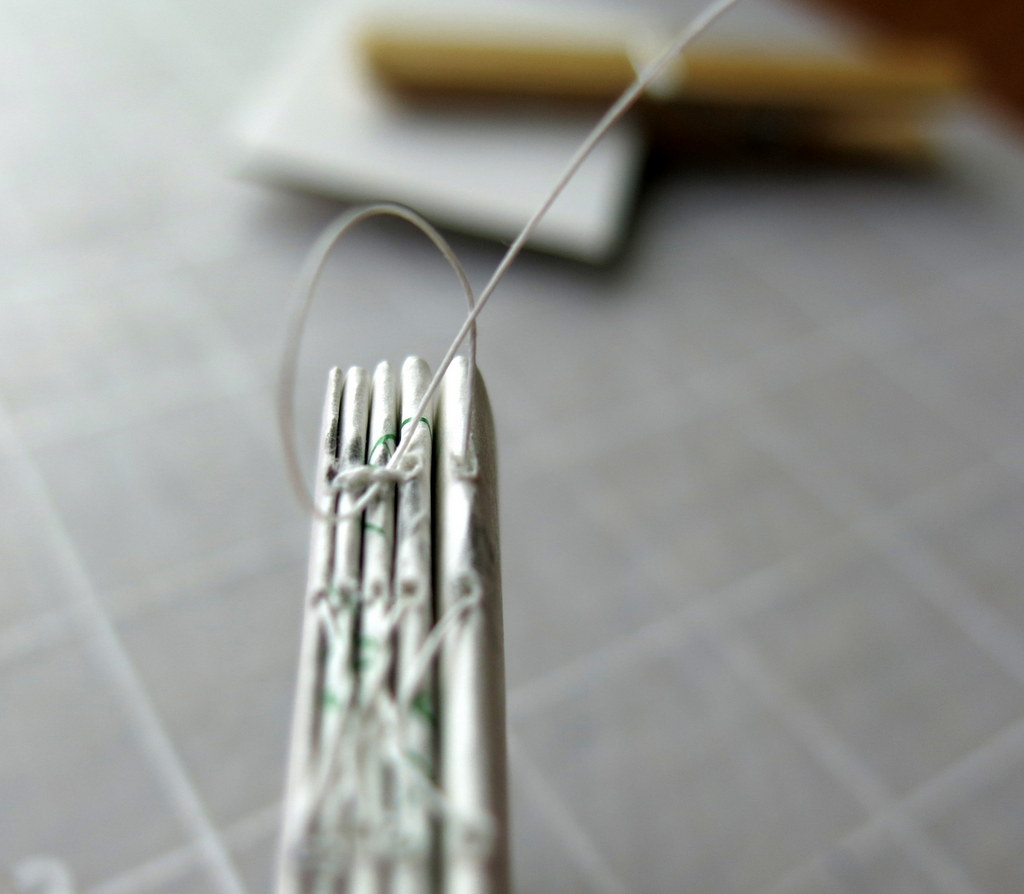
Kettle Stitch
…and a kettle stitch at each end.
.
.
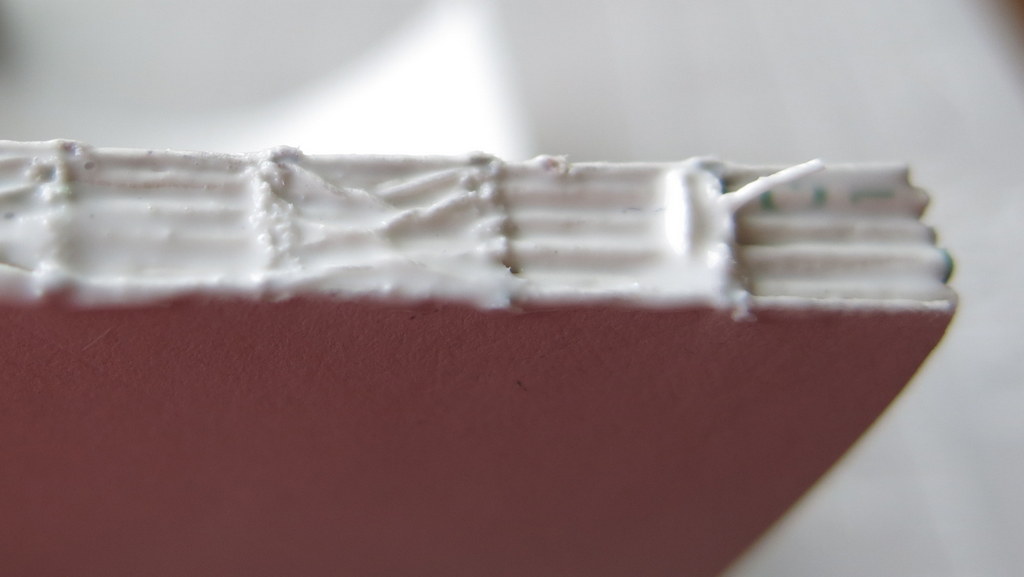
PVA on the spine
They are beautiful stitches, but alas they are invisible in the finished book! I spread PVA adhesive on the spine to keep the signatures from gaping…
.
.
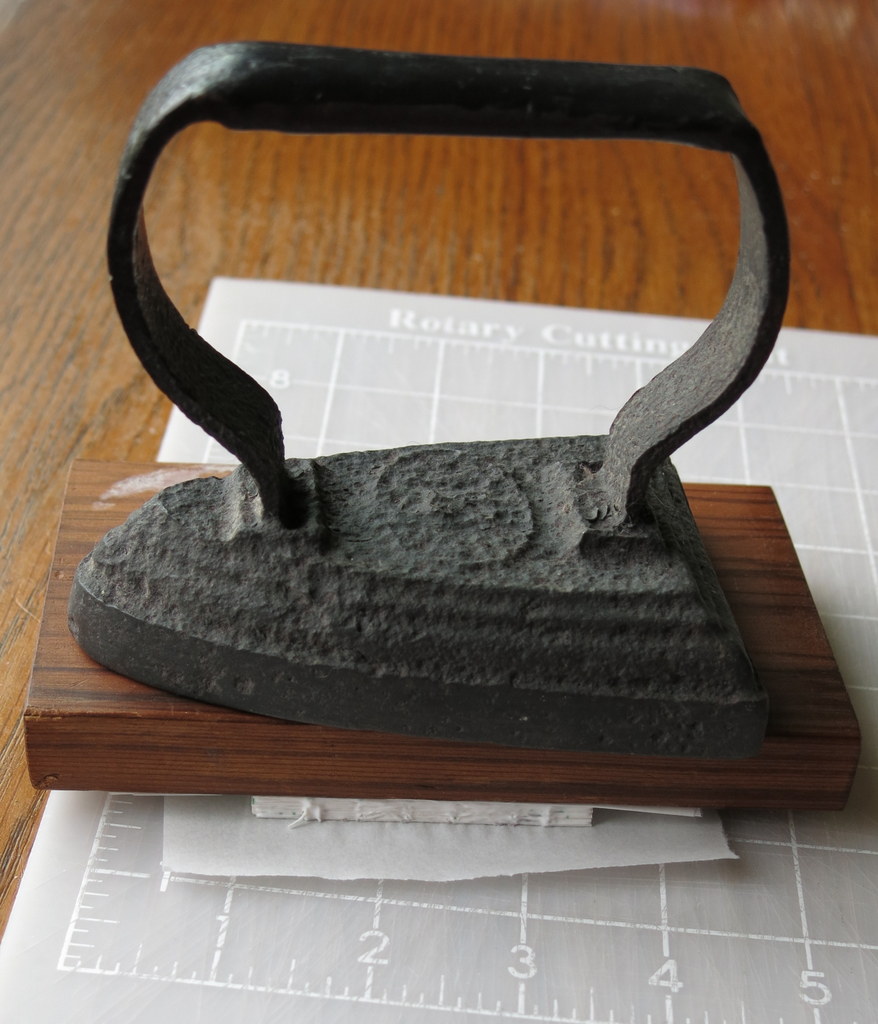
Book Press
Then put the whole book block under weight to dry between pieces of baker’s parchment.
.
.
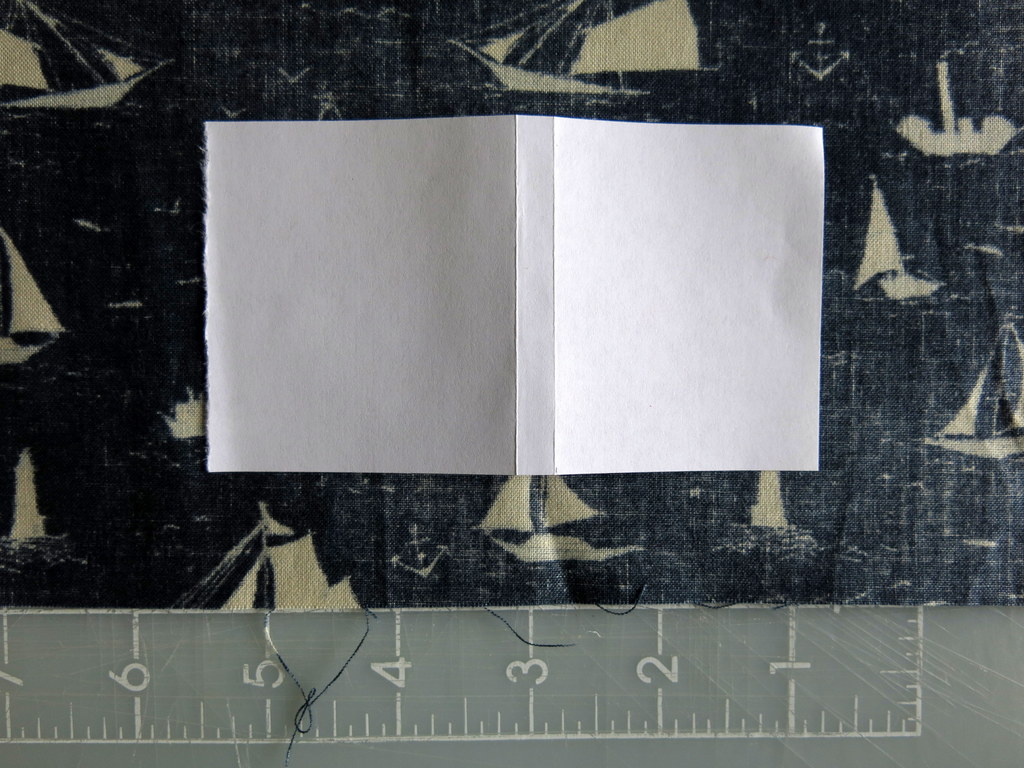
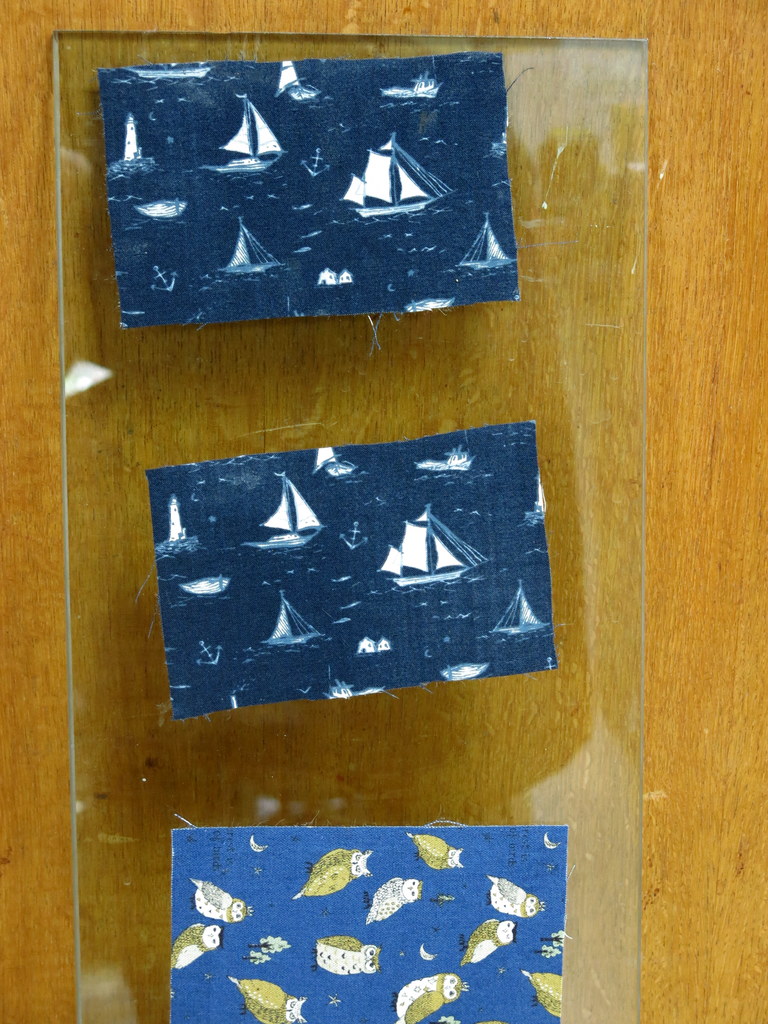
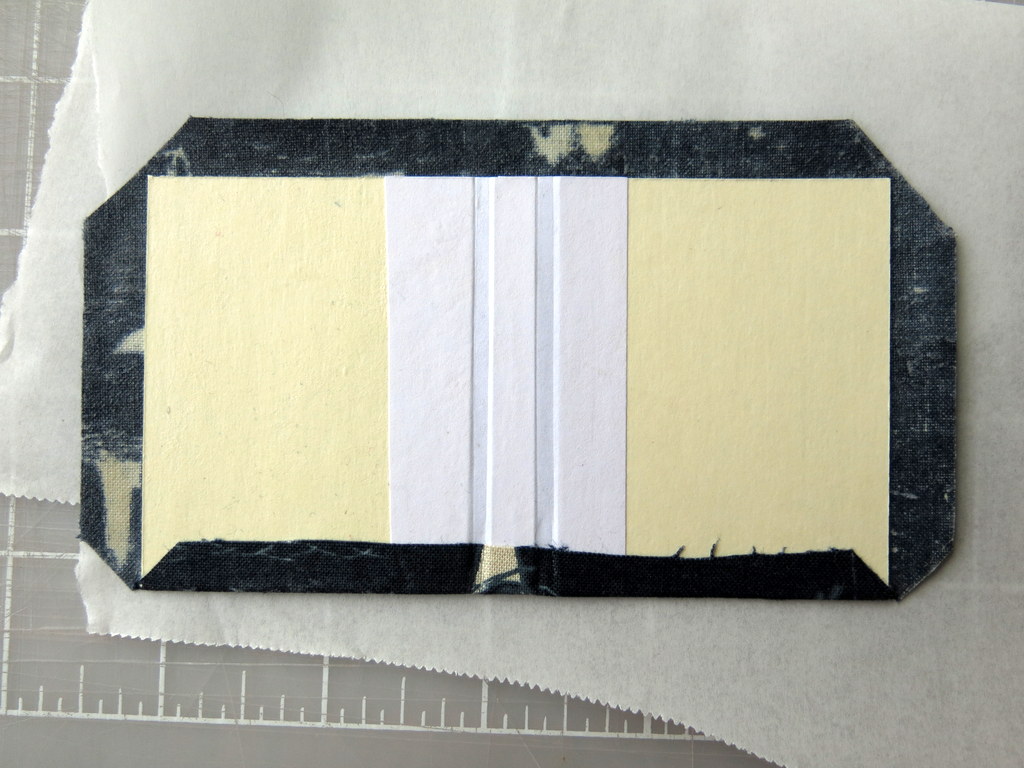
Fabric Scrap
Making plain cloth into book cloth involves coating the inside surface with paste or glue. I’ve tried both…I need to work on my starch paste recipe to make it less like extremely lumpy tapioca pudding! Here is a paper representing the opened book so I know what size to cut the cloth.
.
.
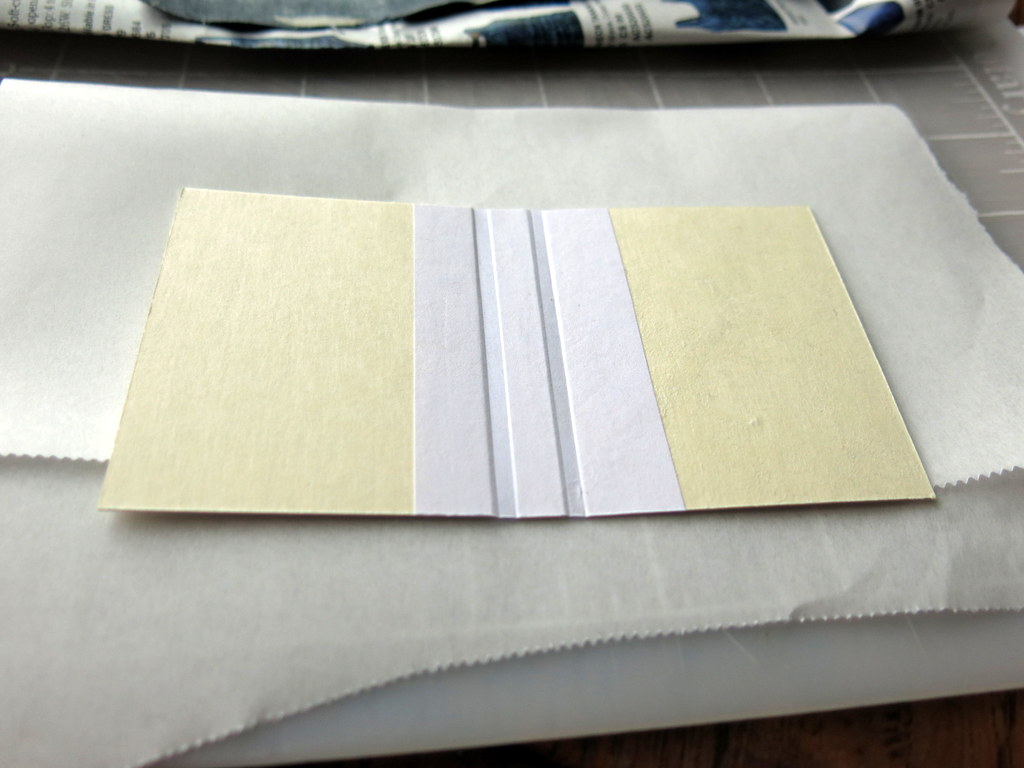
paste and PVA
Starch paste or PVA adhesive is applied to the cloth and then the cloth is dried on a flat surface. When the book is assembled, this pre-treatment will hopefully prevent bubbles appearing in the finished book cover, and also prevent the glue from seeping through to the front of the cloth and making blotches on the outer surface.
.
.
Book Boards
I cut book boards and a spine out of scraps of acid-free card, and glued them to a paper spine support…
.
.
Book cloth application
…then glued the book board assembly to the prepared book cloth.
.
.
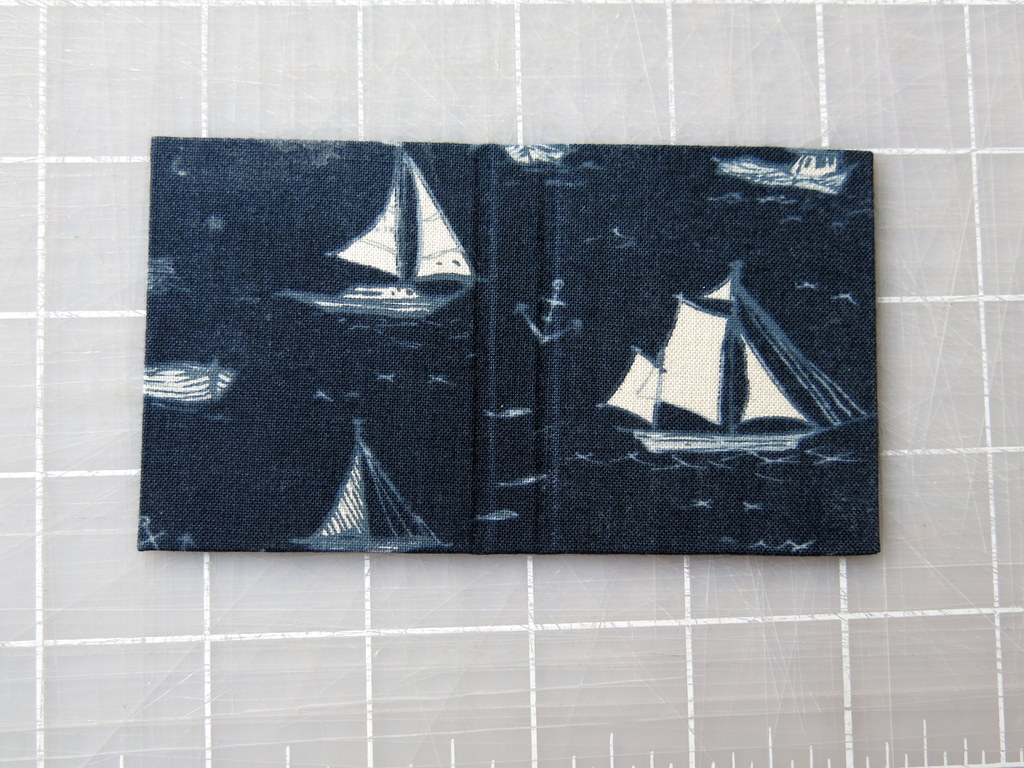
Covered boards
Looks pretty good so far…
.
.
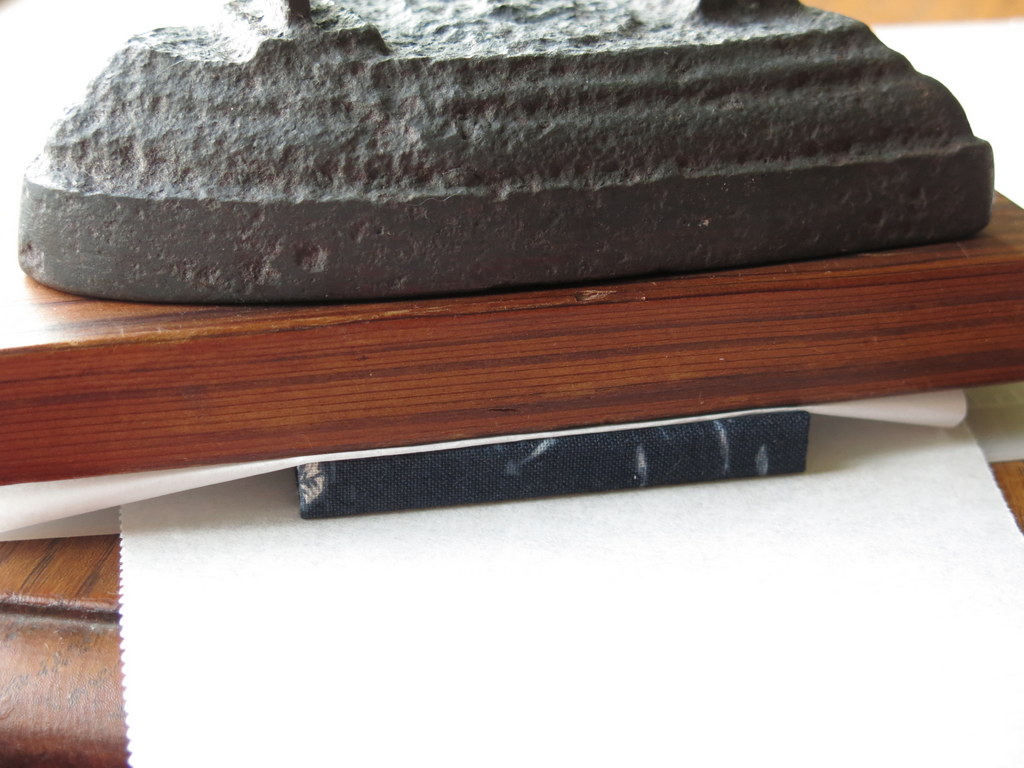
Pressing
The book block with all the signatures was then glued into the cloth-covered book boards – I couldn’t get a photo of that because my hands were covered in glue – but here is the whole book drying in the book press again…
.
.
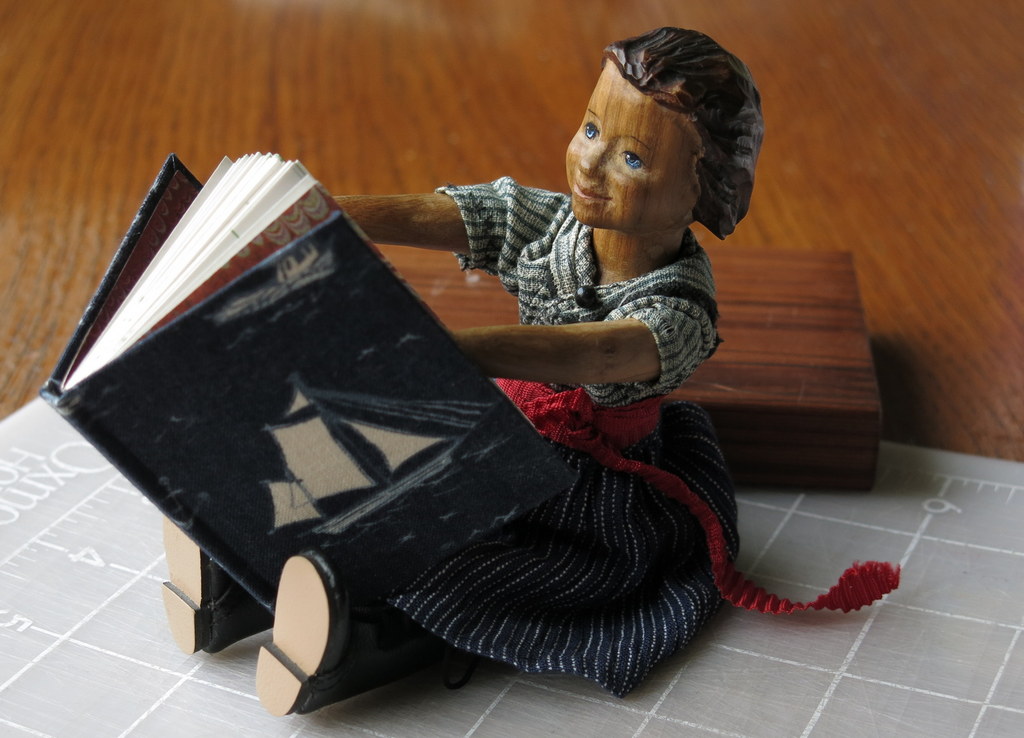
Scrap Book
…and after drying overnight my little pirate could begin plotting in her scrap book!
.
.

Shrinkage
The book I made in the class is the biggest one at the back with maroon covers; I made the medium-sized book with yellow Provencal fabric covers, printer paper pages, origami endpapers and home made lumpy paste; Gráinne’s is the smallest book. The Hittys are hoping the shrinkage will continue and I will eventually be able to make books small enough to fit into their bookshelves…that would use up a lot of scraps!
.
.
ScrapHappy is a group of bloggers (links below) who post monthly about using up scraps! Any genuine scraps are allowed – no new materials. Blog posts are published on the 15th of the month, and it is always a treat to see what ingenious things people are doing with bits and pieces saved from the scrap heaps! If you think you’d like to join the group, contact Kate or Gun who devised and run it – their blogs are the first two links below:
.


Great handwork… but at the end great photographs and story, Thank you dear Hitty lady, Love, nia
Thank you nia, I enjoyed learning this new skill…of course I want to try to make smaller and smaller books!
Those are lovely! I went on a course a few years ago to learn to make books but we just added board covers which we covered in papers and stitched in with the signatures so the stitching was visible on the spines. I prefer yours with the spine enclosed and using fabric on the boards. Very tiny ones would be so fiddly! But I know you have very nimble fingers so maybe the Hittys will be lucky.
I thought it was a great shame to cover up the beautiful stitching, but I like enclosed spine books better too, so I am glad to have been learning these skills. I think my textile conservation background made the stitching easy and fun…and I am determined to make smaller books, though the Hittys don’t seem to mind what size I make them!
I went on a second bookmaking course where we made 8 different small notebooks and a slipcover to keep them all in. I gave mine to my grand-daughter for Christmas. One of them was spiral bound. I bought the machine to punch the holes and made a lot of those tall thin ones for lists as presents.
That’s so wonderful! I am really looking forward to my second class next month – I wonder what we’ll make?!
Do let us all know!
Wowza 🤩 this is awesome 🙌
Thanks!!! I am having so much fun!
An amazing and fascinating process!
http://knitnkwilt.wordpress.com/
I have been wanting to make books for a very long time – I dug out my book-binding books in anticipation of this class, and found that I bought the first one in 1977!
You never cease to amaze! Wonderful little books, you crafty, talented lady!
Thank you so much – I am very much enjoying putting together scraps of paper and cloth – the resulting books are so very satisfying!
You’ve provided marvelous detail and photos in this (and every) narrative. I think this could be a class in itself. You do such a good job of teaching. The results are great, aren’t they?
There are many little details that I haven’t been able to mention, and I truly don’t consider myself experienced enough to teach after only one lesson, but the process is so interesting and detailed I am so enjoying learning about it, I couldn’t help sharing my experience of trying to make wee tiny pretty books!
wow! just wow! Your book making skills are very impressive. Love the cover fabric that matches the paper. Great book press, can’t wait to see the itty, bitty books in the Hitty’s book shelf. You have inspired me to get back to book making, I could use a refresher course.
I just love it! Thanks – I wondered whether anyone would notice and comment on the “book press”…those sad irons are useful for many purposes! What kind of books have you made?
of course I noticed the “book press” – my Mom used one for a door stop. I took a couple book making workshops at Maiwa years ago. My favorite book is a travel journal made in 2013 that has gone to Japan a couple times. Hard cover – covered with woven shibori, with 6 signatures and some maps included and small handmade envelopes to hold business cards etc.
They are wonderful! I love them 🙂
Thanks so much – I love them too!
Heave ho, all hands, raise the colours high, Gráinne has the chart book out! I love the clear instructions for making it, even at such a tiny scale. (Personally, if I had plotting paper in quantity, I’d use it for wallpaper in the smallest room, which already has a giant Map of Australia for Travellers and Adventurers hanging on the wall.)
We have several pads of paper 14 inches square…but not enough I don’t think, to paper a small room, (except possibly the Hittys’ smallest room but it is already decorated)!
That little book is big awesome!
Thanks so much!! I am looking forward to my next class… ❤
Wow! You´ve really done some great work. So much work and the result is perfect!
Thank you very much – it gives me so much pleasure to make things by hand, and I am sure there will be more small books in my future!
such precision….your little sailor must be so pleased with her new log book. Lovely work~~
Thanks! We are so enjoying the process of book-binding, and the chart paper is really nice quality!
Lovely. I have a couple of tips for the starch paste, from my days at bookbinding college… We used rice or potato starch, making a cold water paste (as if mixing cornflour for sauce thickening) before then heating slowly in a double boiler. Finally we’d add some formaldehyde to it which would slacken it down a tad and work as a preservative to deter the silverfish and beetles. Hard to get formaldehyde now, so vodka works reasonably well as a substitute 😉
Thank you so much! I shall try making it this way…I also need to learn when to stop heating it. I really like the cloth-bound books, and I am looking forward to the next class and getting my skills closer to something more usable. Which bookbinding college did you attend? That was my first choice at a career, but I balked at going to England to learn, the options in Canada being limited at that time. The joke’s on me though as I ended up at the University of London anyway studying conservation!
Spooky! I was at Brunel Tech doing City and Guilds in Bookbinding and Document Conservation 1990
1990-91. Loved it, but there was no way I was ever going to earn enough doing it full time. There are so many coincidences, aren’t there!!
I just missed you – I was in the UK from 1985 to 1991 studying and then working at the Textile Conservation Centre at that time at Hampton Court Palace…coincidences!