A Bound Book for Hitty

Tatty Reads
Little Wooden Dolls find reading just as pleasurable as humans do in the Quimper Hitty household. We are lucky enough to get regular infusions of literature from a Hitty Friend, but decided to try our hand at making our own books.
The following gallery shows the steps we took to make a small 32 page bound book with four sewn signatures, and pictures on both sides of each leaf. Click on any image to get into the gallery, and use left and right arrows to navigate back and forth.
-
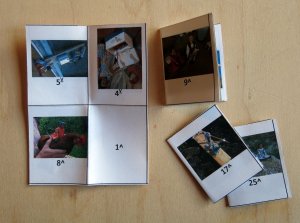
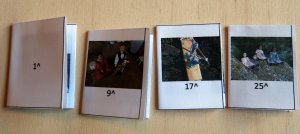
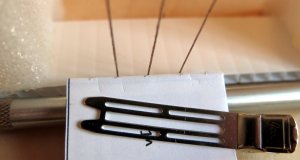
- This book will have four leaves per signature. This is a trial book, with numbers and arrows visible on every page. The numbers will be what the page numbers are in the finished book, and the arrows next to the number show which way up they need to be printed in order to end right way up in the book.
-
- There will be four signatures in this book. Each signature is made of a piece of paper folded in half and in half again. The top edge is uncut at this point. You can see that we are still working on alignment.
-

- Five Points are marked on the folded edge that will be sewn
-
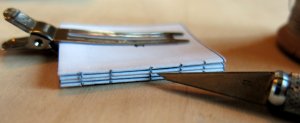
- Cuts are made at each mark. You are cutting through multiple layers of paper, so make sure you cut through them all. Some people pierce with an awl instead.
-
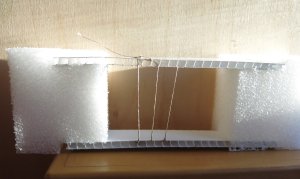
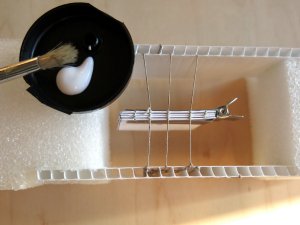
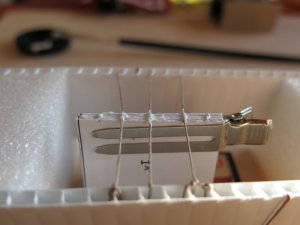
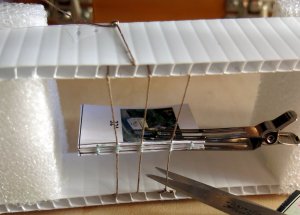
- This is my cord-spacing device with three cords. I made this out of corrugated plastic set on foam blocks and glued into place. Strong linen thread is passed through the channels, and tightened in place.
-
- The middle three cuts in the signatures match the three cords.
-

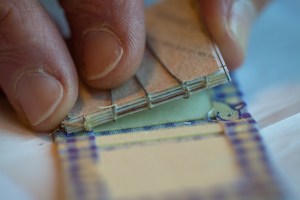
- The first signature is sewn to the cords. Place the signature behind the cords, face down, and with the top of the book towards the right. The sewing thread goes into the cut at the bottom left. Then pull it out the hole to the right, loop around the cord, and pass it back into the same hole. Then pass it up to the next hole, out and around the cord and back in again, etc. When you get to the top, you go out the hole, lay the next signature on top, and pass the thread into the hole above, down to the next hole, round the cord and so on.
-
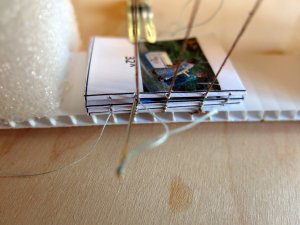
- The last signature is being sewn into place. You can see the sewing thread coming out of the hole, looping round the cord and going back in the hole. When you get to the very end, go out the last hole and tie off the thread.
-
- If the cords are sewn in properly, the book can be slid to the middle of the gap.
-
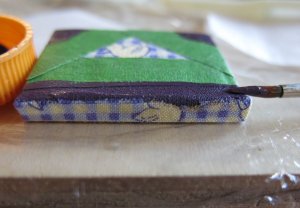
- The spine of the book has been clamped, glued, and left to dry.
-
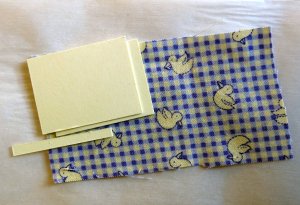
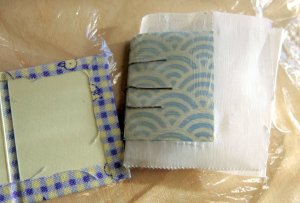
- To make cloth covers for the book, cut stiff card a little bigger than the pages, and a spine the same thickness as the book.
-
- Glue them onto the wrong side of the cloth with a gap between the cover and the spine, and space all round.
-
- Put under weight till the glue dries
-

- Trim the corners of the cloth
-
- Fold over and glue the extra cloth on the inside, weight and leave to dry.
-
- Now cut the cords holding the book onto the cord-spacing device, not flush to the book but leaving a short length of cord hanging free.
-
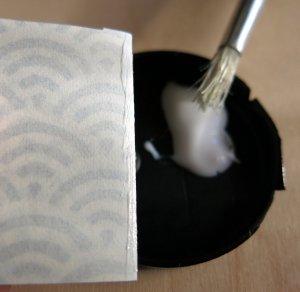
- Cut endpapers out of a nice paper, the height of one page and the width of two pages. Fold with the pretty side to the inside and apply glue in a thin line at the folded edge of one side of the endpaper
-

- Lay the endpaper, glue side down in place under the cords. Do the same to the other endpaper.
-
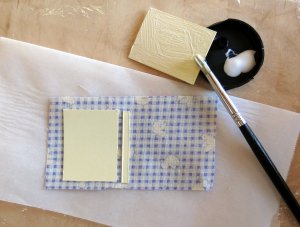
- Spread glue on the top face of the endpaper, including the binding cords.
-
- With the glue side down, align the corded edge of the book edge with the inside edge of the cover board, and press the paper into place. Do the same with the other side.
-

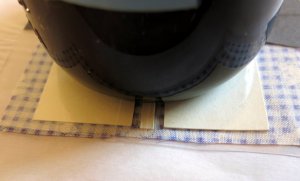
- Clamp the book to dry.
-
- Mask with tape, leaving spine and corners exposed, paint these with acrylic paint
-

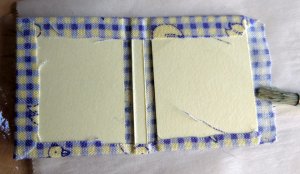
- Almost finished
-
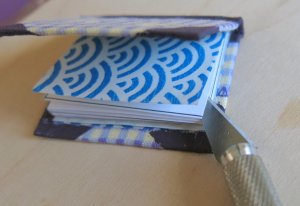
- Cut the top folded edge of the pages
-

- Now the book is readable!
-

- Tatty Reads the finished book.


What a great post – so much detail. Your photos are excellent. I expect the Hitty universe to be flooded with sewn Hitty sized books in the next few weeks!
More books for more Hittys is a good thing!
Absolutely lovely! Such treasures!
…and so satisfying to make too! The Hittys are grateful, as they all like to read, and even Tatty has learned to hold the book right way up!!
you are so neat and precise…I am not so neat and not nearly so precise but I shall give this a try. Your photos and explanations are wonderful. Thank you for sharing this!
We had fun, but we love fiddling with string and playing with glue! We made sure the cat-girls stayed away during the experimentation!
I too thank you, for these detailed instructions. We’ve done this type of thing on a human level.. but,.like an Olympic star, you make it look easy for doll size. Thanks so much!
You are welcome – I didn’t know you had made books before or I might have howled at you for help a few times!
Fantastic tutorial Kjerstin and one I hope to try in the near future. Once I have other projects completed!
Thank you.
It is fun to end up with a “real” little tiny book! I am not an expert by any means, but this is the way I made them – and it did work for me!
marvelous post, beautiful book. I’ve stitched several books using the Coptic stitch, I think there is more work making a tiny book. the hedgehog pin cushion is charming.
My favourite pincushion – the Hittys are fond of him too! Coptic stitch books are very nice – I’ve made a couple of “Photo Albums” for Hitty that way…I really wanted to try a book with signatures and cloth bindings, and am really happy with the way it turned out!
So impressive. That book looks so professional. Just sitting her in awe of your crafting skills.