Spring Cleaning Tools

Cleaning implements
Jane is ready to give the Hitty carpets a beating! To make a Hitty Carpet beater, we suggest practising the method with kitchen string first because it is easier to manipulate and to see what you are doing. After you get the hang of it you can try making it with wire, like the one I made for Jane in this picture.
.
.
First loop
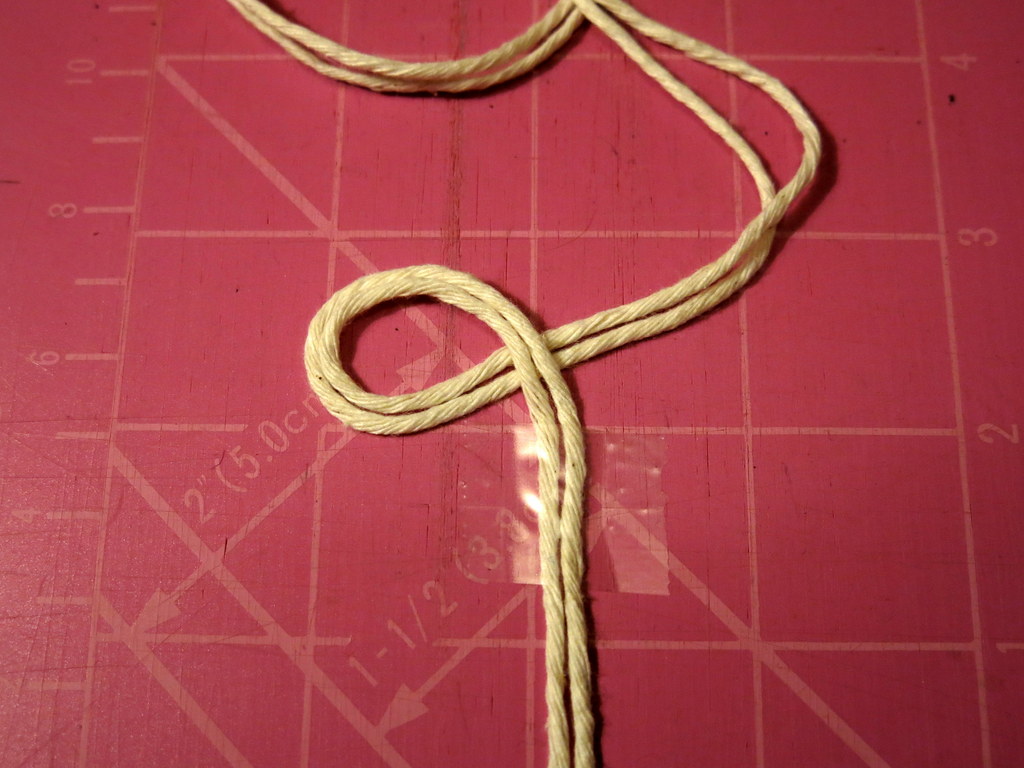
First cut about 60 inches or 150 cm of kitchen string. Thread a darning needle and pull the needle to half way along the string. Tape the string to a surface (craft mat or table top), about two inches from the end (the extra string will become the handle).
Make the first loop right above the tape and to the left, easing the strings around the curve so they keep running parallel with each other. Be sure the leading end of the loop is under the taped end.
.
.

Second loop
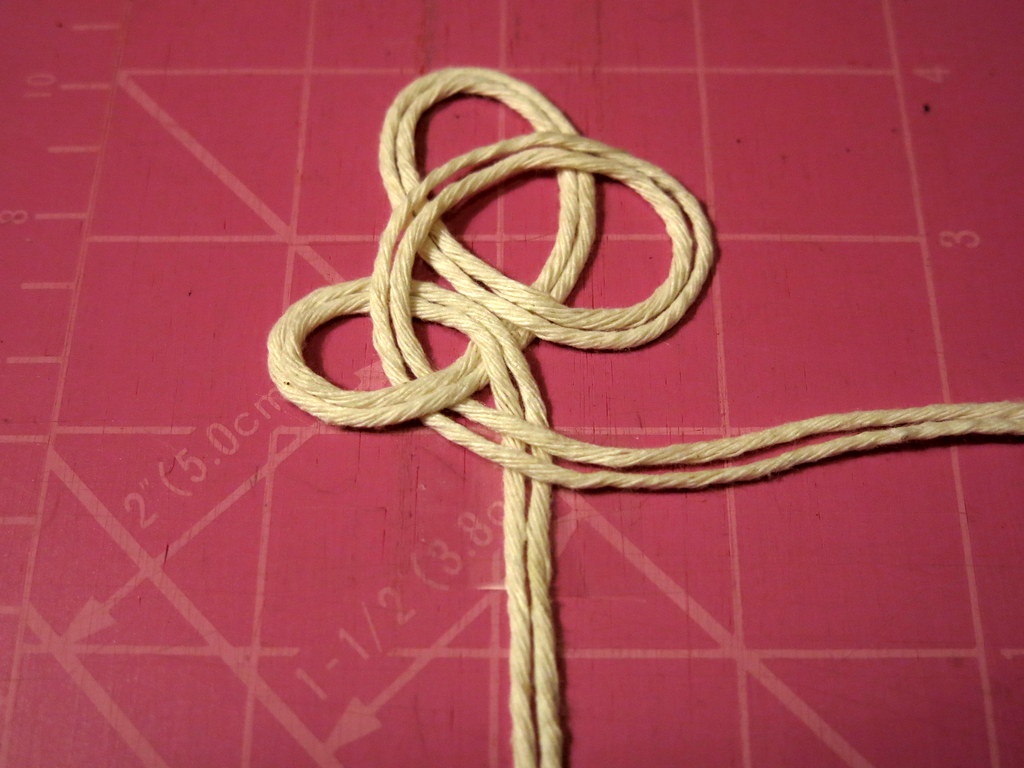
Make the second loop, going towards the top, easing the two strings around as before, and keeping the leading edge on the top.
.
.
Third loop
The third loop is going to go over the top of the second loop, through the first loop (over and then under the strings) and over the handle end…
.
.

Fourth loop
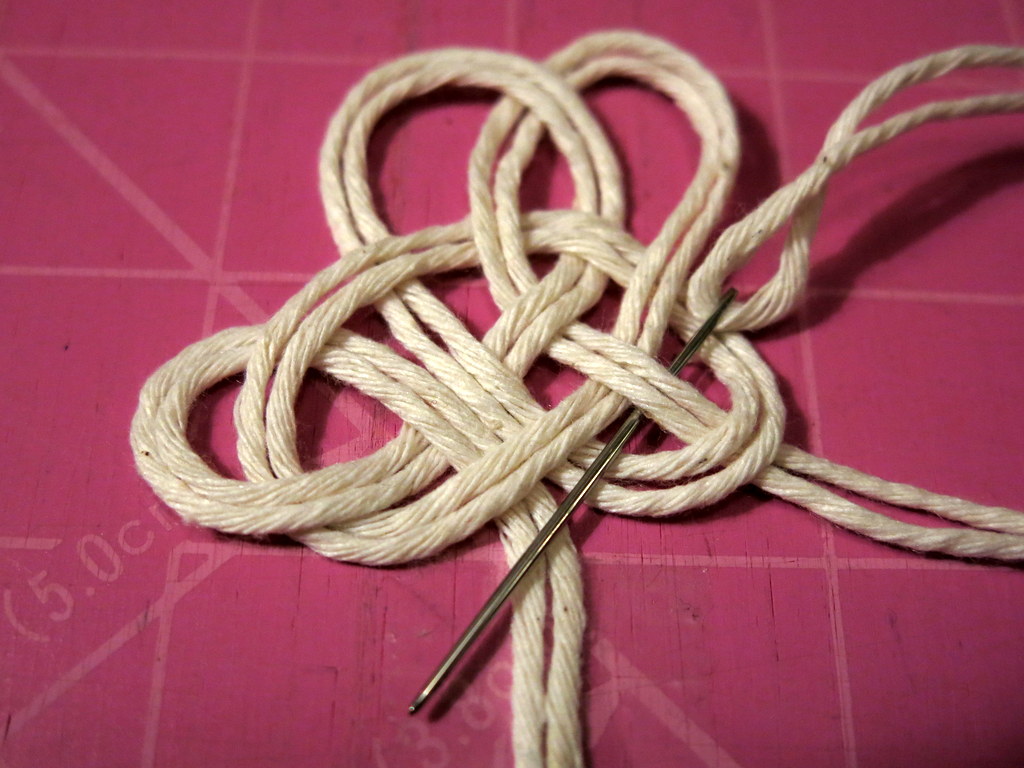
The fourth loop goes up to the same height as the second loop, on top of all the previous strings on the way up and weaving through them all on the way down (here is where the needle is handy!) .
.
.
Fifth loop
The fifth and final loop of string is woven through the third loop on its way back to join the handle!
.
.
Complete
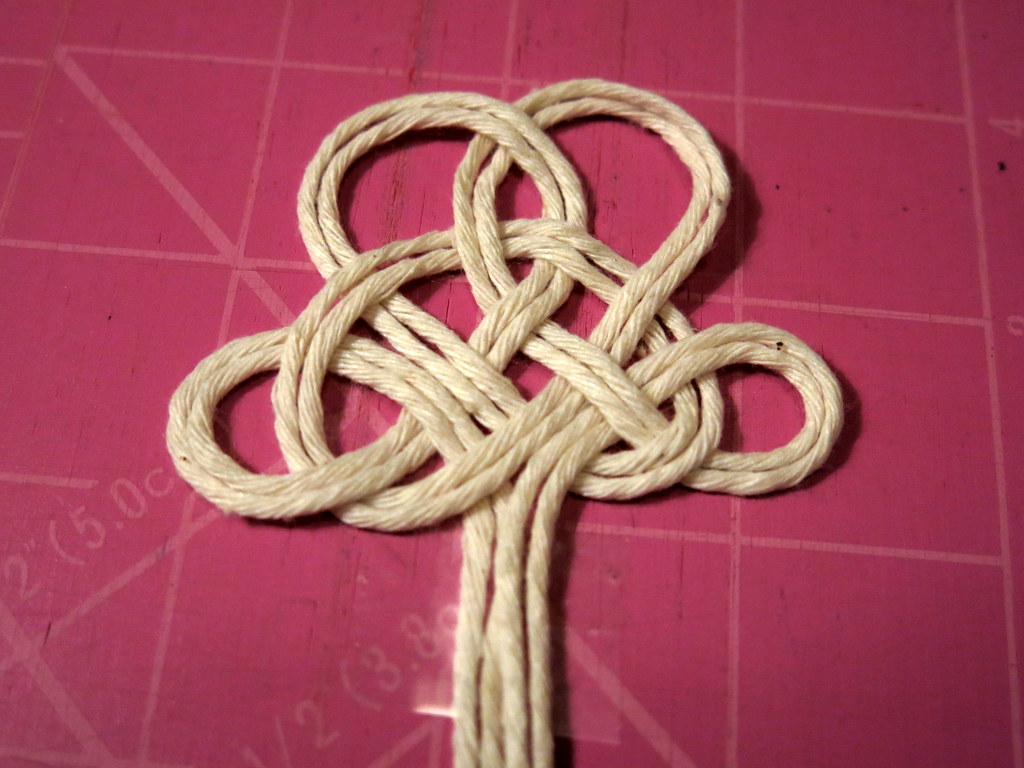
Here is what the rug beater looks like when it is complete. This is a good sample to keep for reference – as it is made of string it will be floppy, but if you want to actually keep it as Hitty’s rug beater, you can paint it with clear-drying white glue, one or two coats to stiffen it.
To finish the handle of a wire one, I just twist the four ends together for as long as I want the handle to be. If you are twisting the string one you will need to do that after at least one coat of glue.
.
.

Bamboo Skewer
As for a string mop – cut about 5 1/2 inches or 14 cm off a bamboo skewer…
.
.
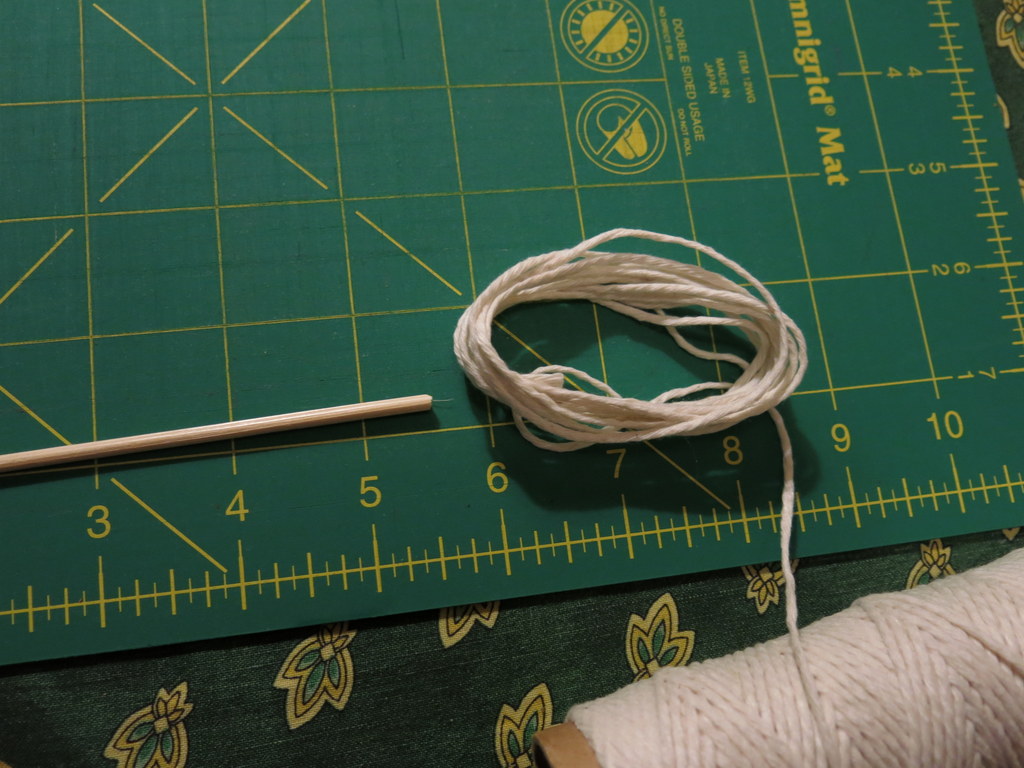
Kitchen String
…wind some kitchen string ten or 15 times around your four fingers…
.
.

Laid out with tie
Make two cuts to get short lengths of string, then lay the skewer onto the strings…
.
.
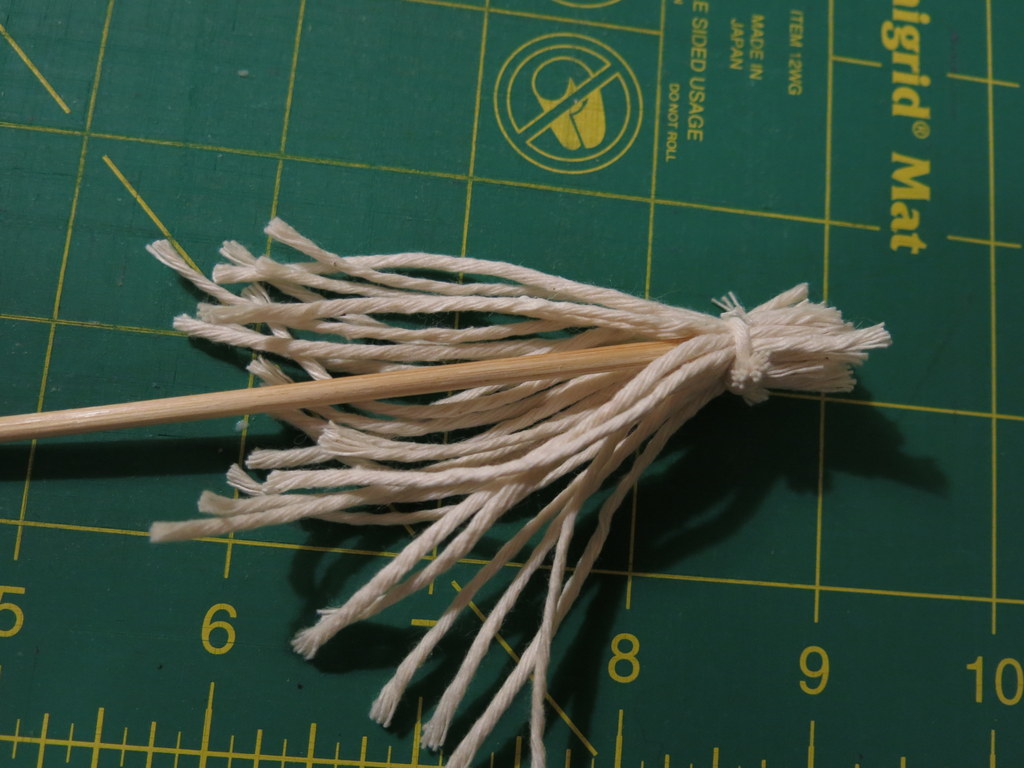
Tied once
… and tie them tightly at one end using more string.
.
.
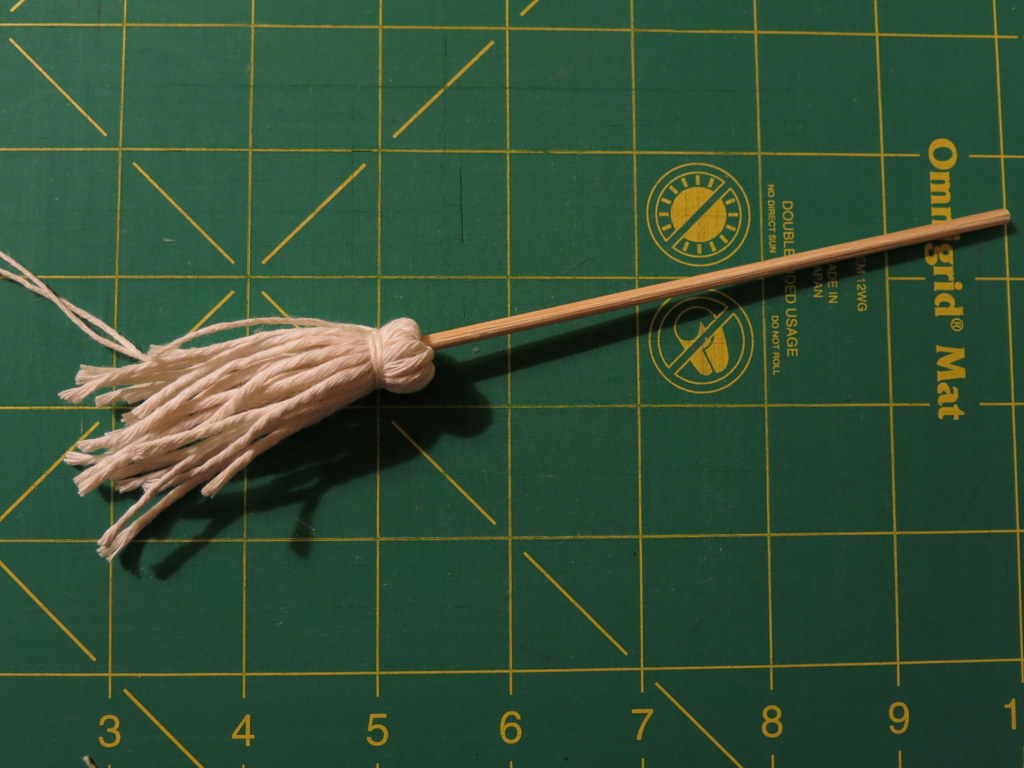
folded over and tied again
Flip the string over and tie again very tightly…trim the ends.
.
.

Ready to deal with the dust bunny infestation
Arianell, Jane and Henrietta are ready for spring cleaning!
.
.
.


Prepped, armed and ready! Onward to conquering those never ending dust bunnies. Thank you once again for a wonderful tutorial and more seasonal doll fun.
We do have a neverending dispute with the dust bunnies – and we think it is good to have some fun while dealing with tedious chores!
Thanks for these directions, Kjerstin. I want to make the feather duster. I remember that you use a matchstick and some feathers. Were there other directions? My Hittys are eager to get cleaning! Judith ________________________________
I didn’t illustrate the feather duster-making, but I shall send you instructions!
oh dear! the sun is shining and there are dust bunnies everywhere.
The sunshine does seem to encourage everything to grow – even dust bunnies, unfortunately for Jane and her crew! I think we may have developed a secondary infestation of Greater-Spotted Window Pains, sigh.
Gosh. This makes me want to make carpet beater earrings!
You know, as soon as I posted this, I thought of you! I’ll buy some if you do…seriously!
lol, you really don’t need to do that! It’s on my list now, cos I think it will be fun.
The dust bunnies are adorable, such a shame they have to go! And I do love how the girls are wearing such beautiful aprons and pinafores to do the spring cleaning in – take pride in the work, ladies, and give it your best!
Hittys seem to love pinafores and aprons…I think it makes the work less of a dreary chore! Dust Bunnies begone!
thank you for the directions! Love your little dust bunnies…so clever!!!
The Quimper Hittys were looking for ways to capture them with live traps, but it hasn’t worked, they just keep coming back!