A Yoyo Apron
A “Virtual Retreat” project is happening on March 22nd! From 10 – 11 am Eastern time. I am leading the activity on making a Hitty-sized Apron and Bonnet from one yoyo quilt circle. People registered for the event will have received a kit with materials. It is easy enough to make these from your own materials if you are reading this some other time and want to try it out. Half the participants have plaid or checked fabric from the actual Yoyo quilt, and the other half have pink floral circles cut from vintage fabric provided by a Hitty friend in Oregon.
This is the post about making an apron out of a half-circle of fabric. I am giving the instructions for hand-sewing these little accessories. I find hand sewing gives me flexibility and accuracy when making little things. I have no objections if participants wish to do their projects by machine, but I also have no advice – I don’t know the tricks of machine-sewing without mangling small garments!
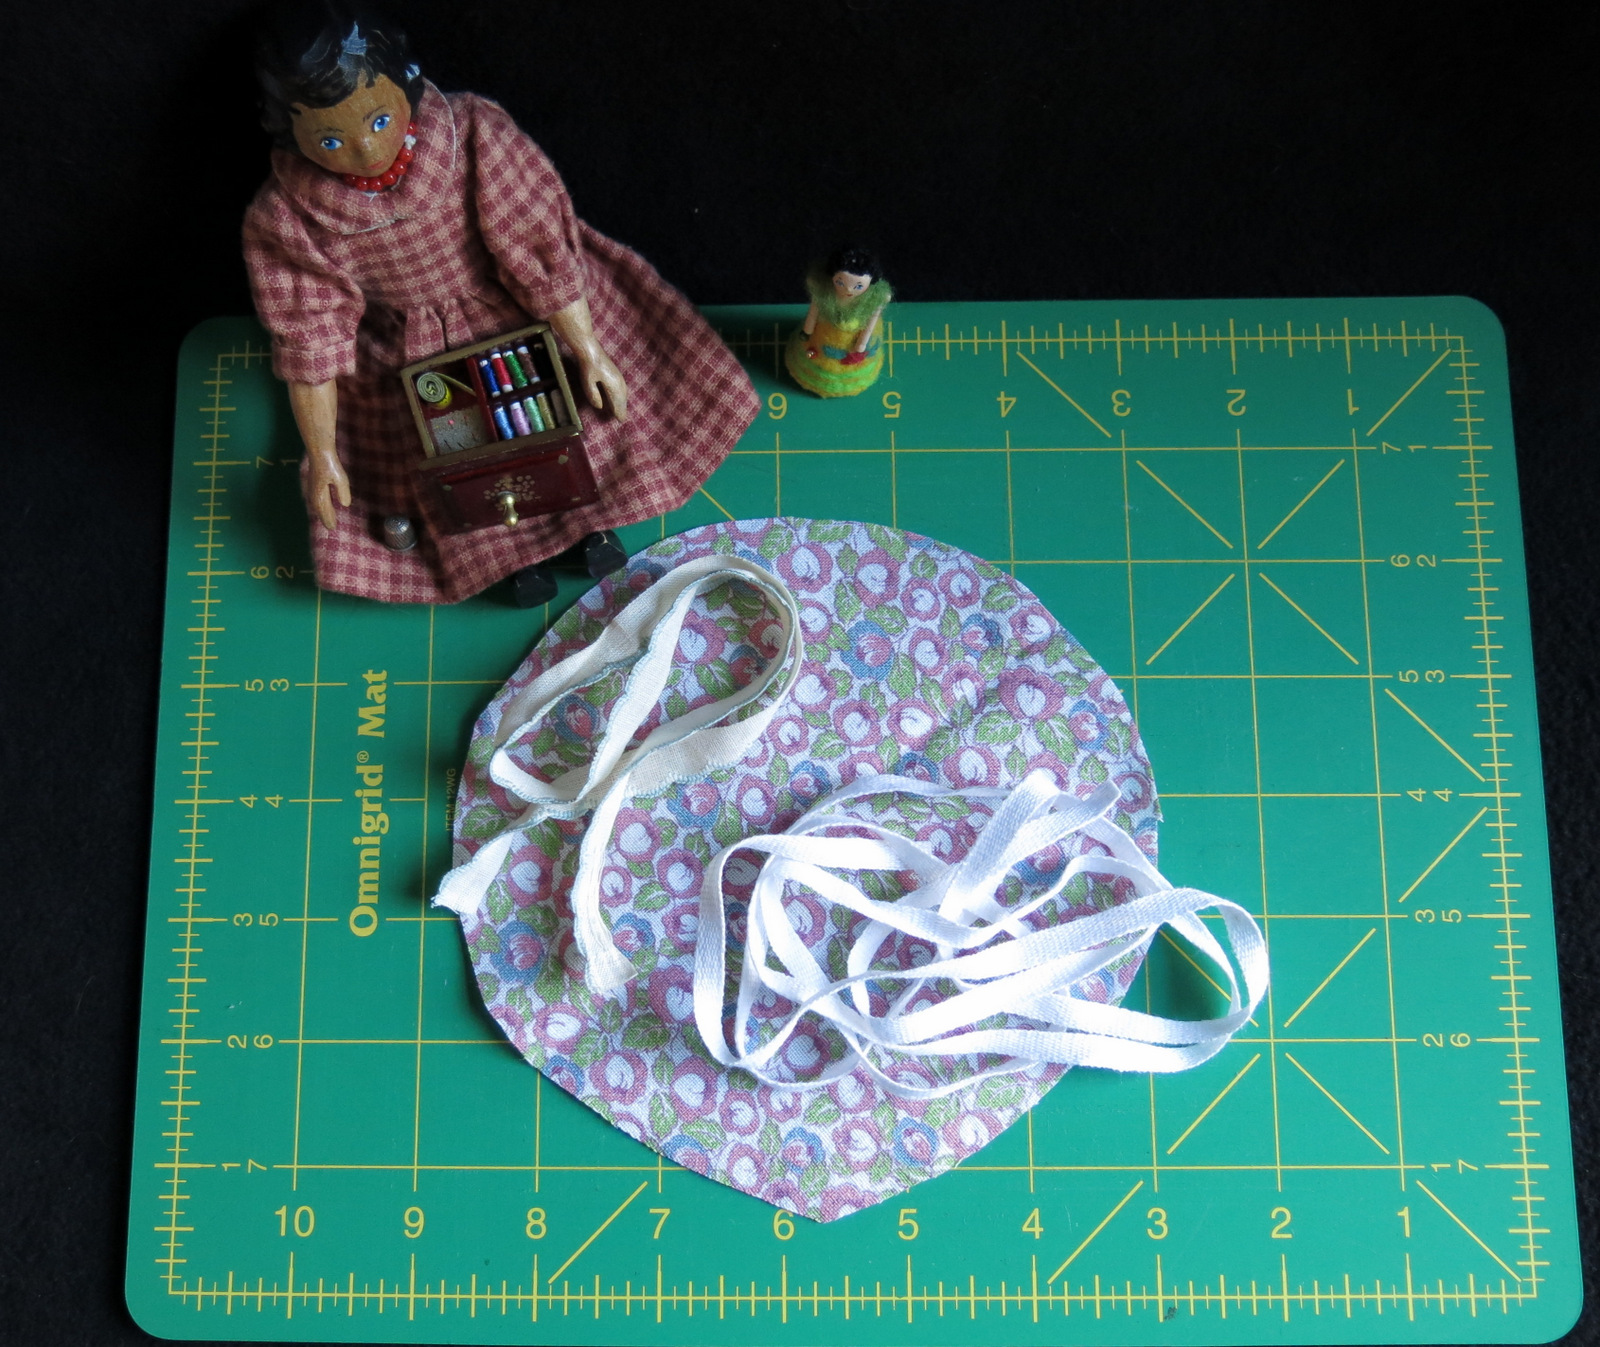
Package contents
Every participant will have received a packet containing an approximately 5 to 6 inch fabric circle, about 30 inches of quarter-inch cloth tape, and about 15 inches of Vintage (1920’s) Nufashond rickrack or scallop trim.
Not all materials are provided. I assume participants will provide their own needle, pins, thread, iron, and ironing board.
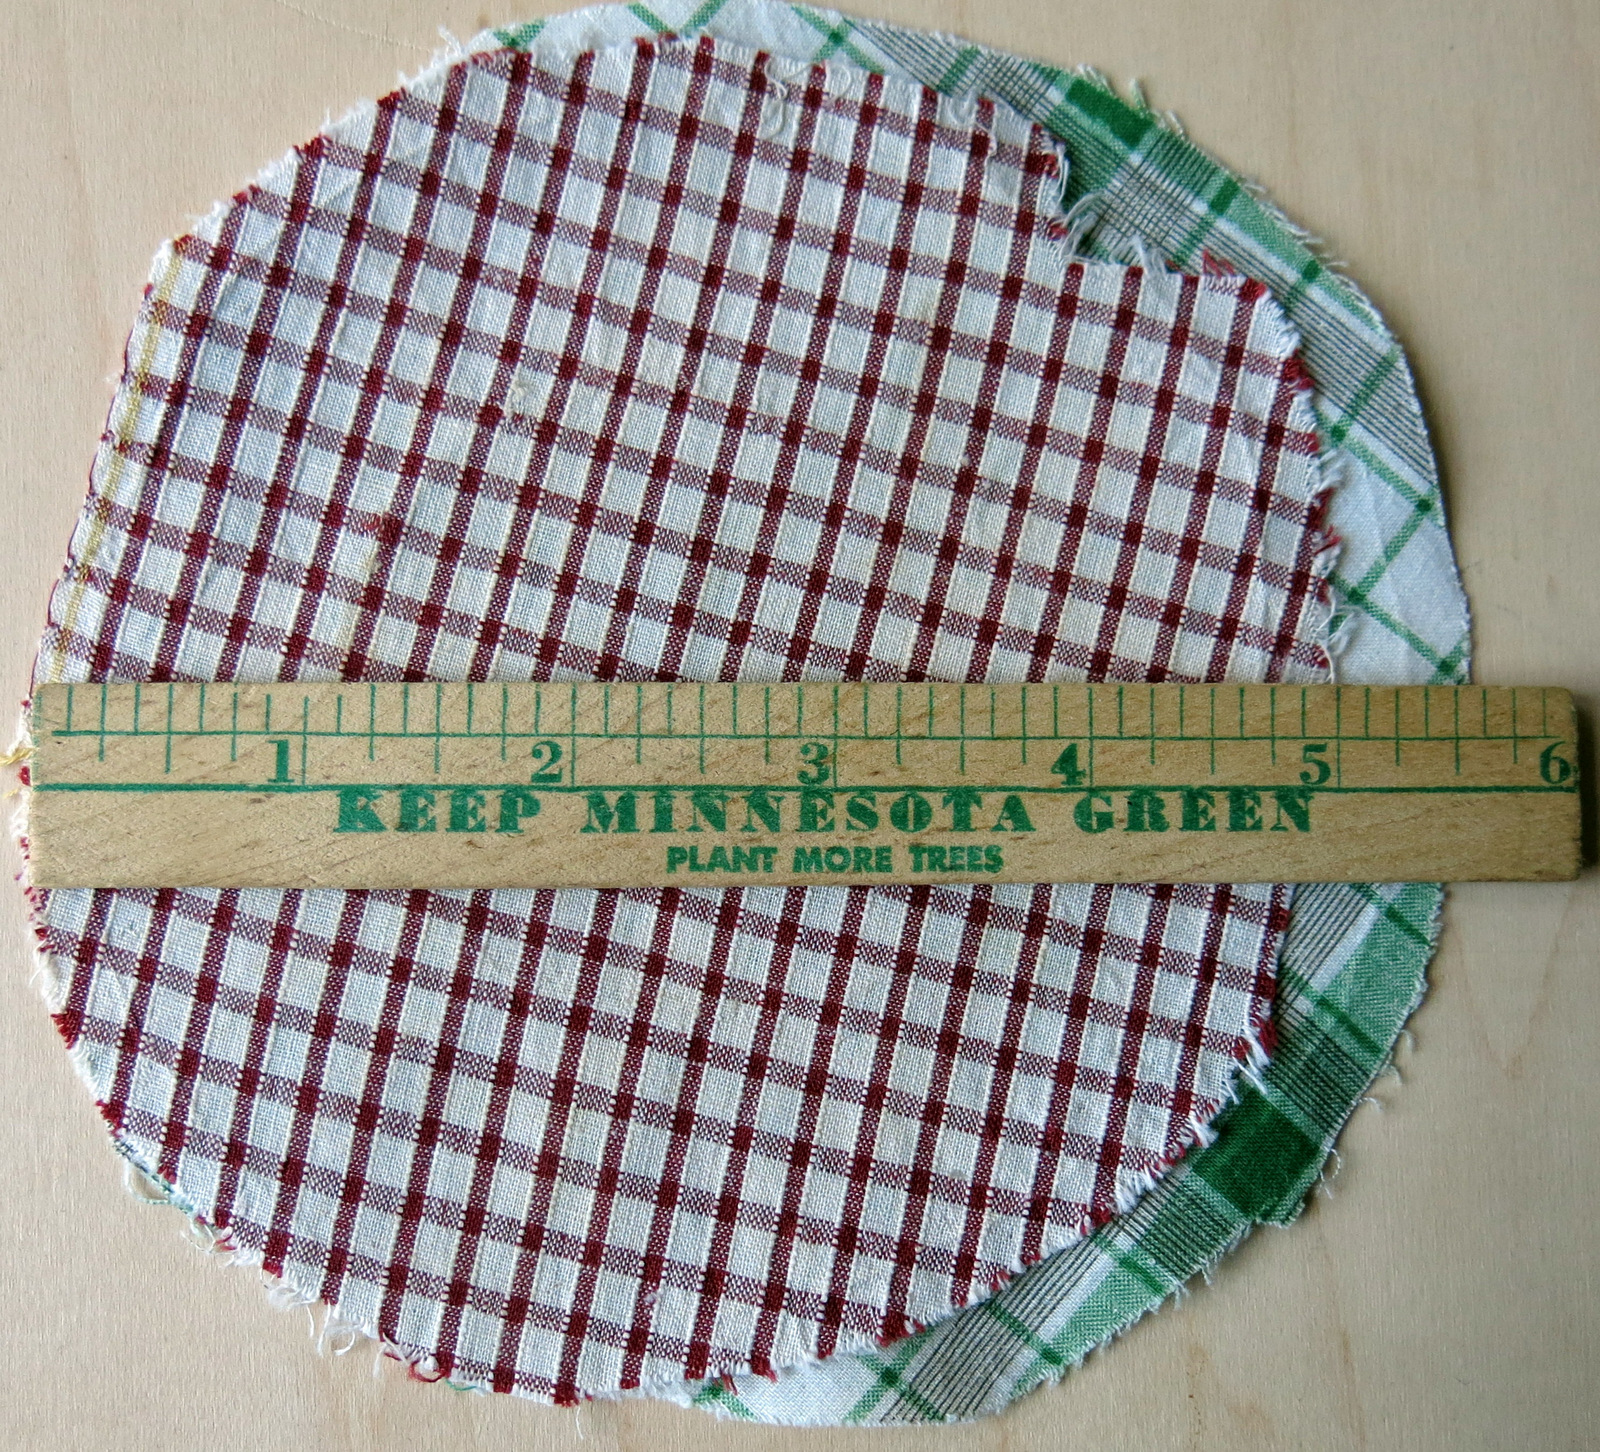
Not Round and Not the same size!
Participants should be aware that though everything is clean, the trims and fabrics are all genuinely old materials, so the whites are not flourescent white and there may be marks, threads or age spots on them. Some of the circles have pencil lines, some have traces of starch, not all are the same size and some are not even complete circles!
.
.

Cut the circle of fabric in half
The first thing to do is cut the circle in half. I usually cut along the straight of the grain, but it isn’t the end of the world if the circle is cut in half on the bias. Put one of the halves away so you don’t mix them up while working..
.
.
Extra trim
The next thing to do is attach the trim to the curved part of the half circle on the right side. Do not cut the trim yet…see how to attach the trims in the next two pictures…
.
.

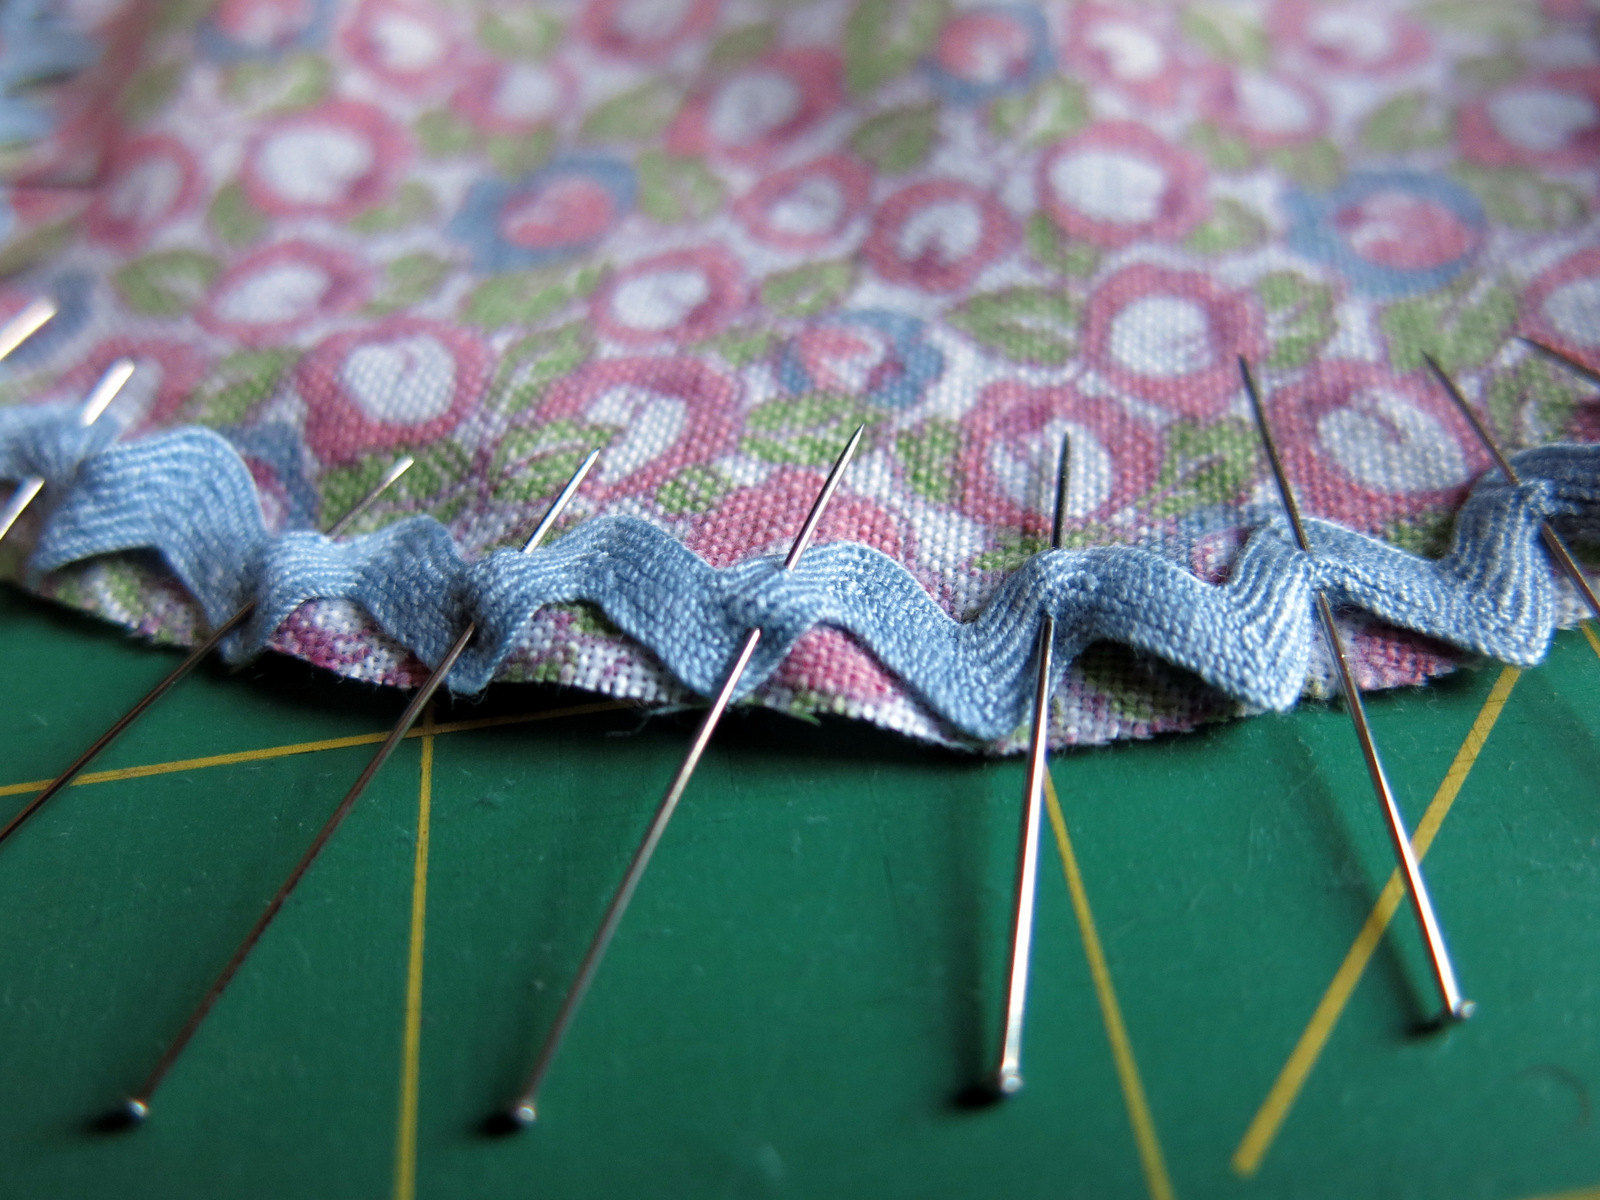
Pinning the flat scallop trim.
Attach the trim, or rick rack to the fabric half circle along the curved edge. If you have the flat scalloped trim, pin every half inch or so, leaving the circle flat, but adding a tiny bit of trim to make a little lump between each pin like in the picture.
.
.
Pinning the rickrack
If you have rickrack, pin every zig or zag, and don’t worry about adding a lump.
.
.
Stitching the trim
Stitch the trim to the curved edge of the circle. For the scallop trim, use about 1/8 inch seam. Pull the fabric circle slightly and take a few stitches onto the needle when stitching. This will ease the trim into place on the fabric.
.
.
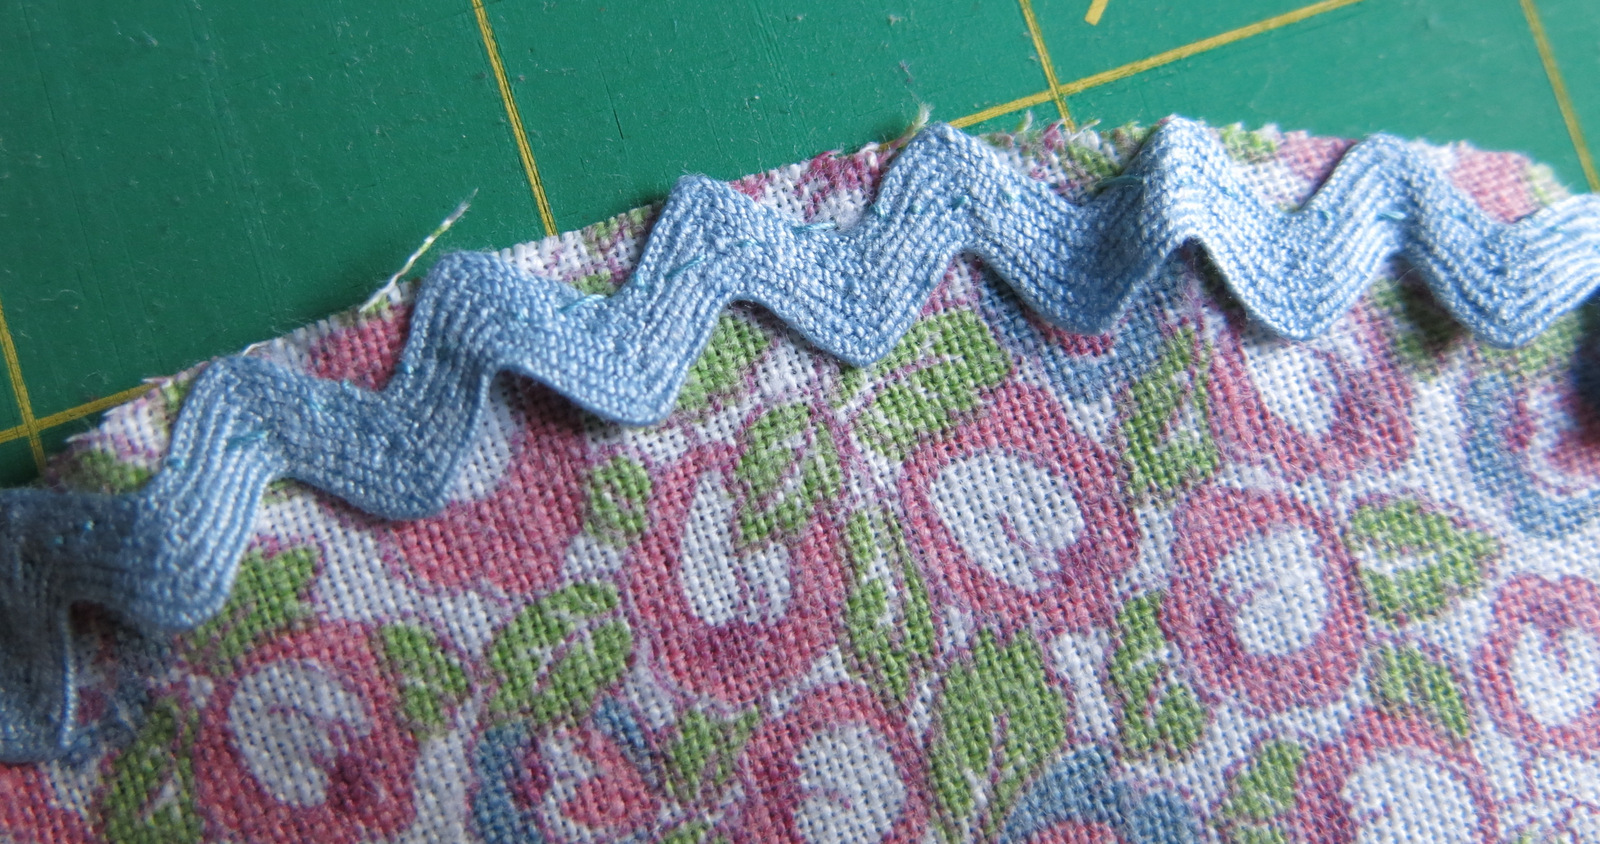
Sewing the rickrack
For the rickrack, stitch evenly catching the bottom of the “valley” as shown.
.
.
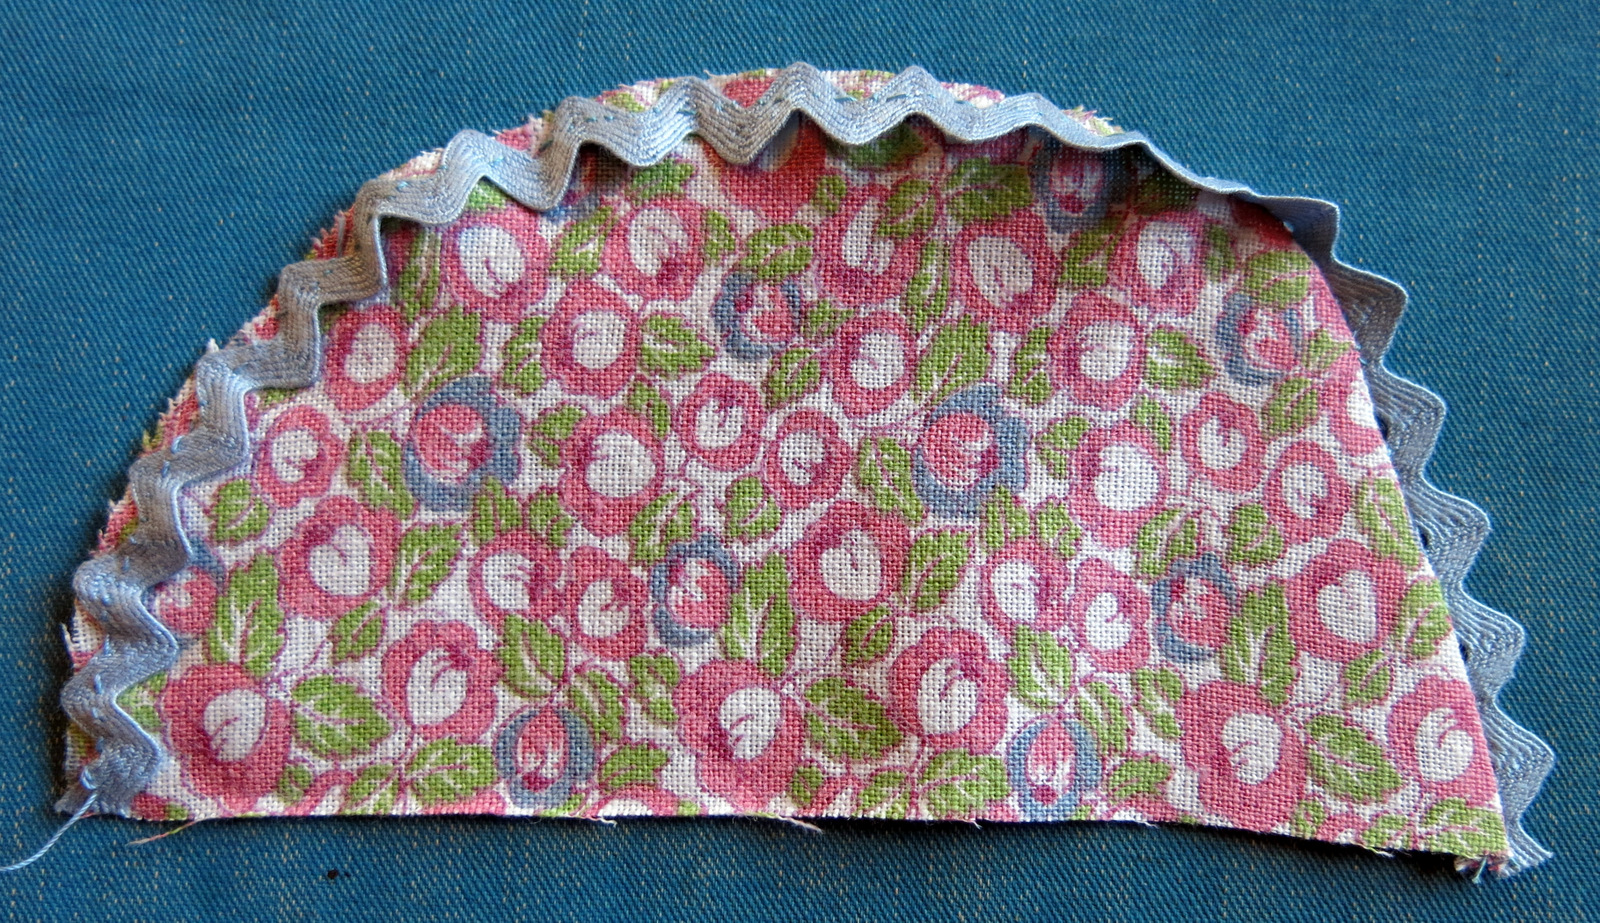
Press trim
Snip off the tail end of the trim and put it in a safe place with the other half-circle. Flip the trim over to the wrong side, and iron it flat from the right side.
.
.

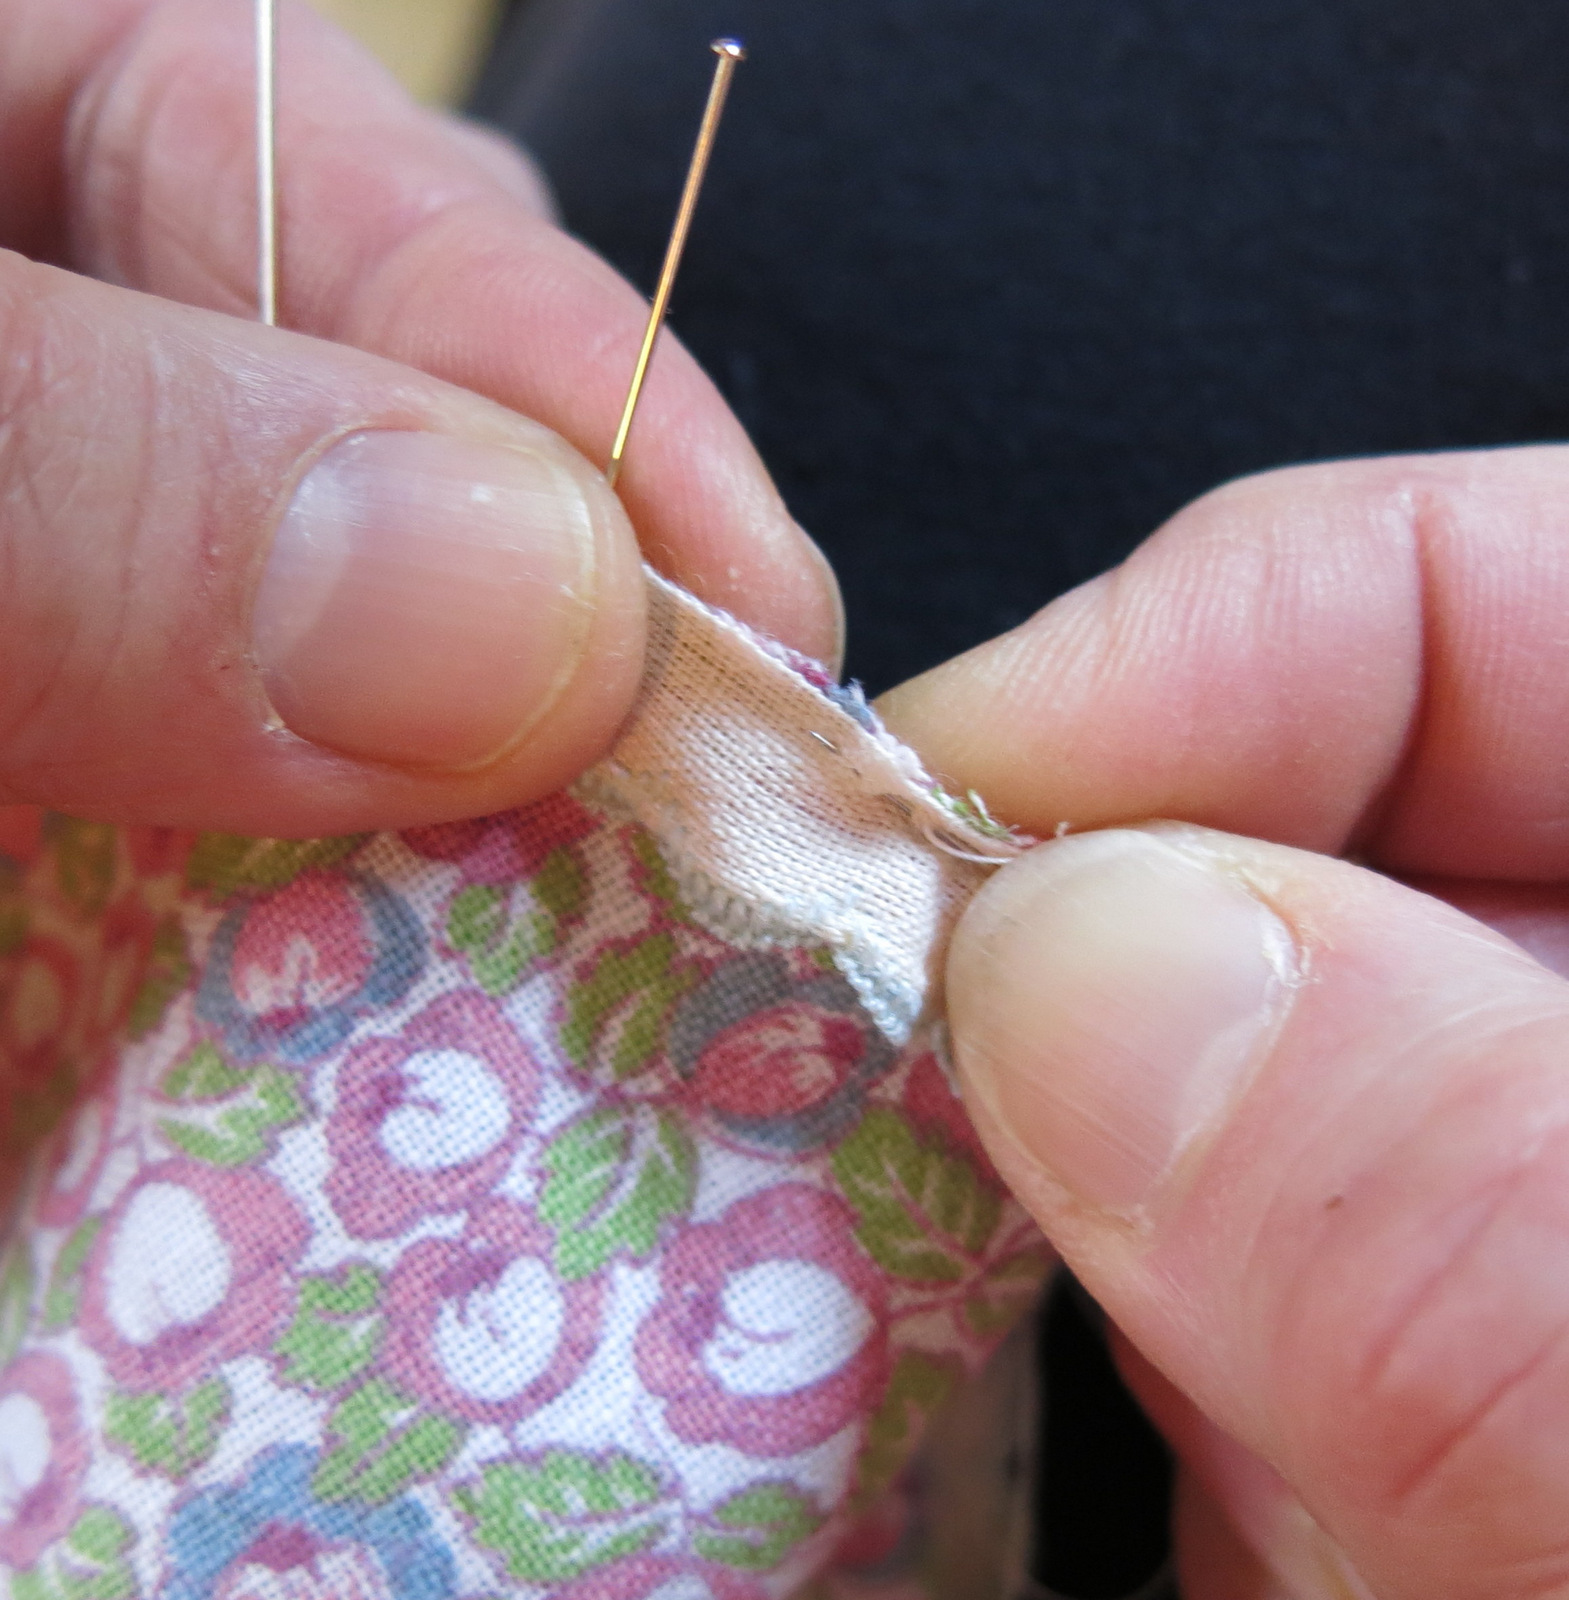
Catching the raw edge
I like to neaten the raw edge by taking tiny overcast stitches on the wrong side. Here Rose is demonstrating the neatening of the rick rack edge.
.
.
-

Catching the raw edge

It also holds the edge flat…here is the same process on the apron with scallop trim.
.
.
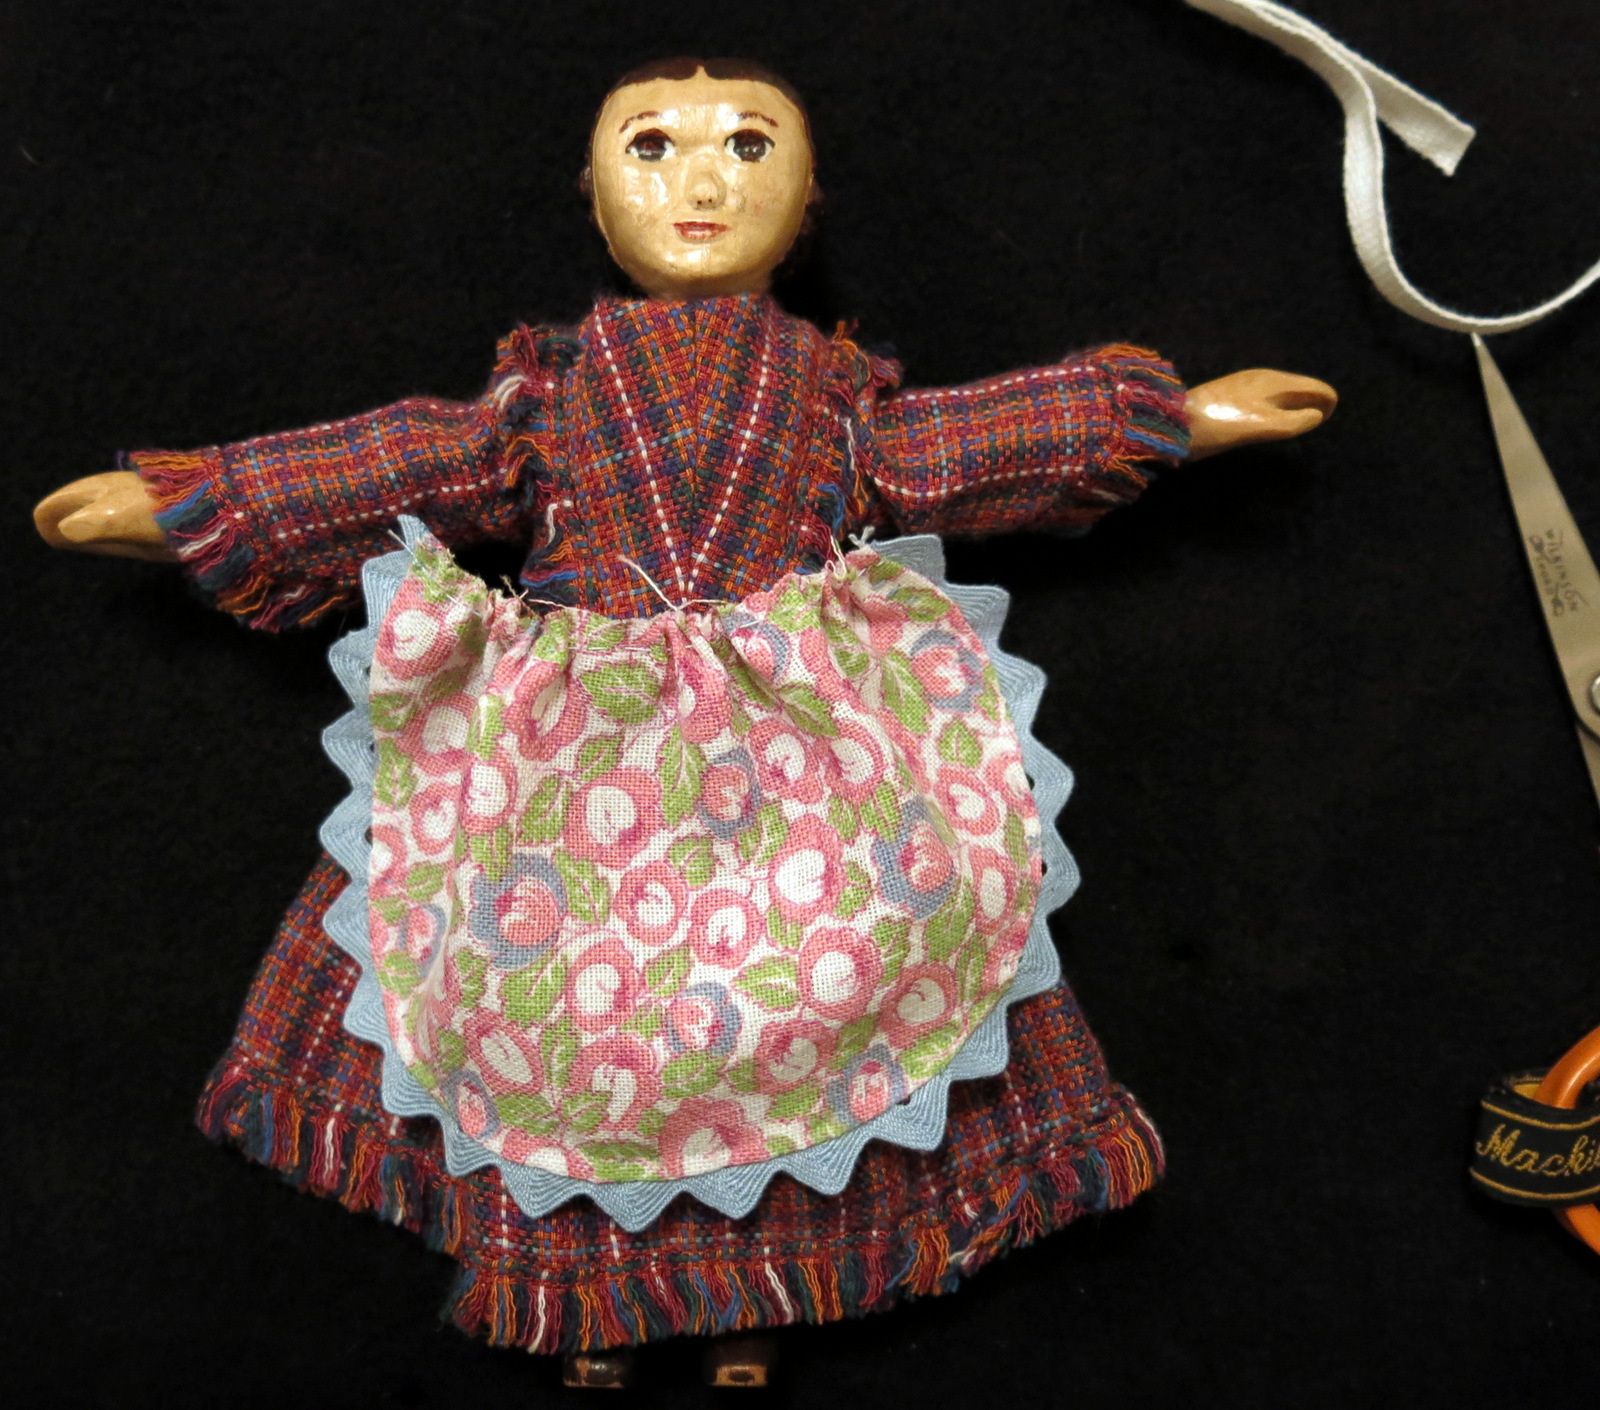
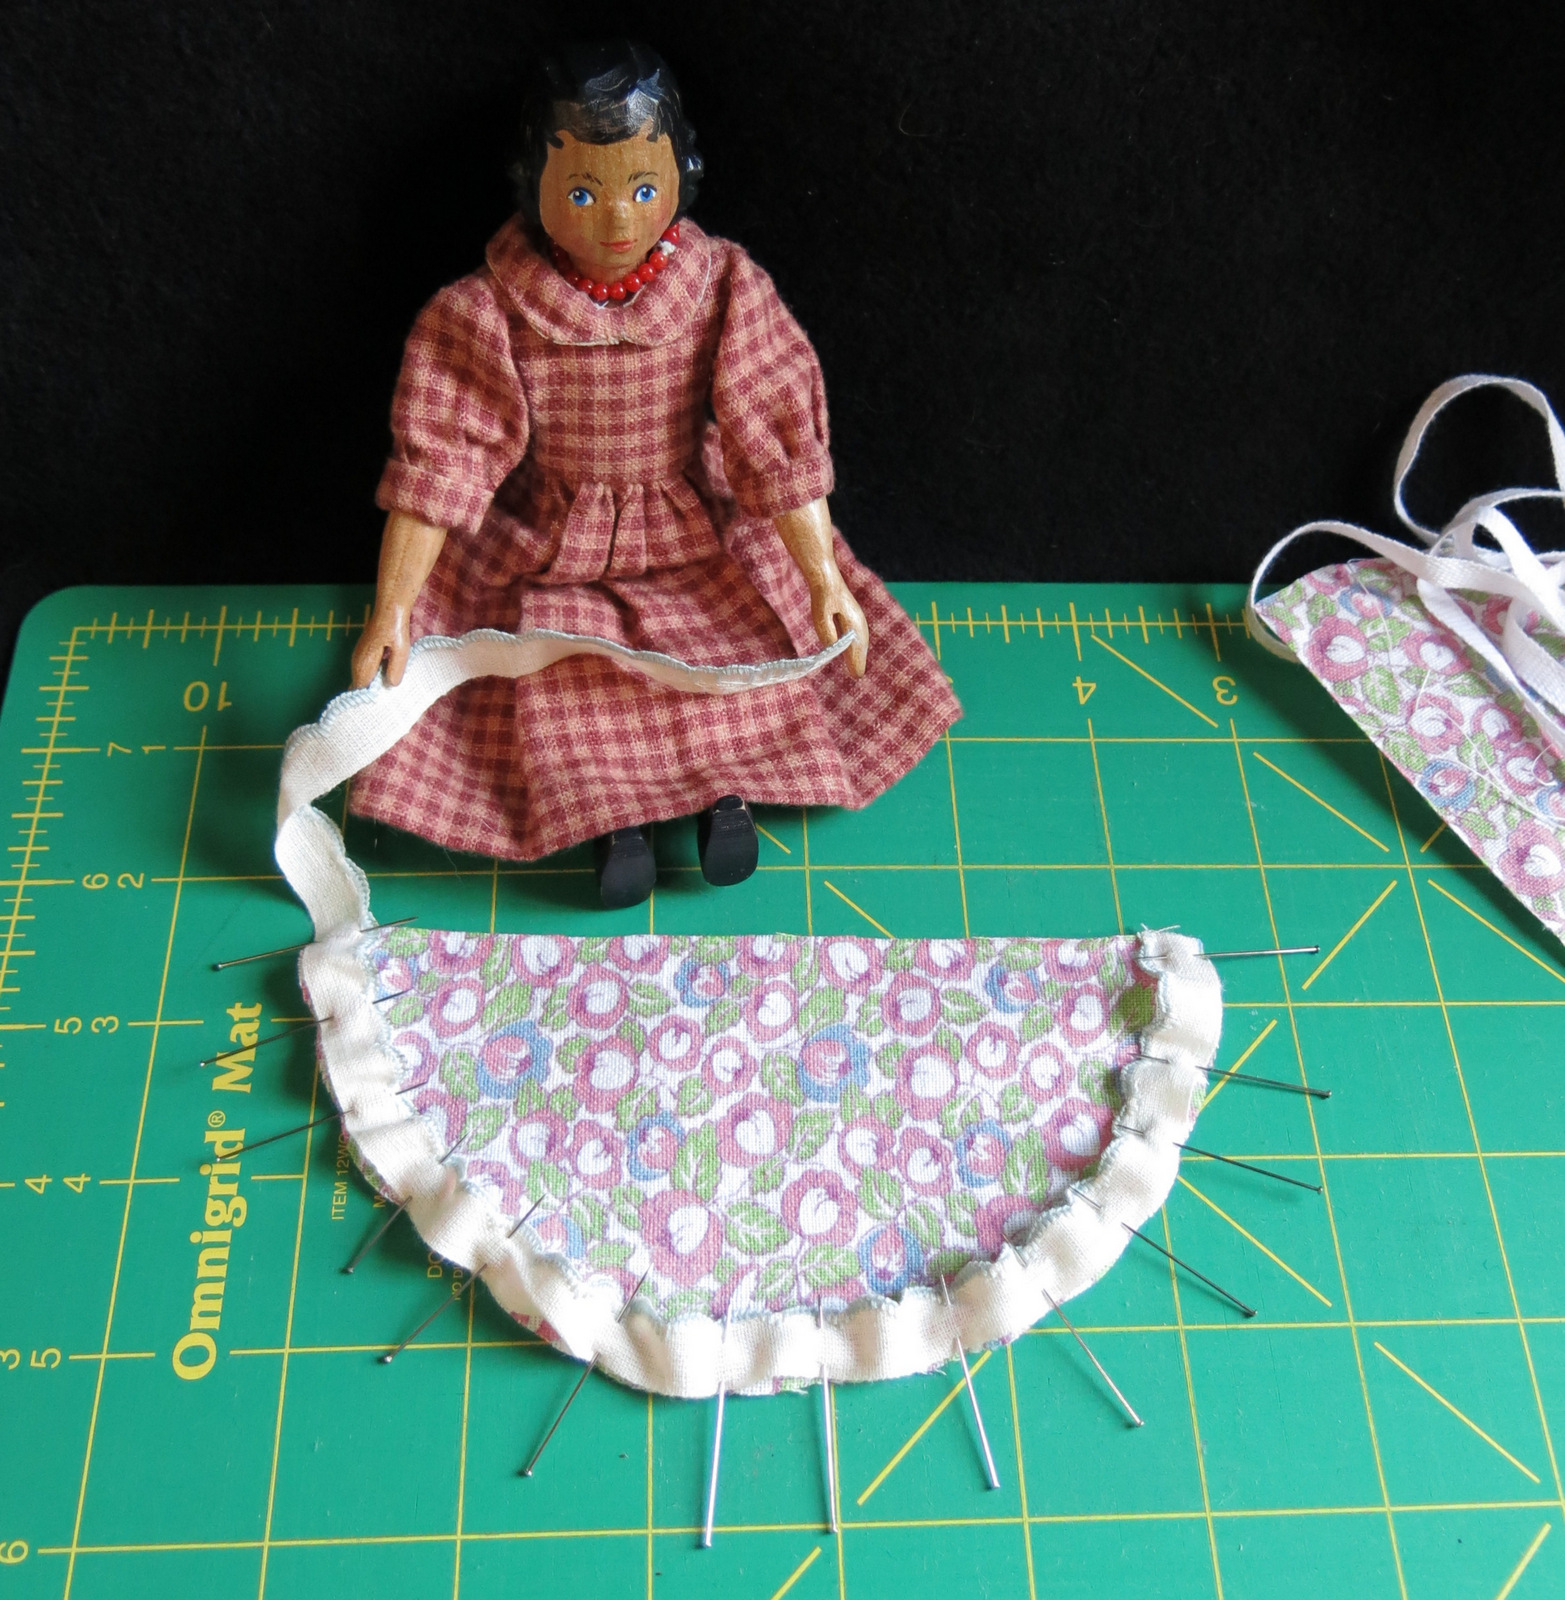
Fit the apron to your doll
Now gather the top straight edge and lay it on your doll to see how wide you want it to be. Make sure you measure while your doll is wearing her clothes! Constance’s apron will be three inches wide.
.
.

Waistband lining pinned
Now take that measurement, and add half an inch more to it. Cut that measurement of the flat woven cotton tape. Constance’s apron will require 3 1/2 inches. Pin it to the wrong side of the gathered edge, tucking 1/4 inch of the raw edge of the tape under on each side.
.
.

Stitching the Waistband lining
With the wrong side up, sew the flat woven cotton tape to the apron along the the lower edge of the cotton tape. This forms the waistband lining.
.
.
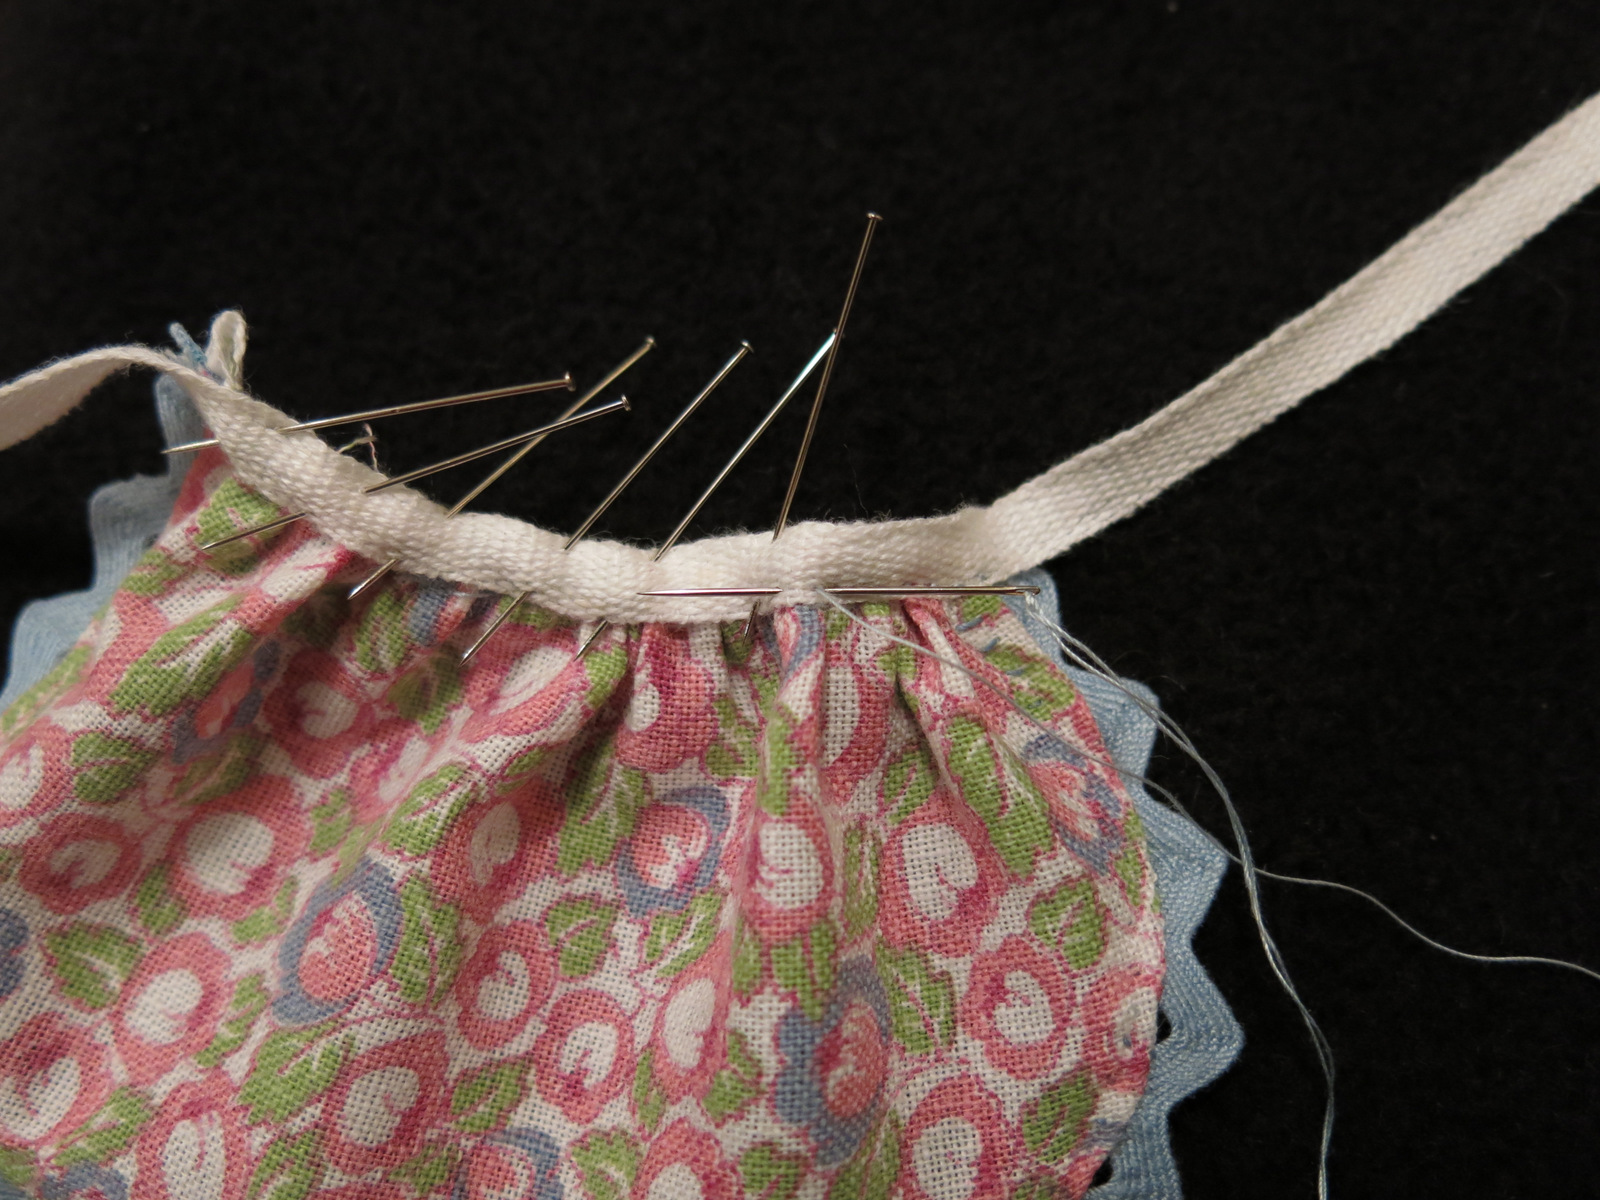
Sewing on the apron ties
Measure about 15 inches of the flat woven cotton tape, and pin the apron to the middle of it. Sew along the lower edge – your stitches will show – make them neat! This forms the waistband and the ties.
.
.
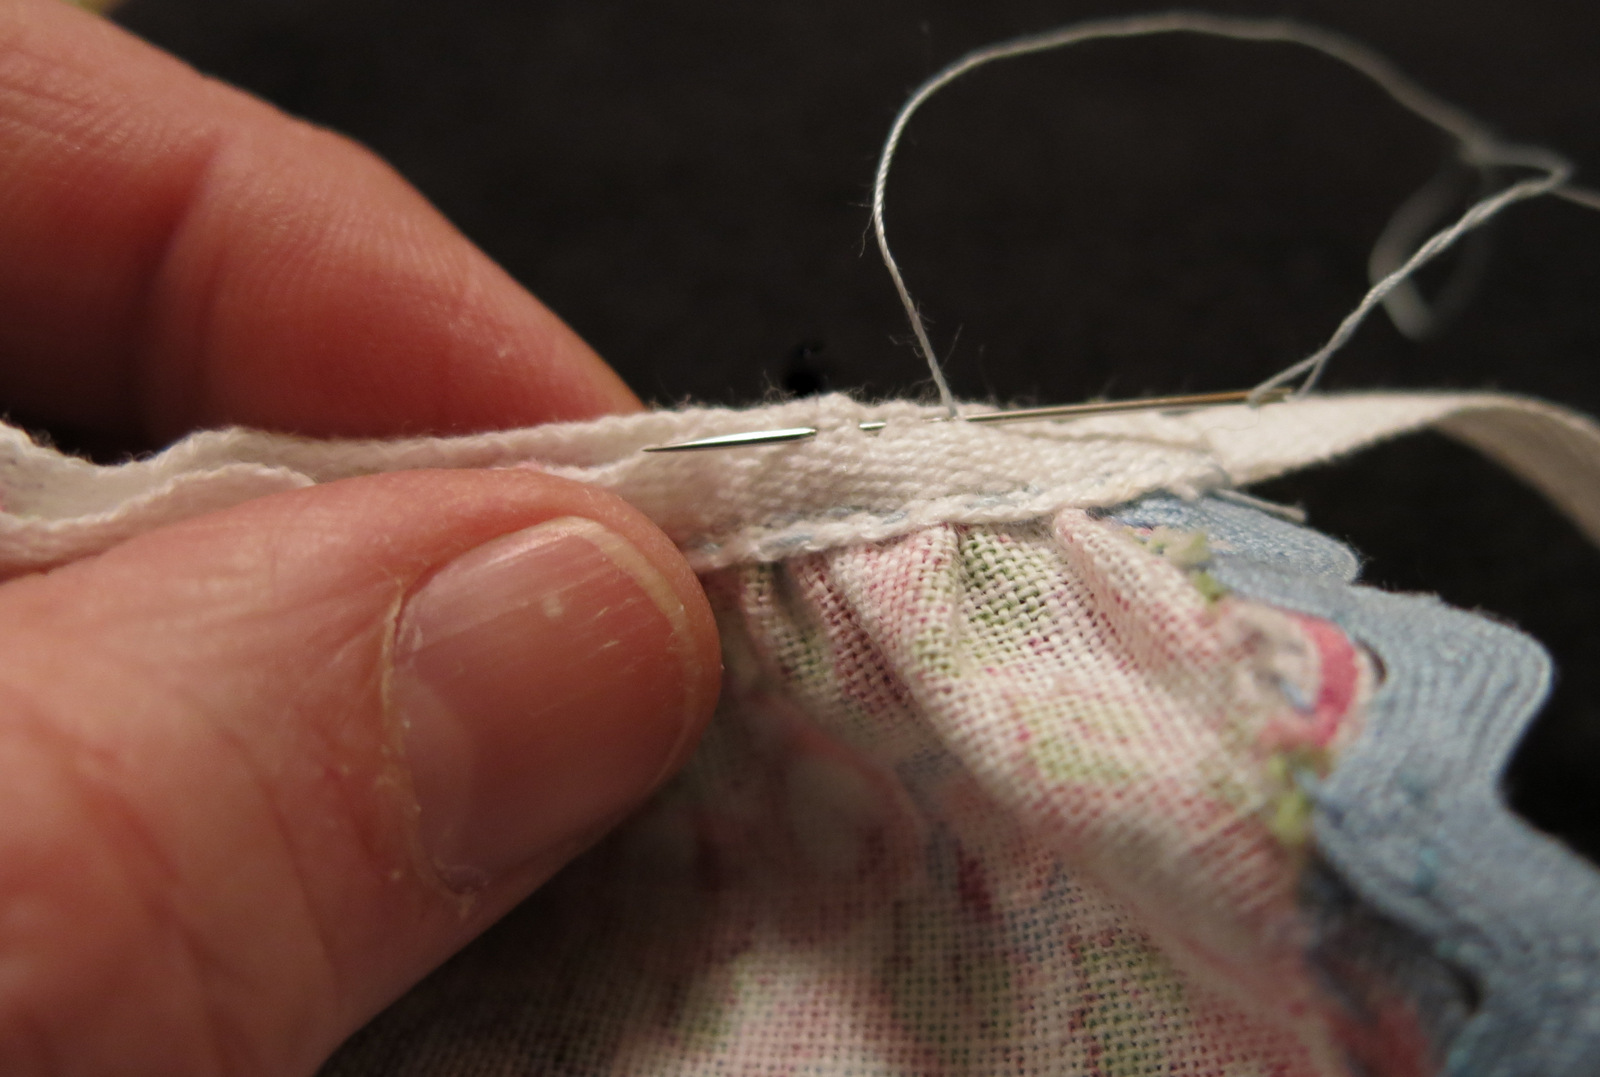
Stitching the top edge
Stitch the top edges of the waistband lining and the waistband+ties together along the top edge of the apron. This encases the raw edge neatly.
.
.

Finished!


Very nice tutorial, Quimper Hitty hostess! You do a great job of teaching. Thank you.
Thanks! I thought it was a pretty easy thing to explain until I started trying to explain it! The more pictures the better, I think!
Another nice lesson! When I can see both your hands, does that mean one of the Hittys pressed the shutter?
They have to hop on it!
Thank you for the step by step instructions . I think sewing requires a lot of patience !!!!
You are right! Patience is an essential ingredient!