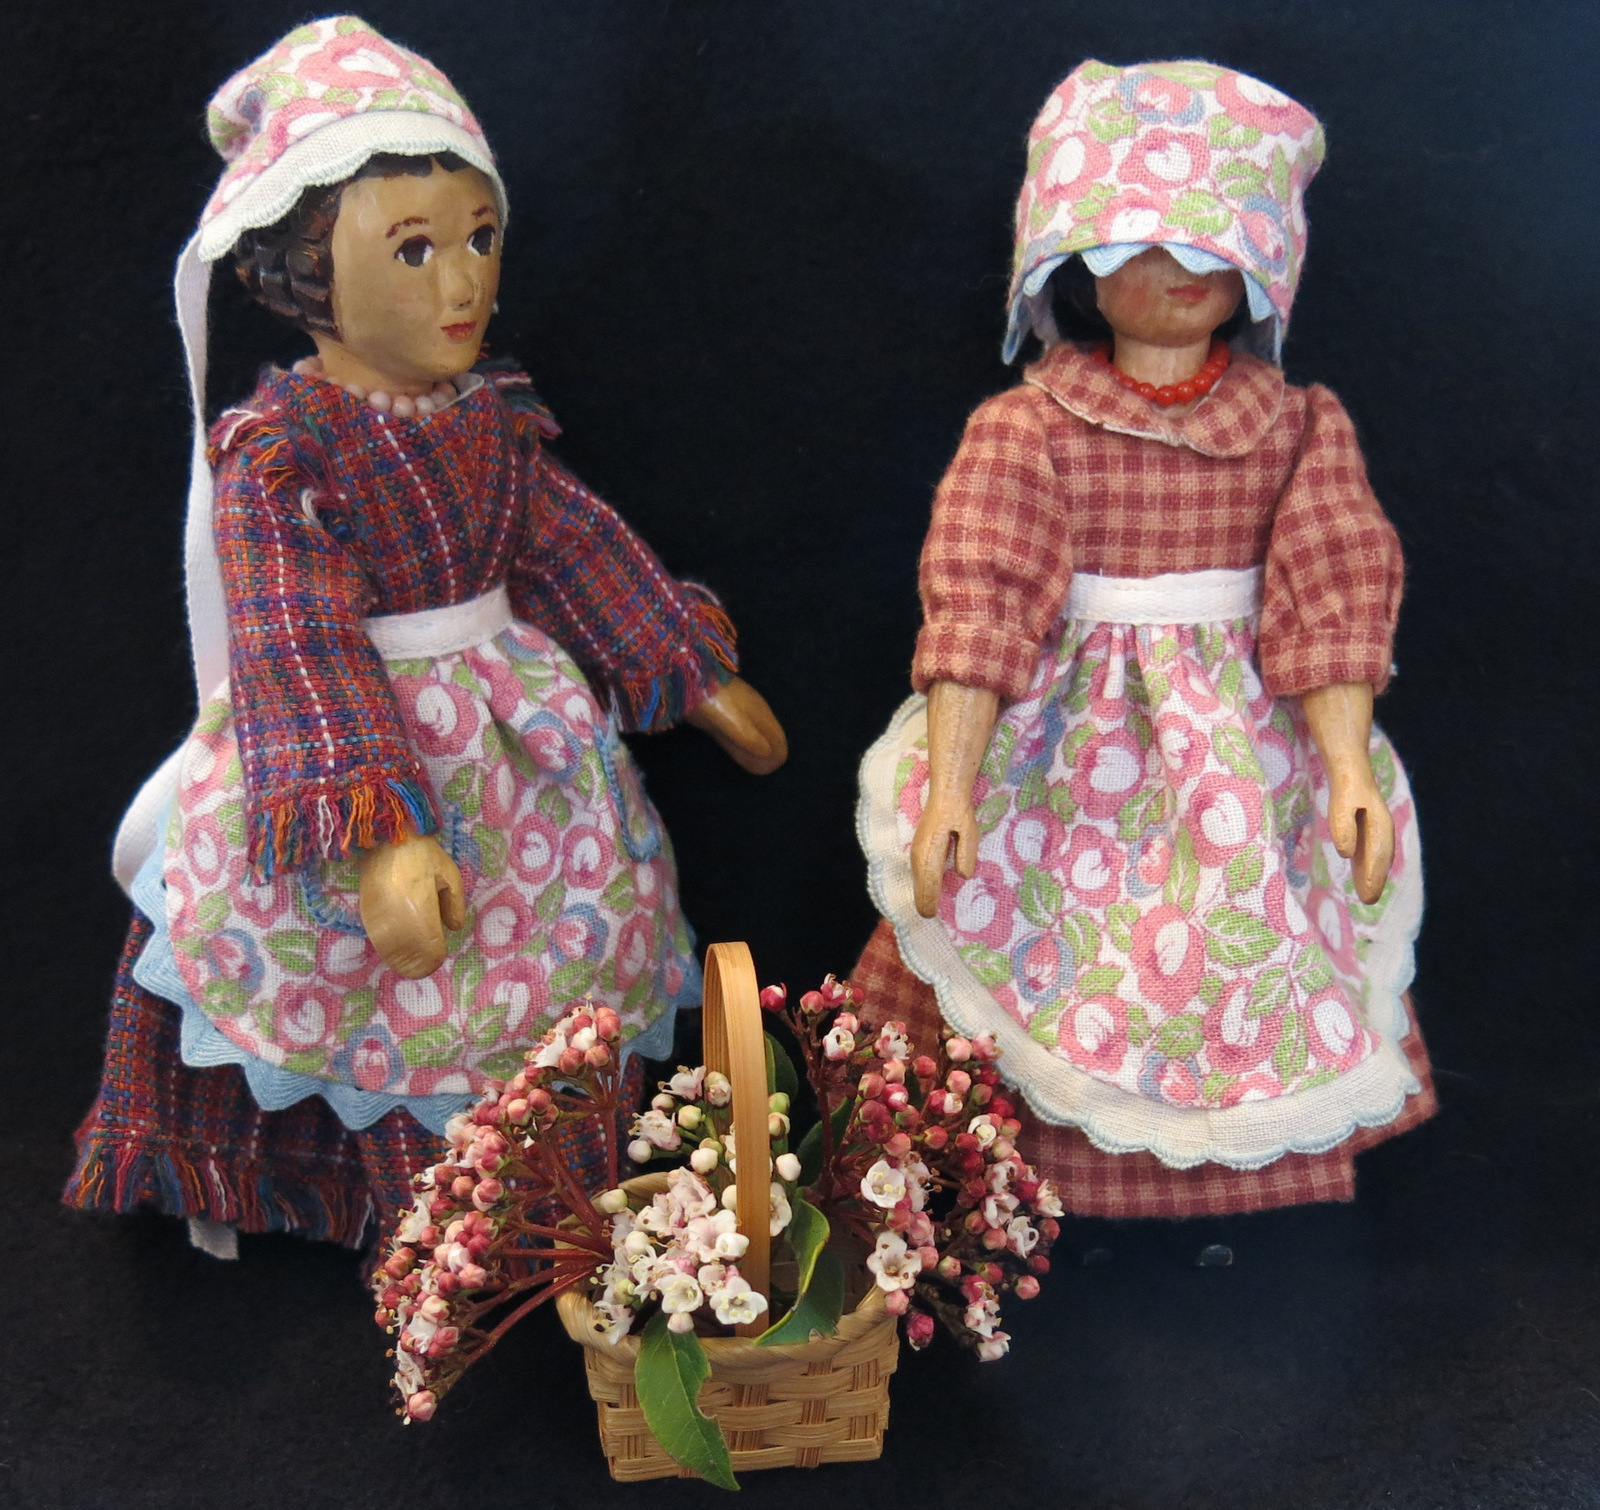
A Yoyo Bonnet
A “Virtual Retreat” project is happening today! From 10 to 11 am Eastern time I am leading the activity on making a Hitty-sized Apron and Bonnet from one yoyo-sized quilt circle. Half the Hitty friends have plaid or checked fabric from the actual Yoyo quilt, and the other half have pink floral circles cut from vintage fabric provided by a Hitty friend in Oregon.
This is the post about making a bonnet out of a half-circle. I am giving the instructions for hand-sewing these little accessories. I find hand sewing gives me flexibility and accuracy when making little things. I have no objections if participants wish to do their projects by machine, but I also have no advice – I don’t know the tricks of machine-sewing without mangling small garments!
How big is your Hitty’s Head?
.
.
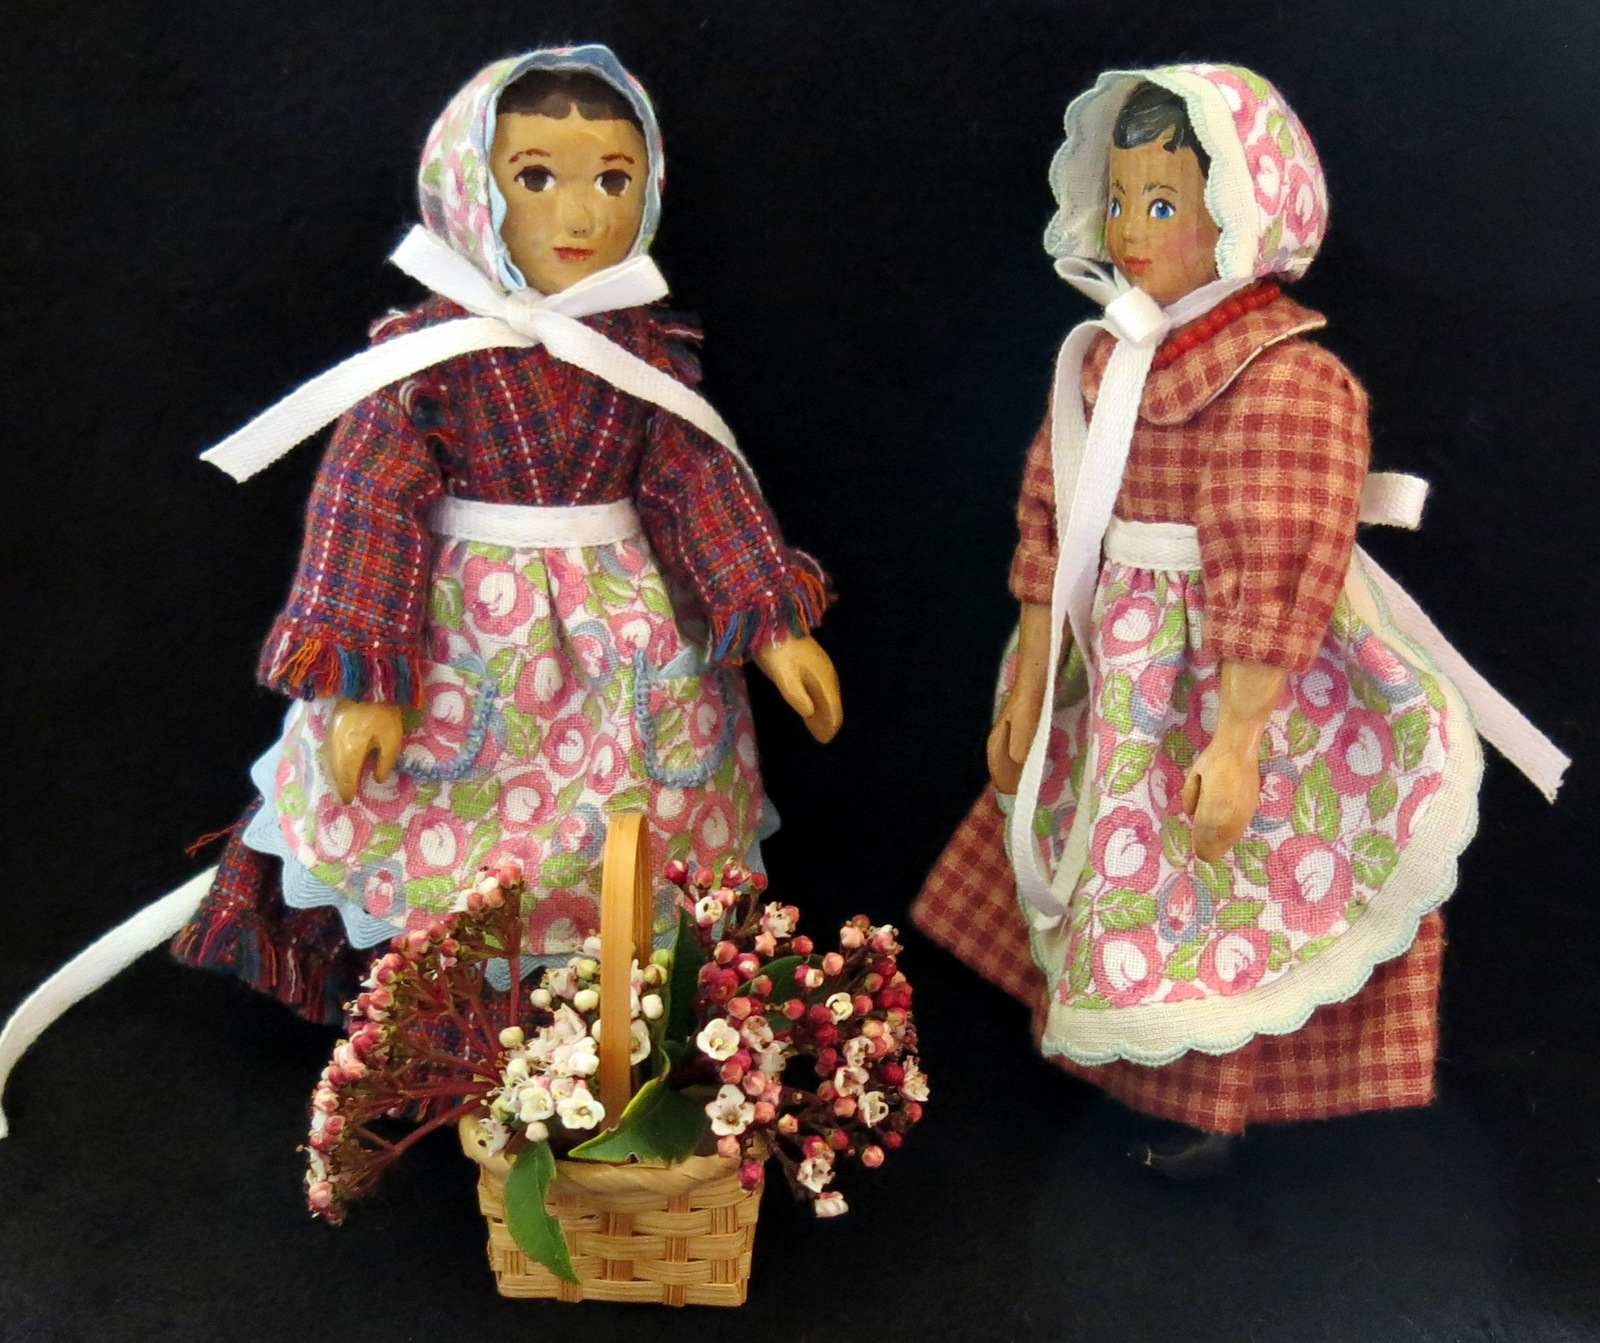
Constance and Rose Switch Bonnets
It is important to pick the right pattern for your doll. I have included one pattern which will fit a Hitty like Constance whose head is round and another for a dainty Hitty like Rose.
.
.

Cut the circle of fabric in half
I am writing these instructions as though you have completed the apron, and are ready to start on the bonnet.
Start by getting out the half circle that was put away while working on the apron, and also get out the scrap of trim left over from working on the apron…
.
.
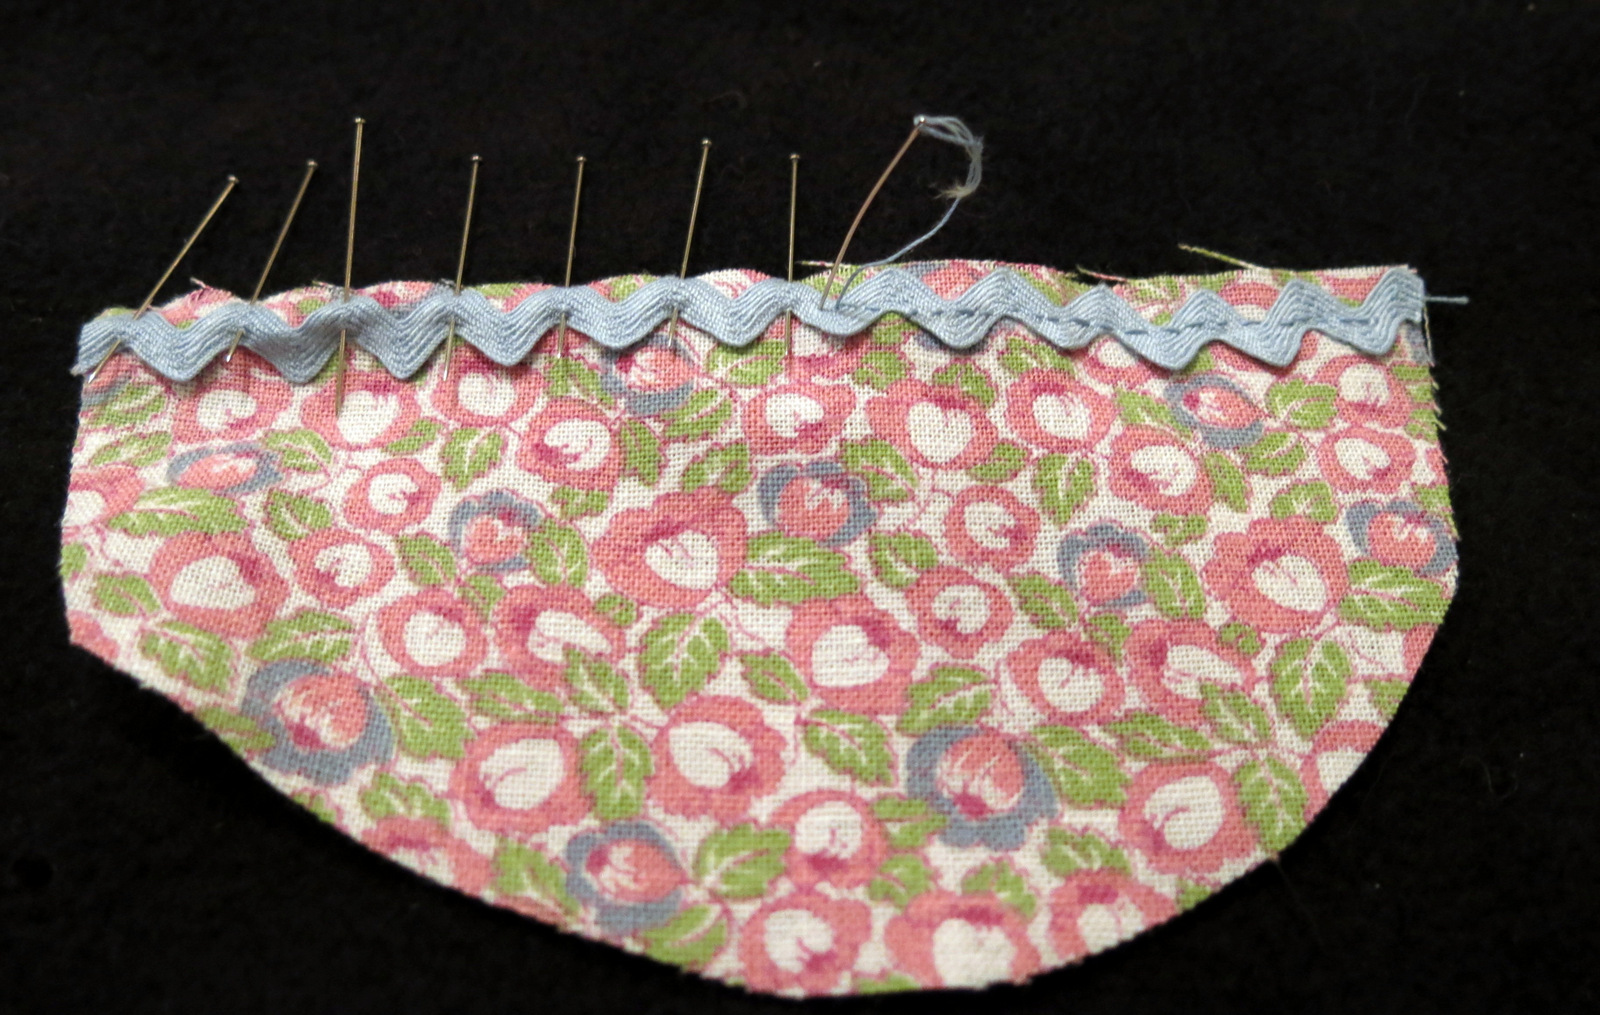
Stitching trim to the bonnet
The next thing to do is pin the scrap of trim to the straight part of the half circle on the right side. if you have rickrack like in the picture, arrange the trim so the lumps hit the straight edge, pin into every zig or zag. If you have scalloped trim, stitch it flat against the straight edge. If you don’t have quite enough trim, don’t panic, just arrange it in the middle – you are going to cut off the edges in a minute anyway.
.
.
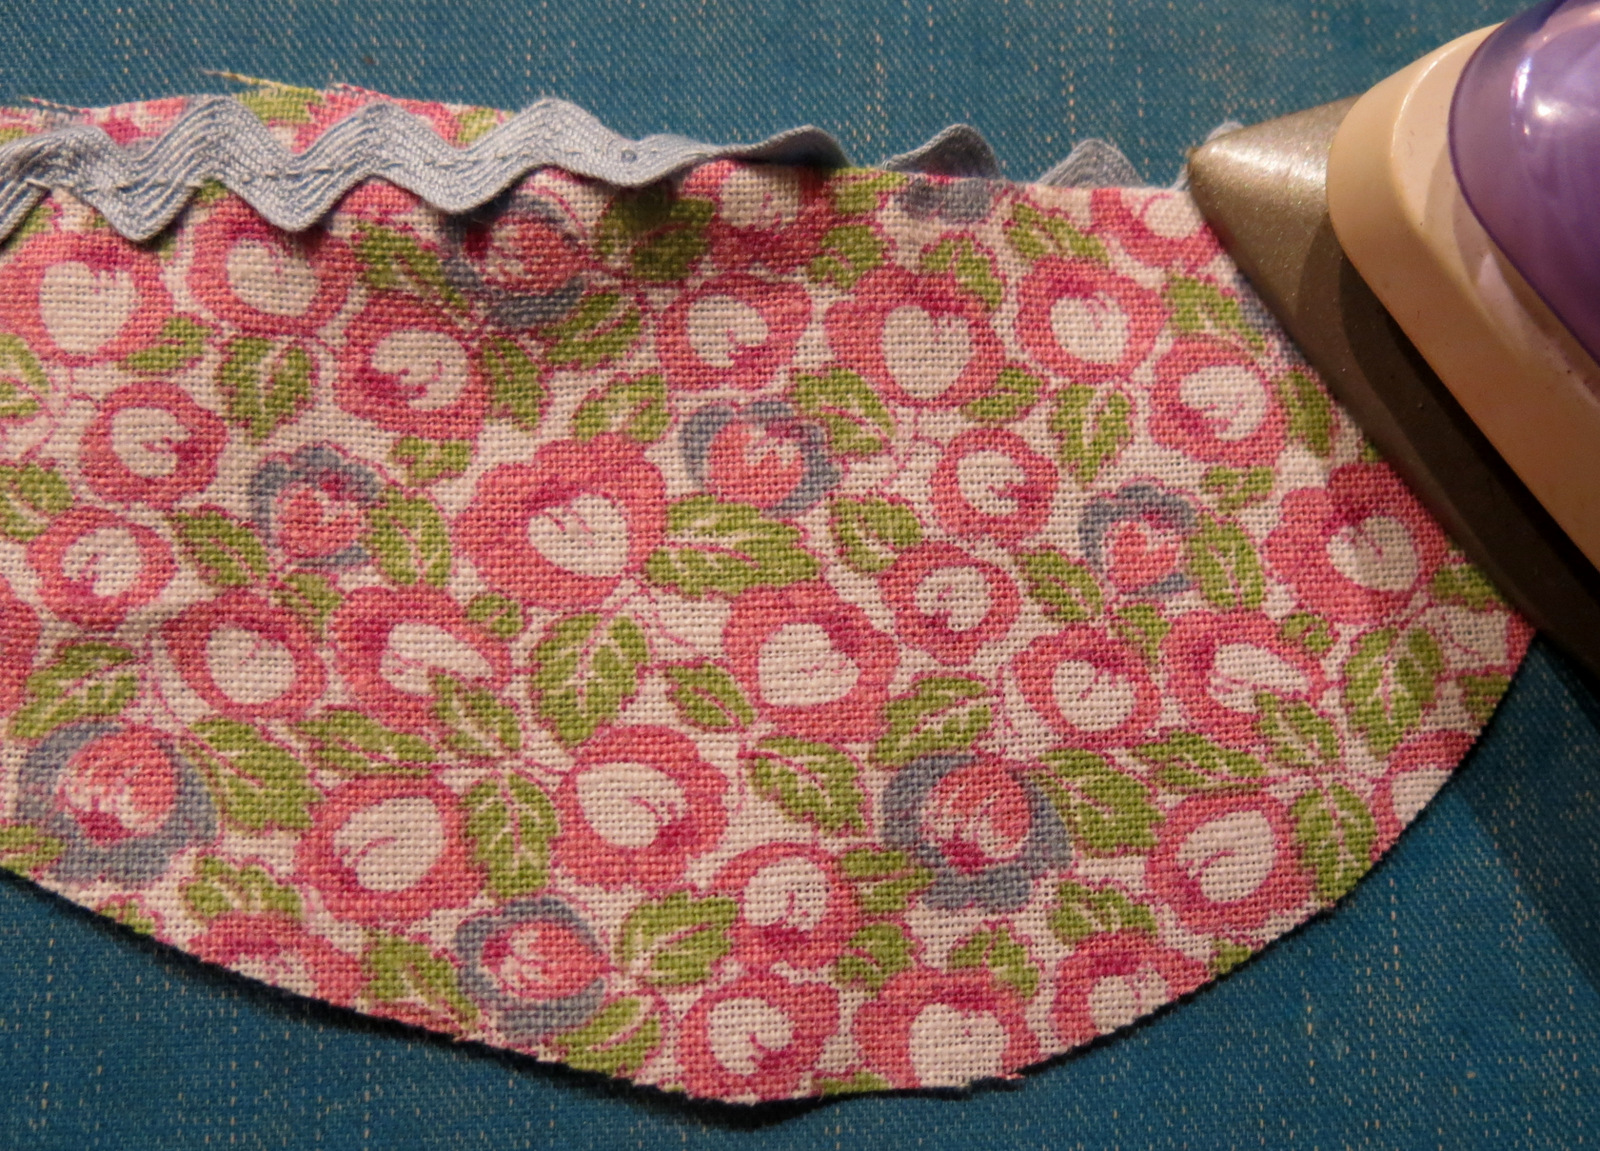
Press the trim
Working on the right side, flip the trim over to the wrong side, and iron it flat...
.
.
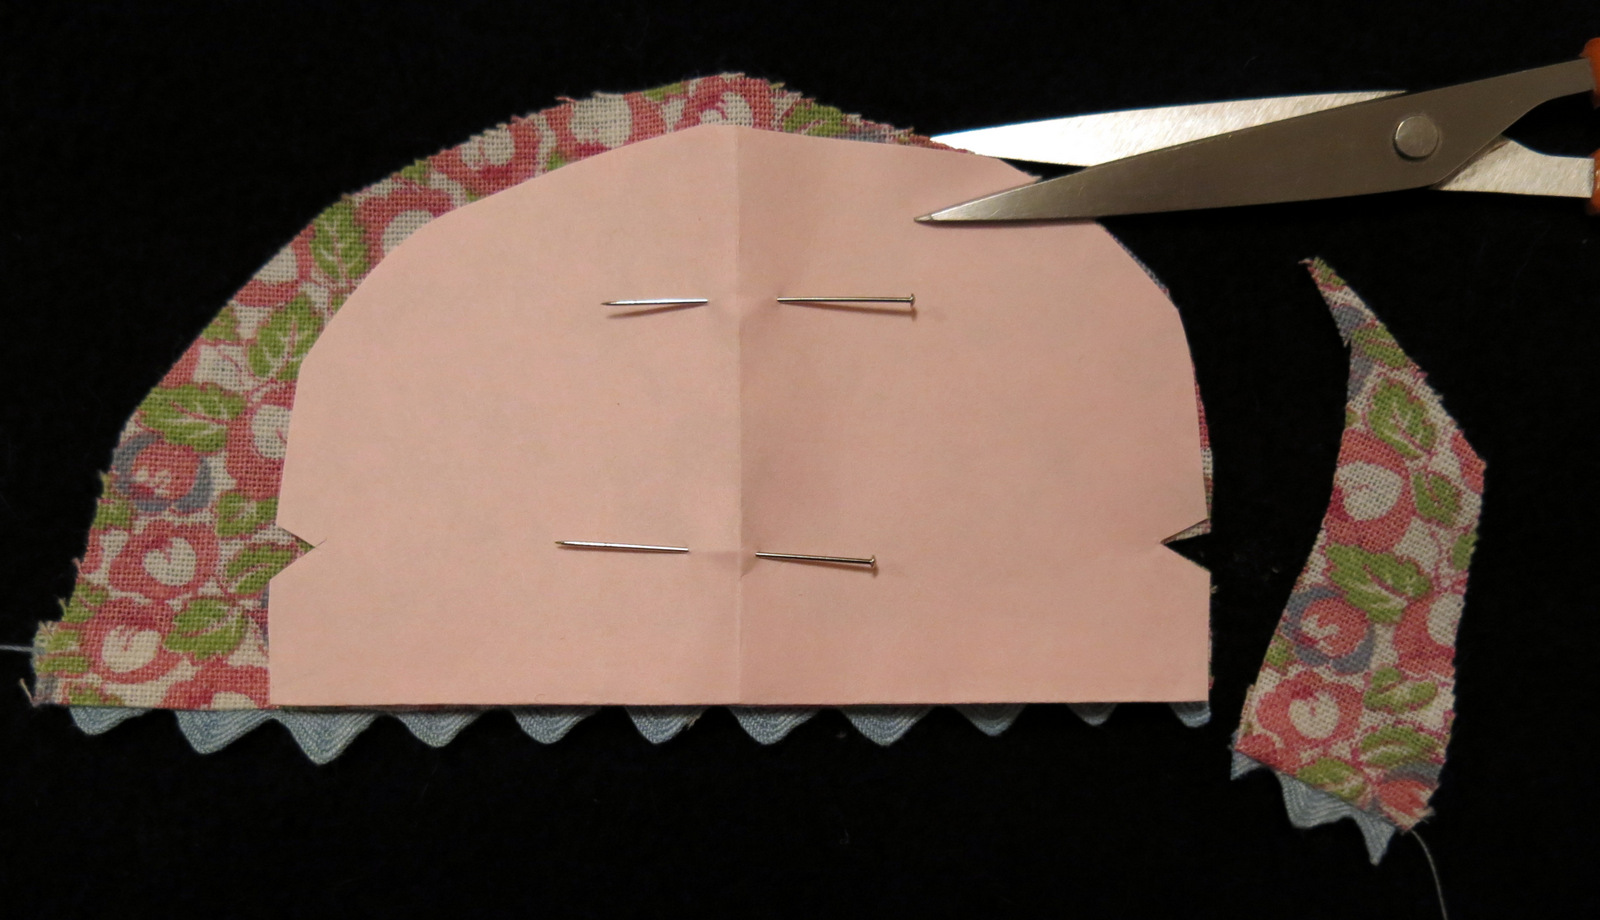
Place the pattern
Having chosen the size of Bonnet you want to make, carefully place the straight edge of the pattern against the straight edge of the fabric (Not the trim). Pin it in place and cut around, including the notches…save the scraps!
.
.
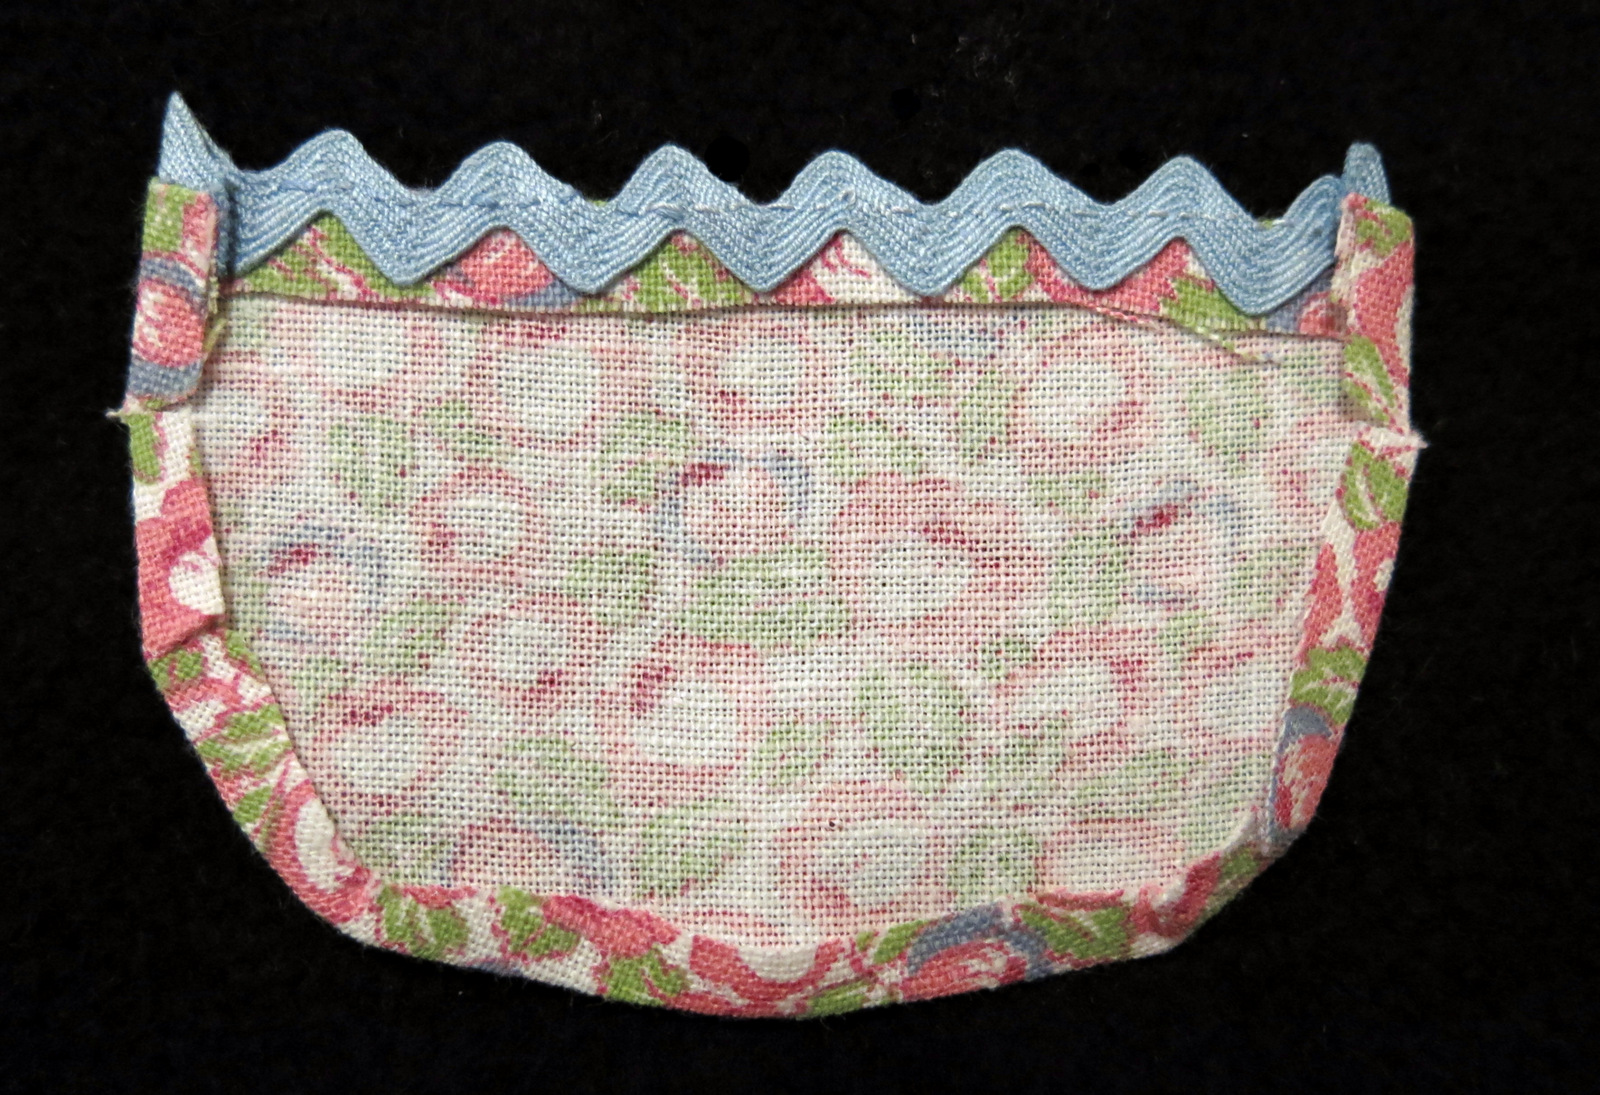
Press the curved edge
Working on the wrong side, press about 1/8 of an inch along the curved edge in toward the centre…as you can see, it doesn’t have to be a perfect ironing job. Stitch the folded edge of the fabric from the trim to the notch on each side (about half an inch – this is visible in the following picture).
.
.

Position the tape
Take the remainder of the flat woven cotton tape, and centre it on the wrong side of the flat edge of the bonnet. The tape will cover the raw edge of the fabric, and enclose the edge of the trim making it neat. It will also act to stiffen the face edge of the bonnet. Pin and stitch both edges of the tape, as shown. Don’t cut the woven tape – it will form the bonnet ties!
.
.
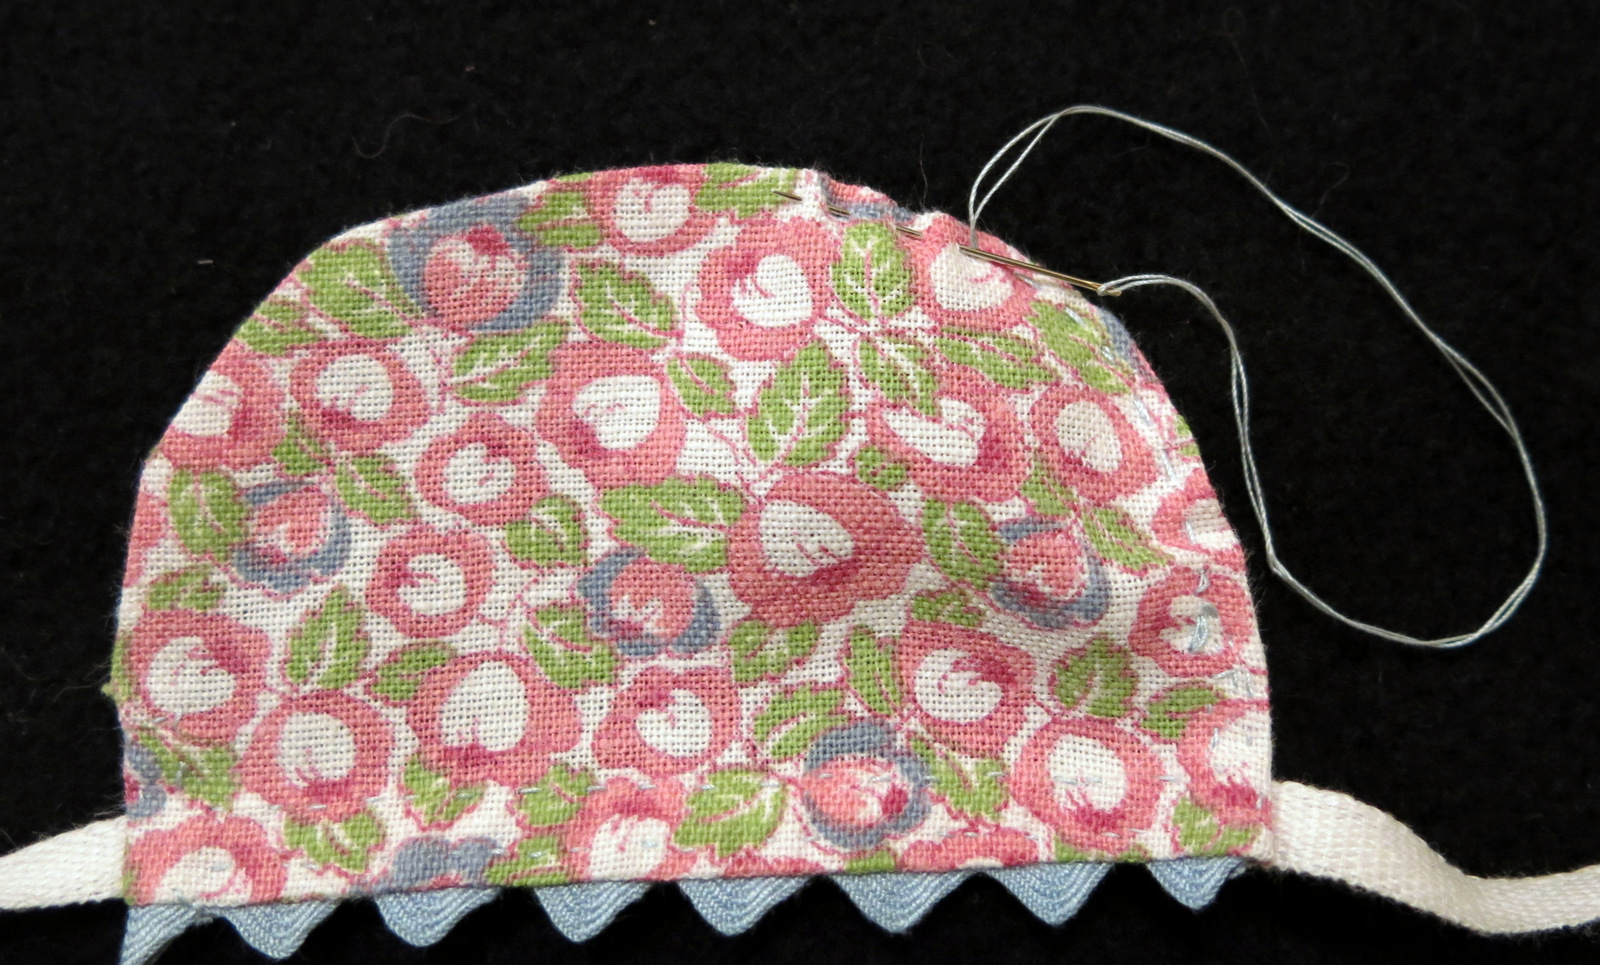
Running stitch
Now gather the curved edge of the bonnet: using a double thread, anchor the thread at one end of the curve at the notch… work a running stitch around the curve to the other notch, and pull it tight enough to fit your doll’s head.
.
.
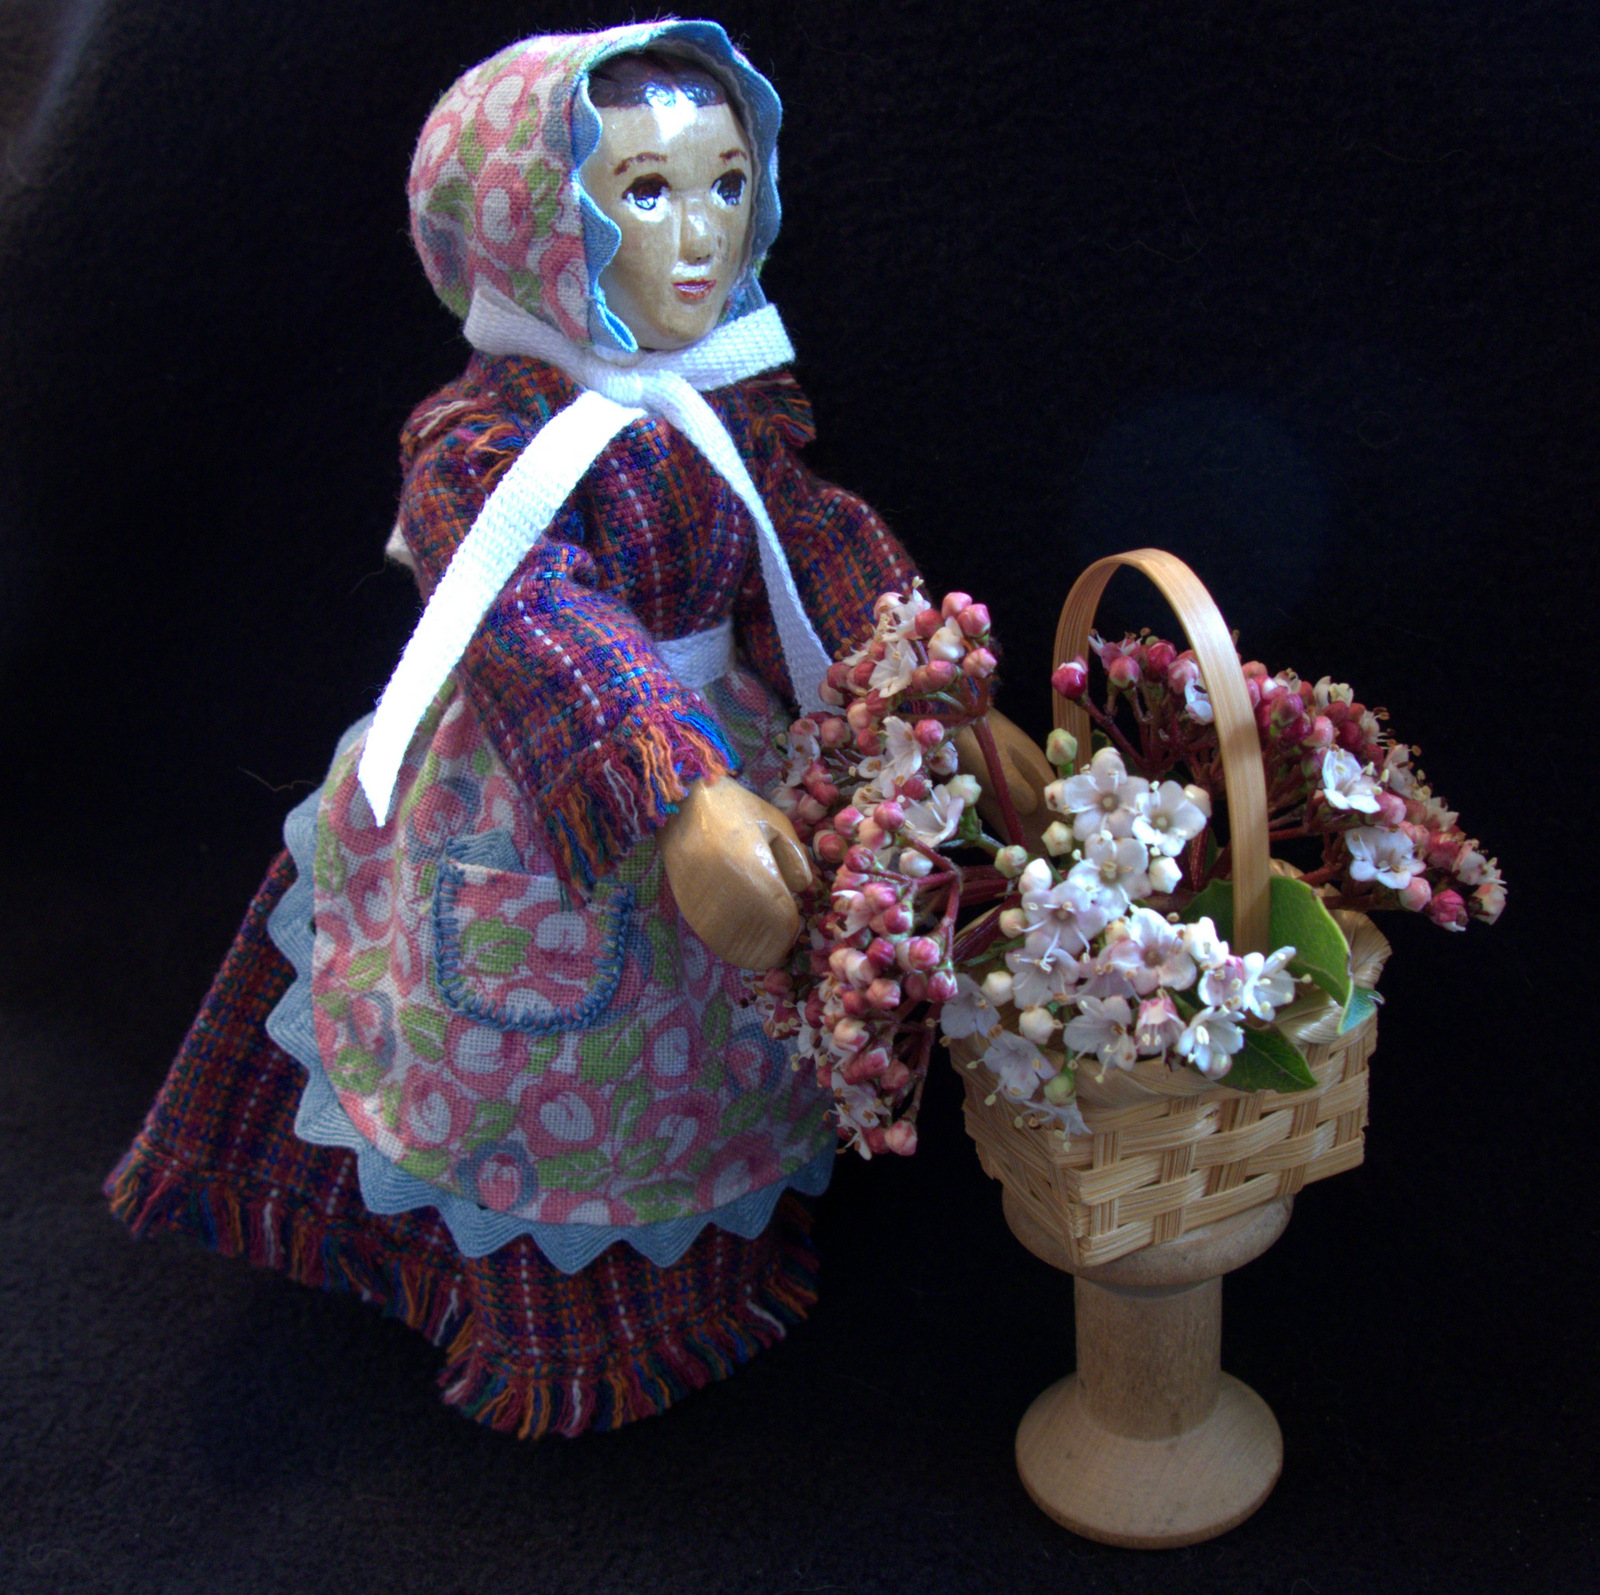
Finished Bonnet and Apron
Constance is modelling her finished bonnet and apron…
.
.
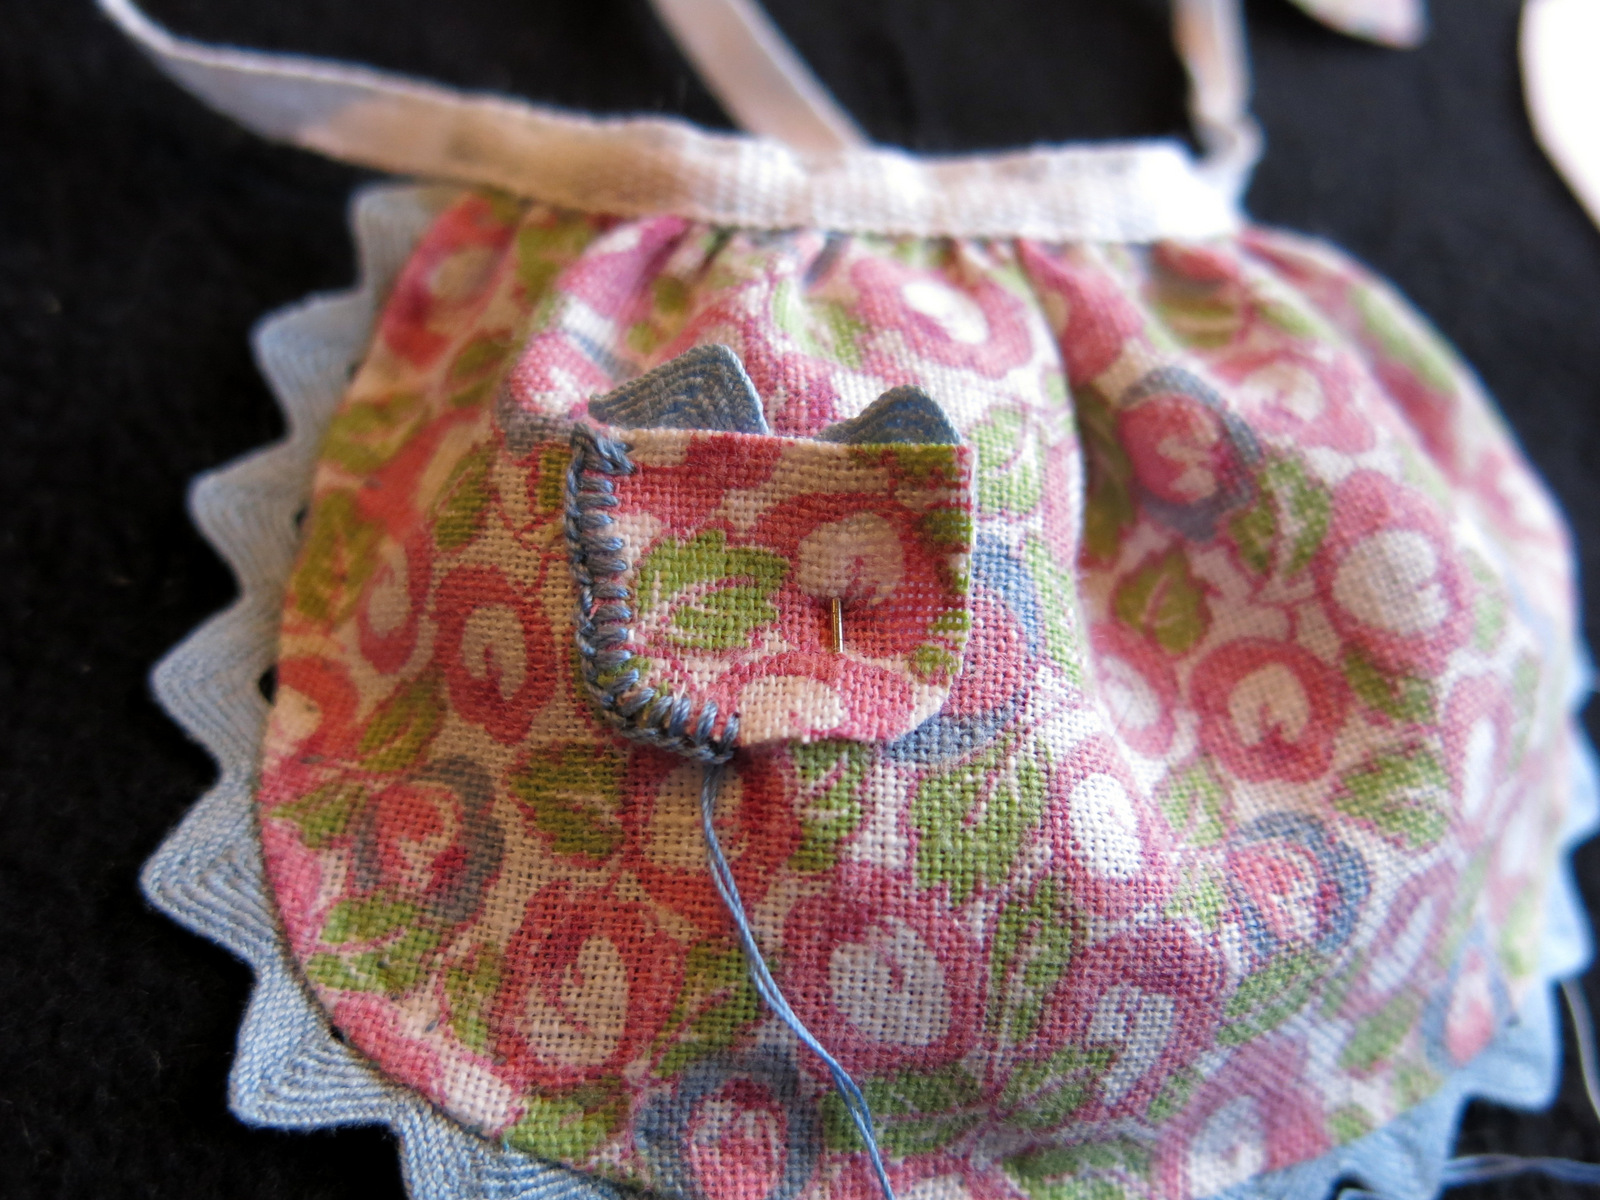
Optional apron pocket
Extra optional step: if you have saved the scraps leftover after cutting out the bonnet, and if they are big enough, you can make apron pockets. They are sewn to the apron using buttonhole stitch.
.
.


Always lovely, always clear, always practical! Thank you!
Thanks! I invented these when I was looking for ways to use up the yoyo quilt circles – I think there is probably a version that would work for a 4-inch square too!
I wondered the same thing…looked at them yesterday and pondered that. Let me know if a light bulb goes on with that subject.
Very nicely done tutorial! The models look very pleased with their new finery.
They especially liked having their pictures taken with the “wrong” bonnet!
Another fine lesson on sewing and making a bonnet!!! Constance and Rose look very pleased.
We hoped that this is a easy little project, and that people who want to sew for their Hittys will have fun with it.