Scrap Happy doll quilts September 2021
Backing
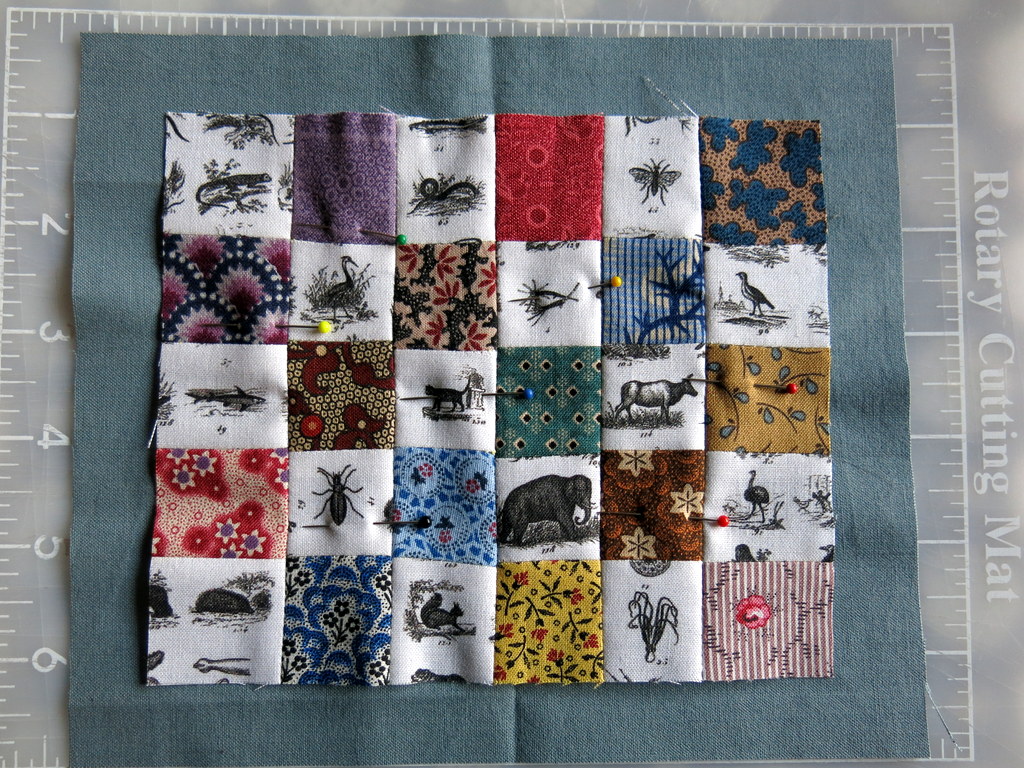
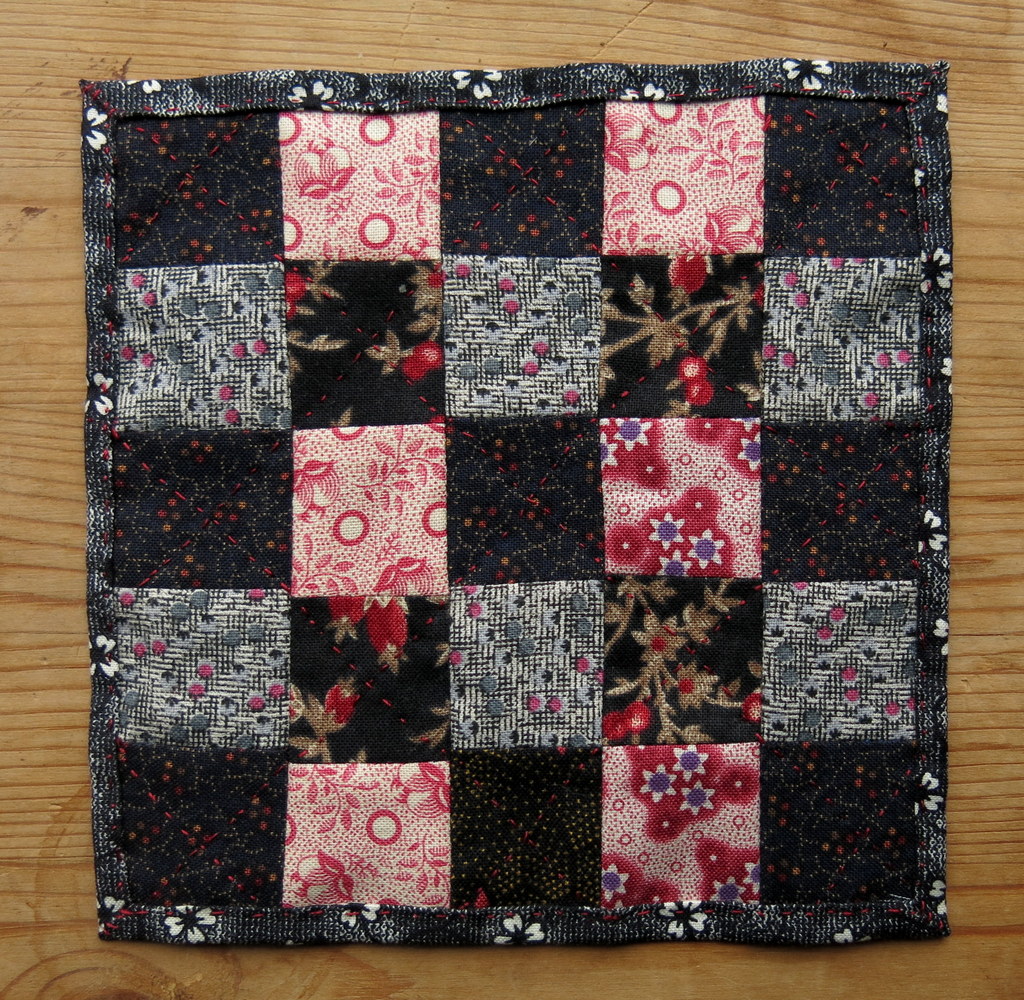
This little doll quilt is 6 1/2 X 5 1/2 inches…the “Encyclopedia print” was bought new, but the colourful prints are definitely scraps!
A nearby historic house from the 1860’s makes various things out of these reproduction print fabrics, and they gave me a bag of scraps leftover from their projects, so that I could make them a small quilt for a china doll (I also dressed the doll in historic clothing) Click here for a link to Ross Bay Villa.
After making their larger doll quilt, I had scraps of scraps which I used to make three doll quilts for myself!
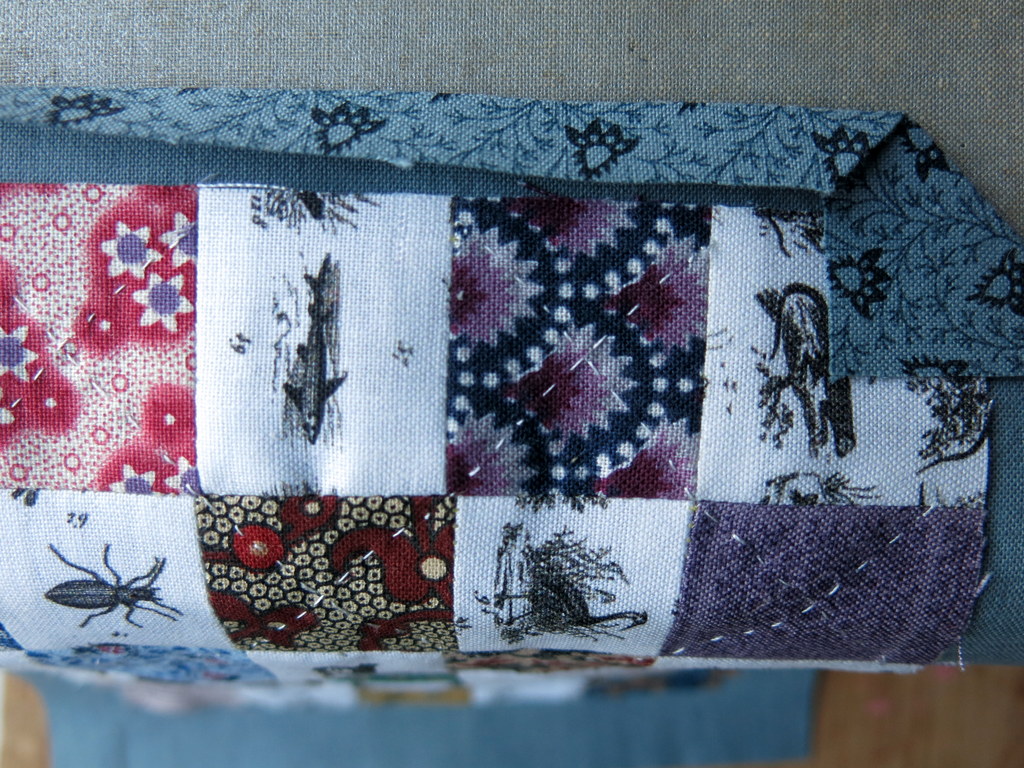
I wanted to show how I like to make a “fold-over” binding using the backing fabric.
First piece your top, square it up and then quilt the layers together (I don’t use any batting on a tiny quilt).
Then cut the backing fabric exactly 1/2 inch from the outside edge of the top.
.
.

Fold
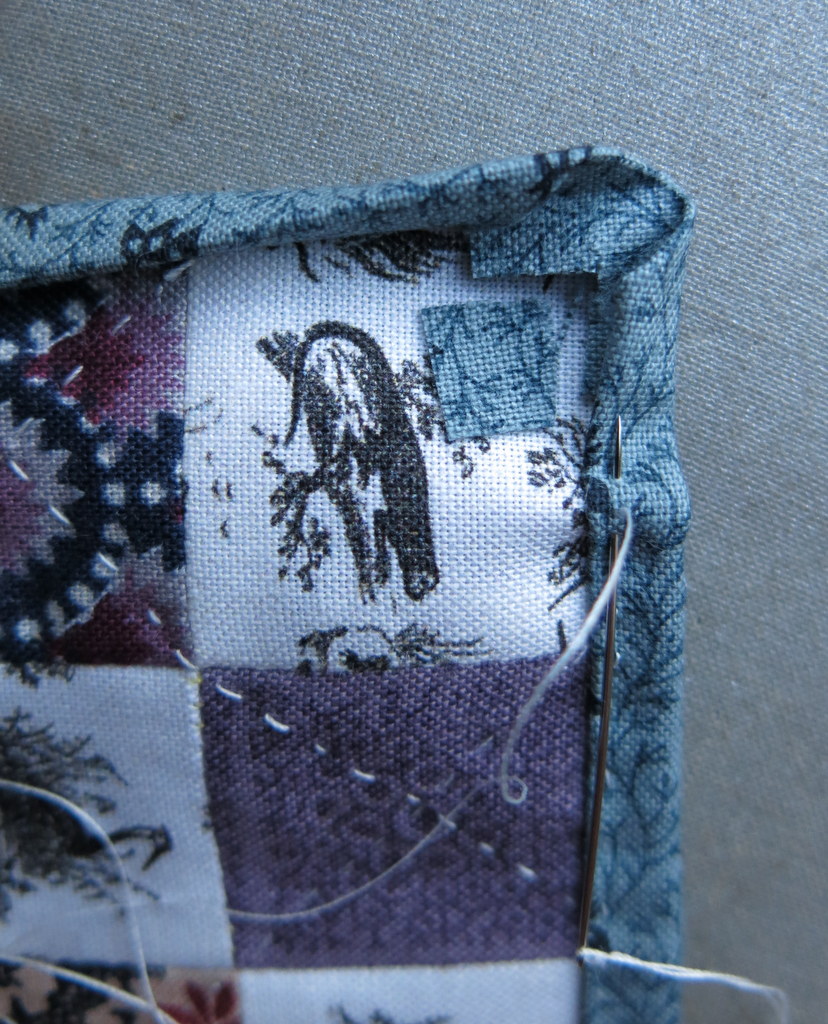
Next fold and press the corner over in a right angle, exactly at the corner of the top…
.
.

Four corners
…do this on all four corners.
.
.
fold once
Fold and press the edges of the backing towards the centre so it butts exactly against the edge of the top.
.
.

Fold once more and pin
Fold once more towards the centre, using the outside edge of the quilt as the fold line, then pin.
.
.
Stitch and snip
Sew the edge in place with a running stitch, or use what you like best – perhaps a slip stitch, or a ladder stitch…snip out the protruding tag when you get to the corner.
.
.
Encyclopedia Quilt
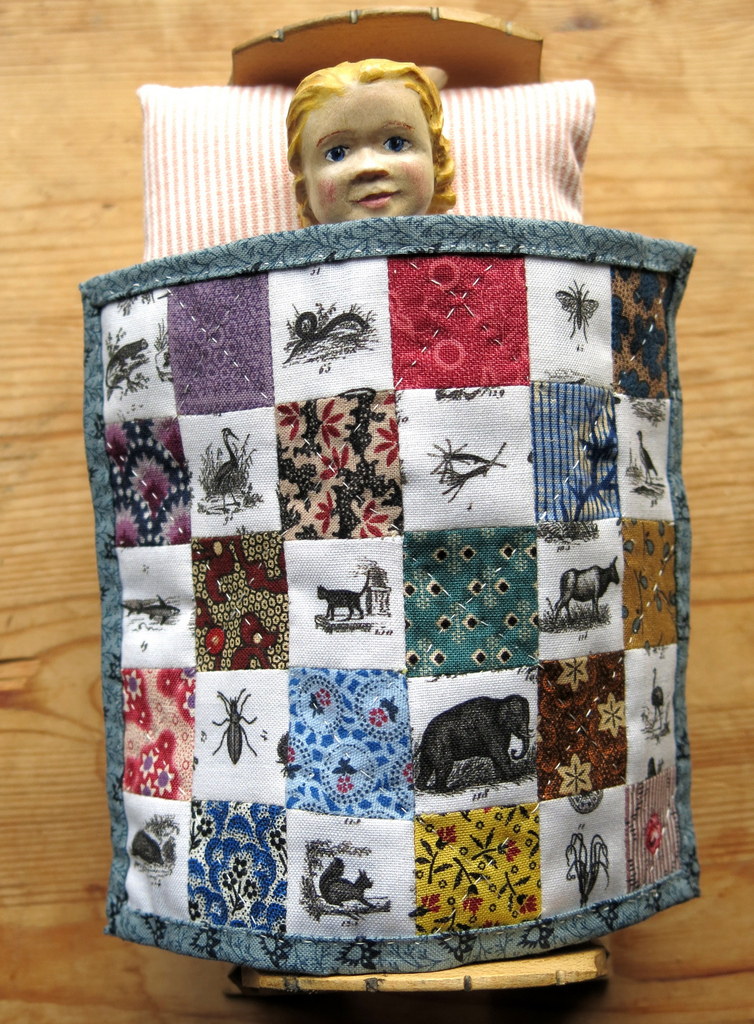
Tuck your Hitty into bed!!
four square
My three little quilts were made for a mini-workshop on mini-quilting last weekend: the encyclopedia quilt; this five-inch square quilt; and the browns and reds one I posted a few days ago. All three quilts used scraps from Ross Bay Villa’s scrap bag!
.
.
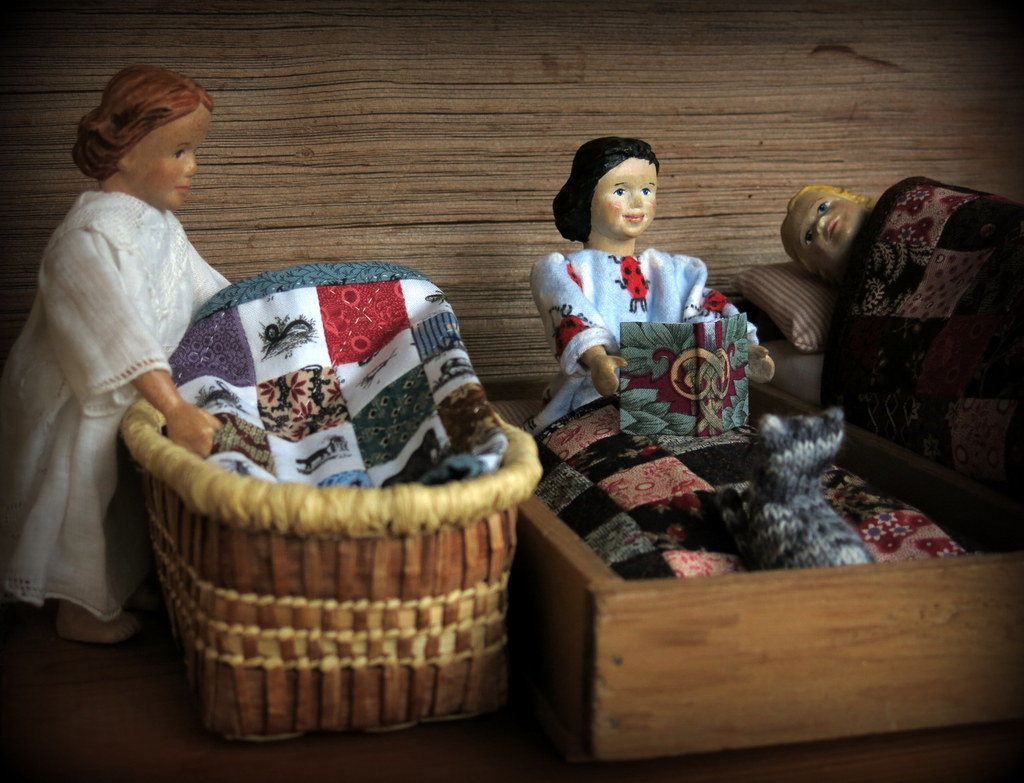
Sleepytime
Now three girls are ready for bed!
ScrapHappy is a group of bloggers using up scraps of anything – no new materials…Anything made of genuine scraps is eligible, and posts come out once a month on the 15th! If you like the idea and want to join the group, contact Kate or Gun who devised and run this group. Their blogs are the first two links below:
.


Those tiny quilts are just gorgeous. You use the same method for your binding as I do for hems on my handkerchiefs, except that I cut across the corner before folding it down and pinning. It makes a beautiful finish. I have been searching around for something to make for Constance when I write back to her, and this has given me an idea…
Thanks very much! I like that method on little quilts because it is a lot less bulky than adding a separate binding, Constance is intrigued…as am I. perhaps I will make some handkerchiefs for a friend who is having a birthday later this month!
I love your scrap postings. This one is just another in a series of enjoyable voyages into what one can do with a little bit of this and a little bit of that.
We love the idea of scraps being happy – and a little of this and a little of that is the way I like to make things. I admit that sometimes feel like I am cheating on scraphappy days, because almost everything I make for the Hittys is made of scraps anyway, but I do like having to pause and identify the scrappiness!
Thanks again for your wonderful tutorial! Our wee quilt turned out beautifully!
We are glad that the process made sense, and worked out for you!
Oh, thank you for showing how it’s done. I have a King size quilt that will need to be bound this way from the front to the backside. I’ve been quandering over how to do the corners. This is so helpful! I usually use a strip binding so mitered around the corners. This way will be different. 🙂 ❤ So beautiful!
I have made this kind of border on human quilts too – it works a treat, adjusting the width of the backing to suit the width of “binding” you want to show!
These quilts are OOAK … I am especially fond of the white nature squares with wildlife inserted in the quilt. As always you have a talent for picking out unique themes and colors that go together so well. Love all your quilts.
I love that quilt too – and the reproduction fabrics seem to suit it admirably! The girls don’t mind having snakes and insects up under their chins, thank goodness!
I wish I had seen your corner technique before I spent a day trying to figure out how to do that, and came up with a much more complicated technique! Beautiful little dolls quilts, and now I am inspired to make more fabric cards with that lovely mitered edging. 🙂
Thank you very much – I hope you find this method works for you! It certainly makes for a relatively painless edging, and the border makes a nice frame!
what perfect little quilts ^^
Thank you so much! The Hittys like them, that’s the main criteria around here (small wooden dolls have strong opinions)
tiny lovelies – each quilt is unique in it’s own way and the girls look ready for a long winter’s sleep.
They are ready to sleep, and the nights are getting longer and longer! I am glad you like the quilts…I really enjoyed making them!
thank you for the binding/finish photos. Lovely little quilts for lovely little girls!
You are very welcome! I love making quilts for the Hittys, somehow they never object when I make then yet another one with yet another colour scheme! They just like to snuggle under and drift off to the land of counterpane!
Beautiful doll quilts!
Thank you – I can’t stop making them!
Adorable tiny quilt, you have great patience
Thanks very much – Luckily when making a little quilt, I only need a little patience!
These are such lovely mini quilts! Perfect fabrics too!
Thanks very much – I do like these reproduction 1860’s prints – the toned-down colours and small prints work really well in tiny Quilts!
colours, and patterns of the fabric are so beautiful. I loved them all, but you know what I love most, the story and your photographs, fascinating me, always… I have been working with some scraps on Sashiko now… It is so enjoyable to to. By the way the project of your miniature letter, is going to be finished at the end. I will write the details, why it took times… I will write an e-mail to you next week, Thank you, dear Hitty Lady, have a nice Sunday, Love, nia
Dear Nia, you are a good friend. I hope the Sashiko goes well, it is a lovely technique.
Beautiful little quilts and, as always, beautifully displayed and photographed. Thank you for the little tutorial for the binding – I must remember to use that method sometimes on smaller quilts.
I hope it works for you! I like that the method doesn’t add as many layers as one with a separate binding, so it is slightly less stiff.